Play beats and change the sequence in real time. It’s basically all you need to become a hiphop artist. That, and rapper skills. But that’s another course.
Materials
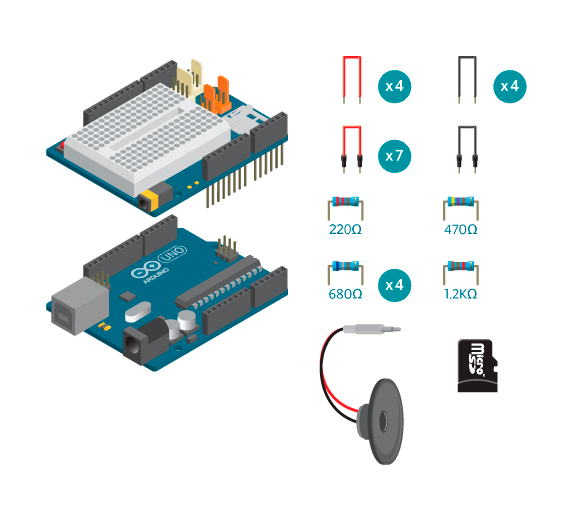
- 1 Arduino board
- 1 Basic Education shield
- 4 680 ohm resistors
- 1 220 ohm resistor
- 1 470 ohm resistor
- 1 1.2K ohm resistor
- 8 ohm paper speaker
- 1 micro SD card
- 4 black loose wires
- 4 colored loose wires
- 1 black jumper wire
- 7 colored jumper wires
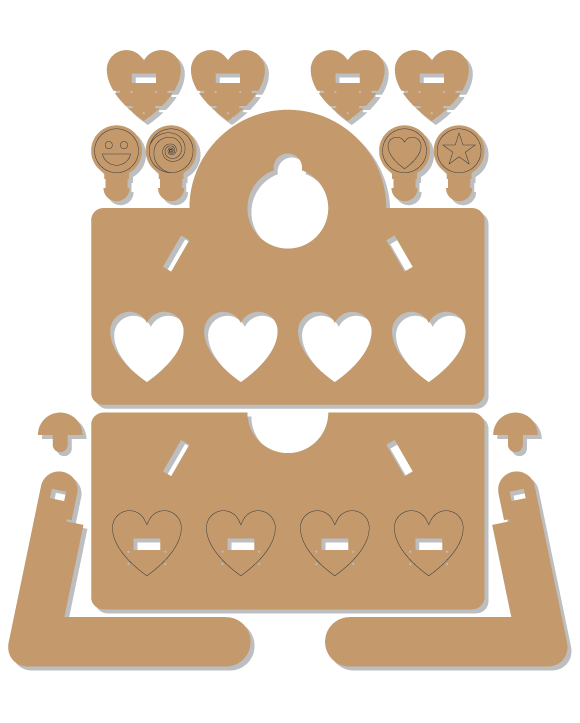
- 1 Sequencer kit
Instructions
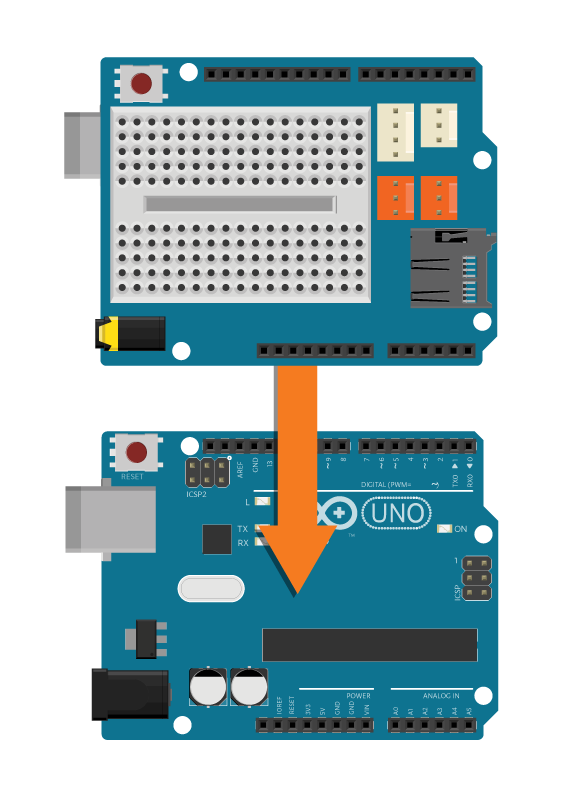
- Attach the shield onto the top of the Arduino board.
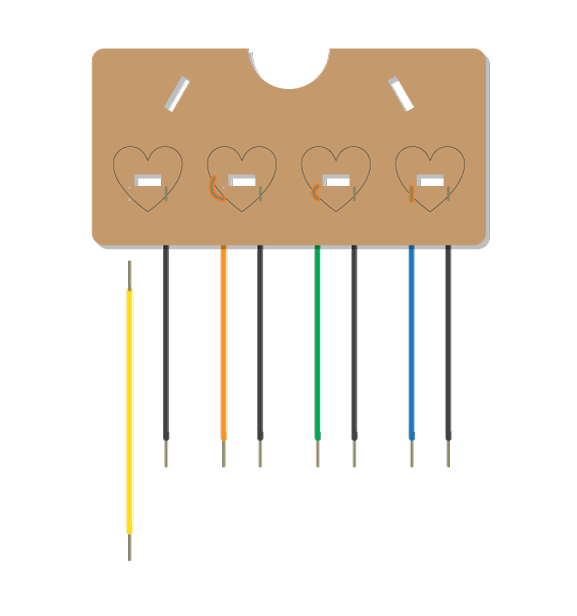
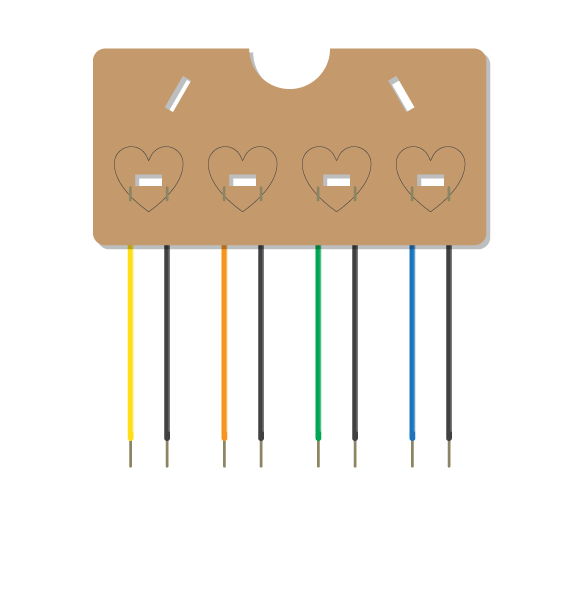
- Put the stripped end of a black wire through the two holes on one side of each heart. Using a stripped colored wire, do the same for the remaining holes of each heart.
-
-
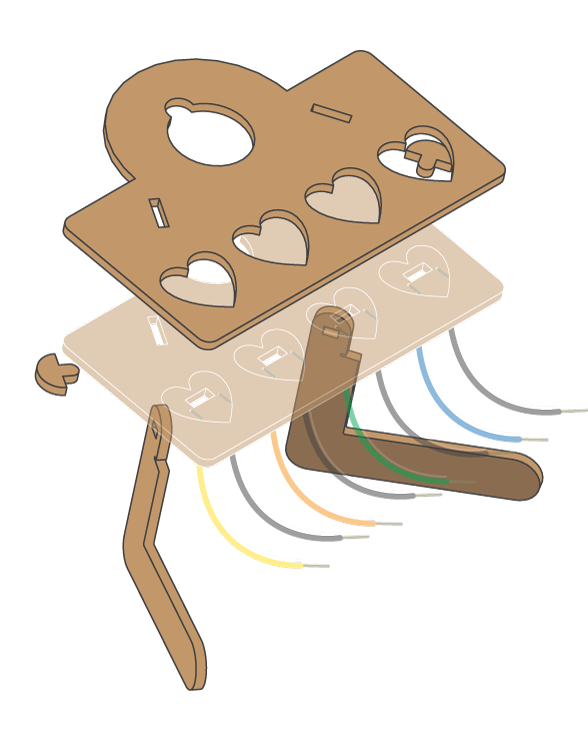
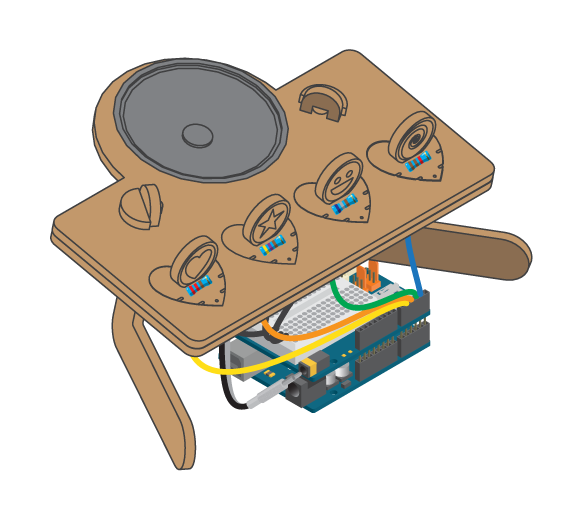
- Assemble the Sequencer table.

-
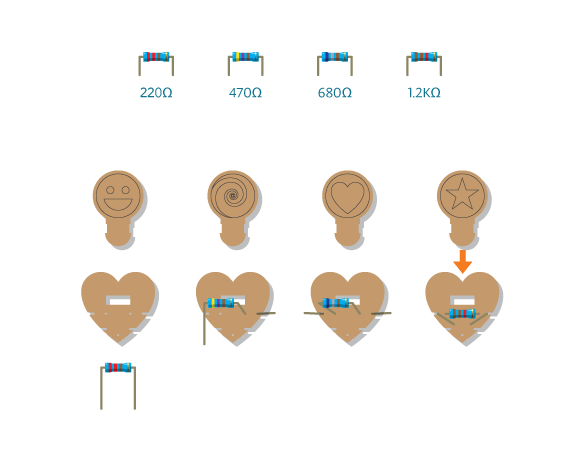
- Place a resistor into each heart piece (220Ω, 470Ω, 680Ω, 1.2KΩ) and use the top piece to secure them in place.
-

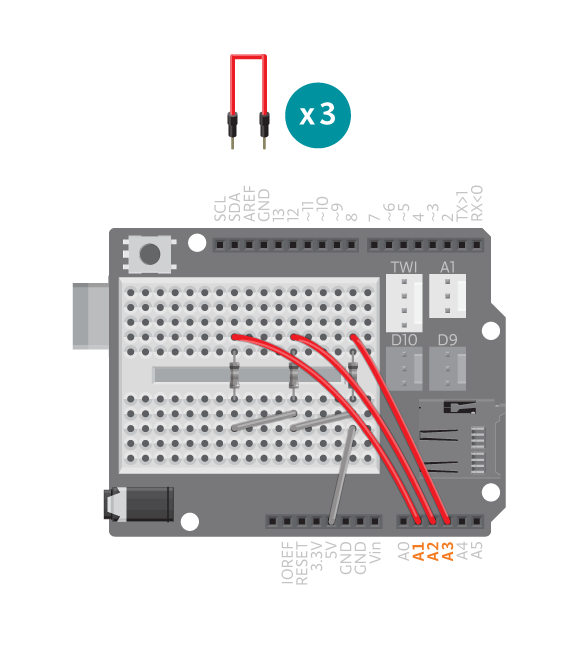
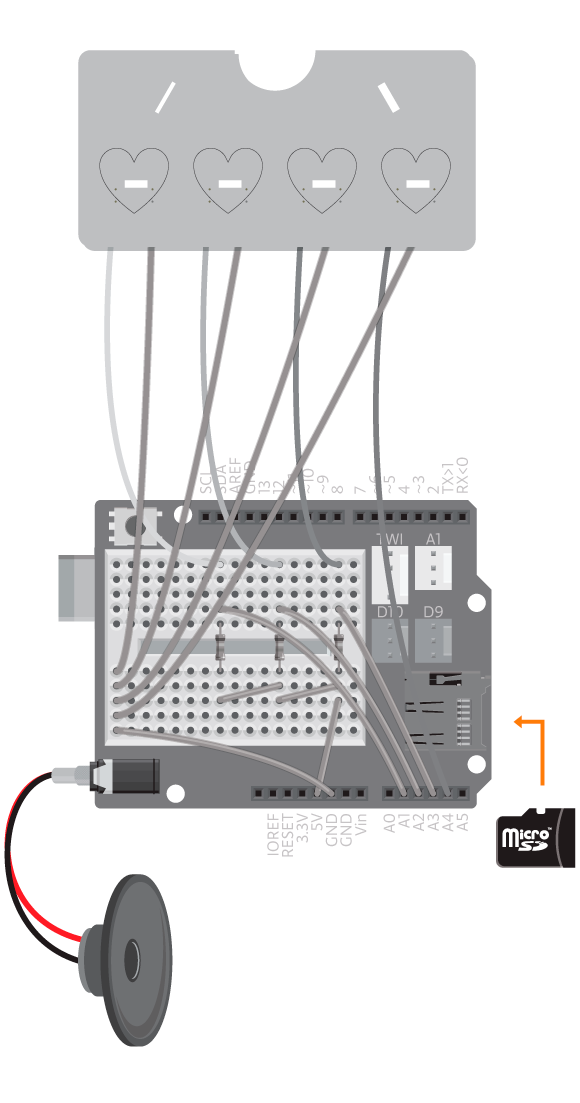
- Connect three 680 ohm resistors over the breadboard gap.
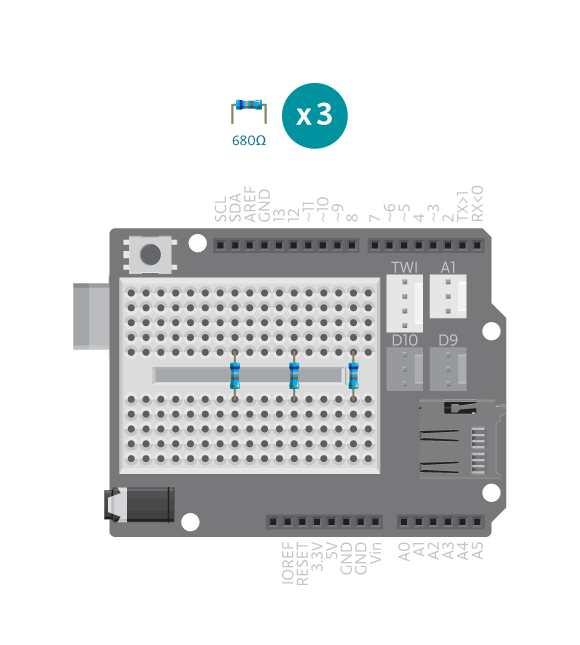
- Connect one side of the resistors to 5V.
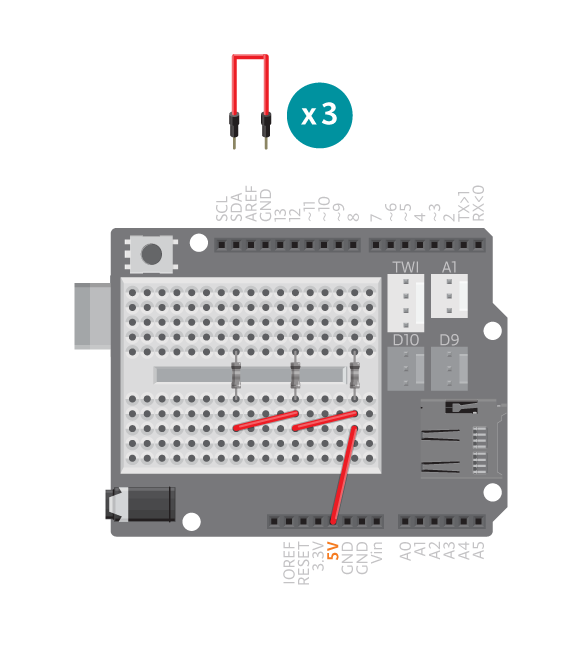
- Connect the other side of the resistors to analog pins A1 to A3. (Analog pin A4 has a built in resistor on the shield, this is why we don’t need to connect a resistor there.)
- Connect three colored wires from the sequencer table to A1 – A3 through the breadboard and the fourth wire directly to A4.
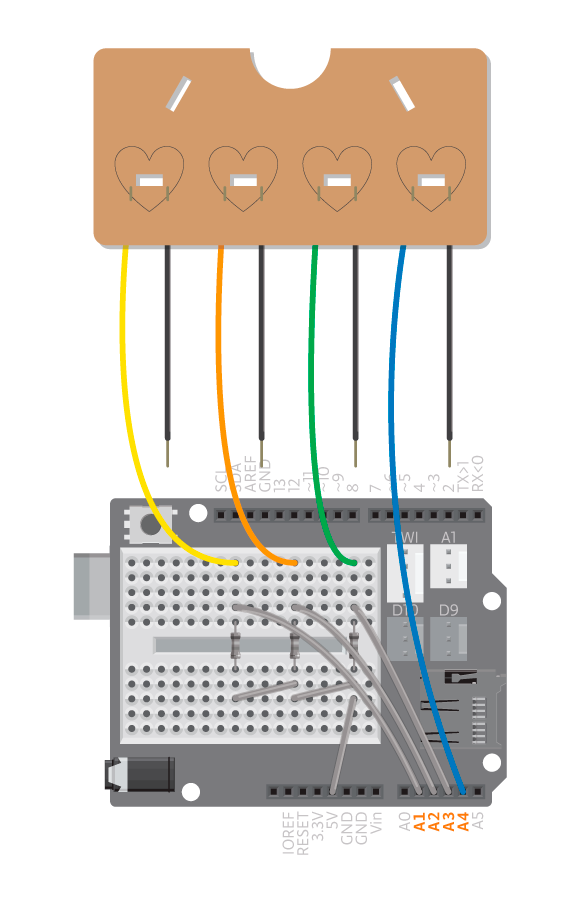
- Connect the black wires from the sequencer table to GND.

- Take the sound files provided named seq0.wav, seq1.wav, seq2.wav, seq3.wav, seq4.wav and move them to the root directory of the SD card.

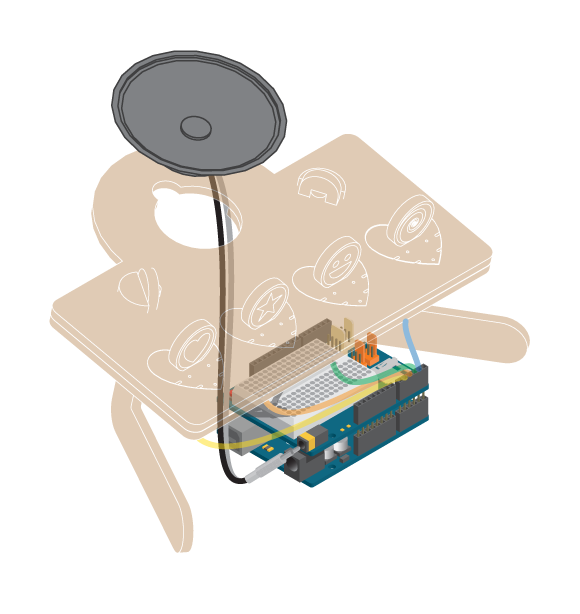
- Plug in the paper speaker to the audio socket.
- Place the SD card into the shield’s SD slot.
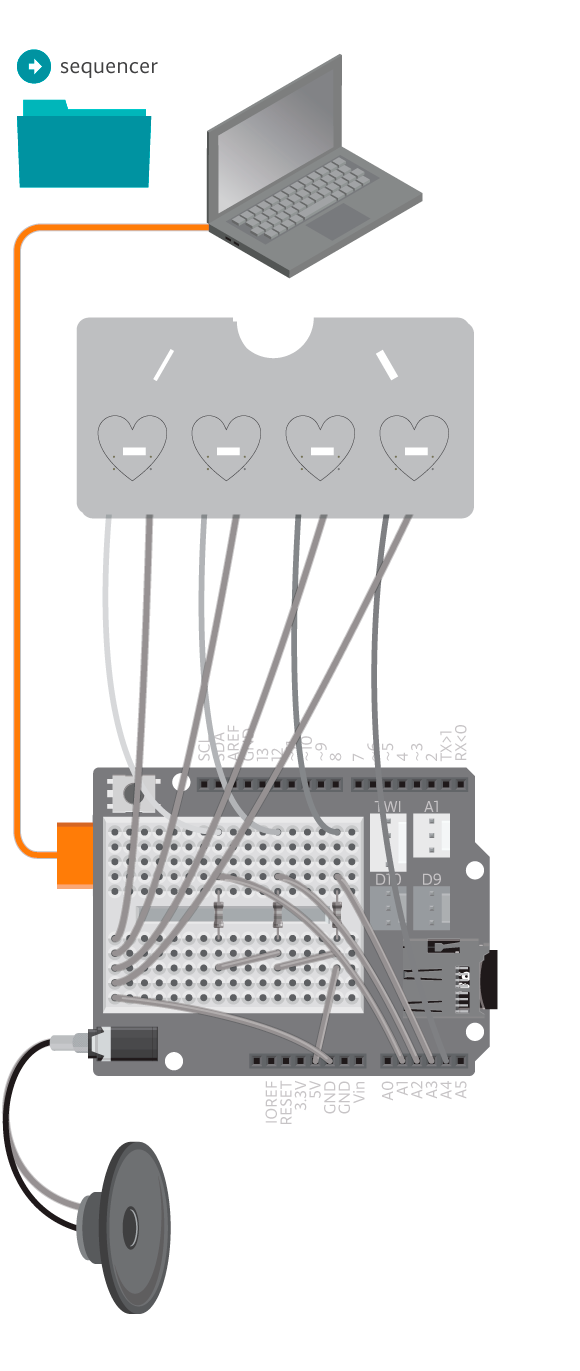
- Connect the Arduino board to the computer and upload example Sequencer.
-
Code
You can find the code in File -> Examples -> BasicEducationShield-> Magic -> Sequencer
How it works
Each heart shaped slot is connected to an analog pin and ground. Each heart has a resistor of different resistance and when it’s placed in a slot the resistor connects the slots wires. Since each heart has a unique resistance, it also has a unique reading. This means that we can distinguish which heart is connected to which slot.
In the program we use analogRead() to read the analog value from a pin. We check which heart is connected in getSeq(), that is which resistance is used. If it’s the 220 ohm resistor the function will return a ’1′ so that sequence will equal ’1′. We use this value to decide which file to play. In this case it is “seq1.wav”. If no heart is connected to the slot the file “seq0.wav” is played, this is a silent file.
The procedure is repeated 4 times, 1 for each analog pin we are using. When it’s done, we do it again.
Troubleshooting
- Refer to the illustrations and double check all your connections. Make sure the shield and wires are firmly connected.
- Having problems playing the sound files? Check the reference for debugging the sound player.
- Make sure you are using the right resistors. Check the reference to see how to check it.
Experiment further
- Record your own 5 wav sounds and name them “seq0.wav”, “seq1.wav”, “seq2.wav”, “seq3.wav” and “seq4.wav”. They should all be equally long for the best result and “seq0.wav” should be silent. You can use Audacity (http://audacity.sourceforge.net/) to record sound that fits with Arduino. See reference Prepare Wav Sound for details.