Come on lucky number! Use this digital die next time you play a board game.
You “throw” the die by shaking a tilt sensor. The LEDs will cycle through different numbers, slowing down until it finally stops and reveals the number.
Materials
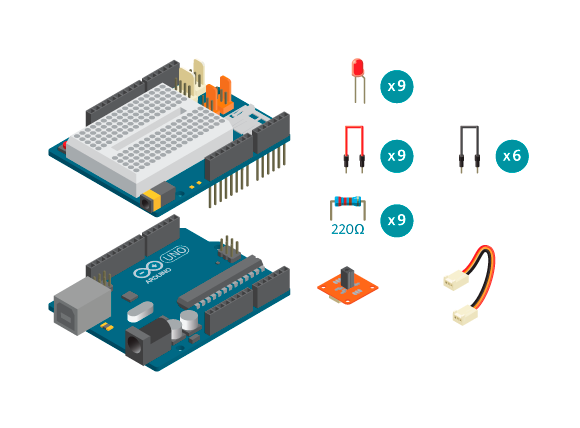
- 1 Arduino board
- 1 Basic Education shield
- 1 Tinkerkit tilt switch
- 1 Tinkerkit wire
- 9 LEDs
- 9 220 ohm resistors
- 6 black jumper wires
- 9 colored jumper wires
Instructions
- Attach the shield onto the top of the Arduino board.

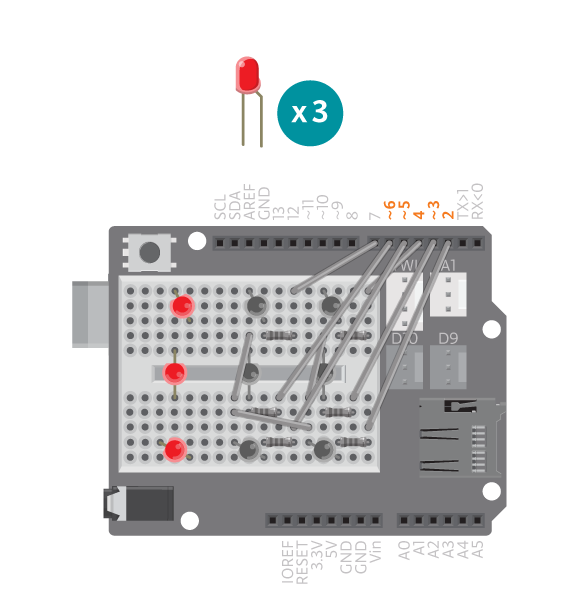
- Connect three LEDs to the breadboard.

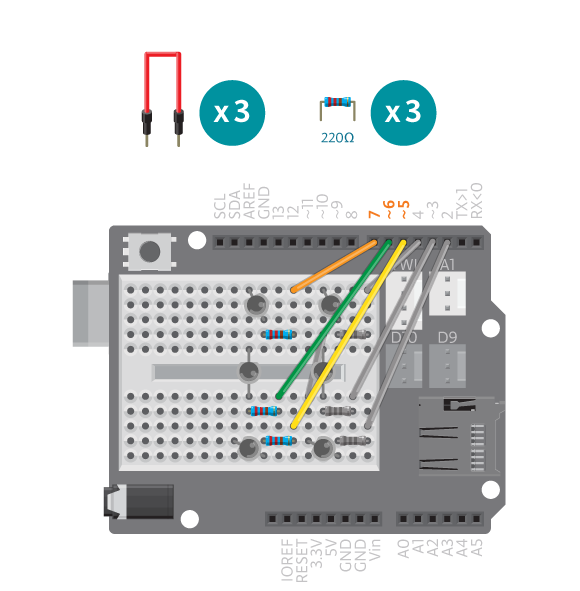
- Connect a 220 ohm resistor to digital pin 2. Connect the other end of the resistor to the long leg of the first LED.

- Connect digital pins 3 and 4 to the corresponding LED following the same method.
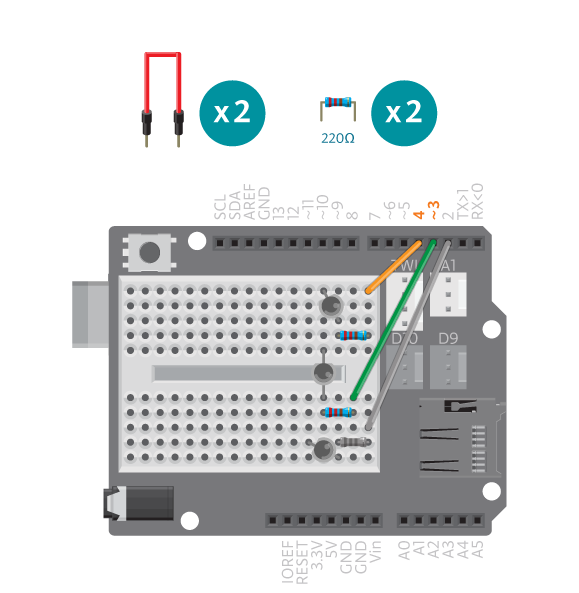
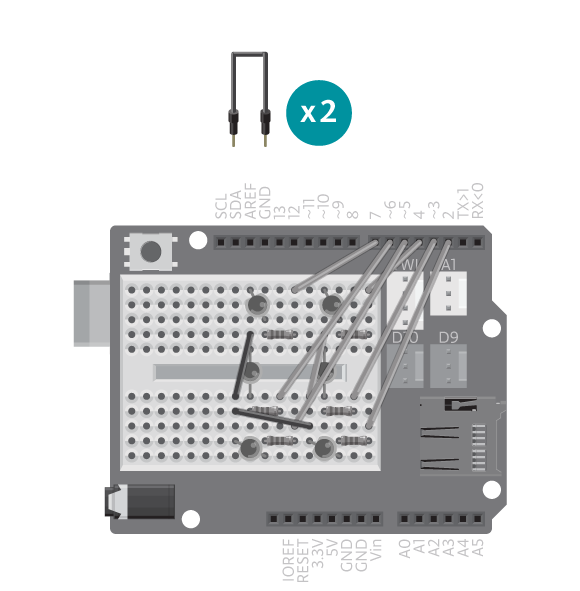
- Connect the short leg of the LEDs with a black wire.
- Connect three more LEDs to the breadboard.
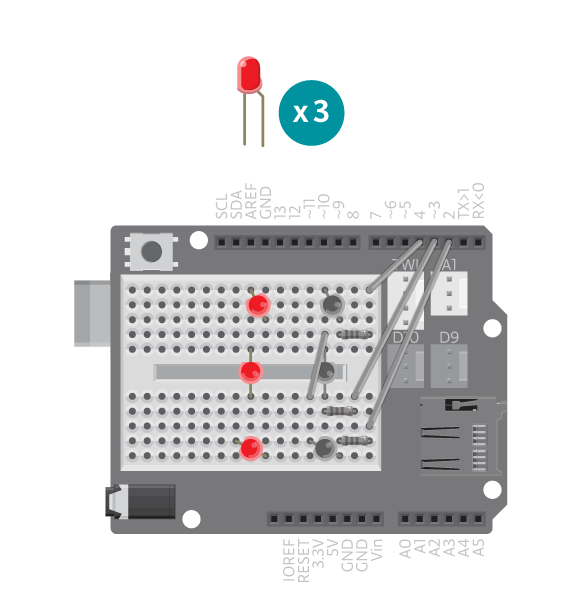
- Connect digital pins 5 to 7 to the corresponding LED through a 220 ohm resistor.
- Connect all short the legs of those LEDs with 2 black wires.
- Connect the final three LEDs to the breadboard.
- Connect digital pins 8, 11 and 12 to the corresponding LED through a 220 ohm resistor.
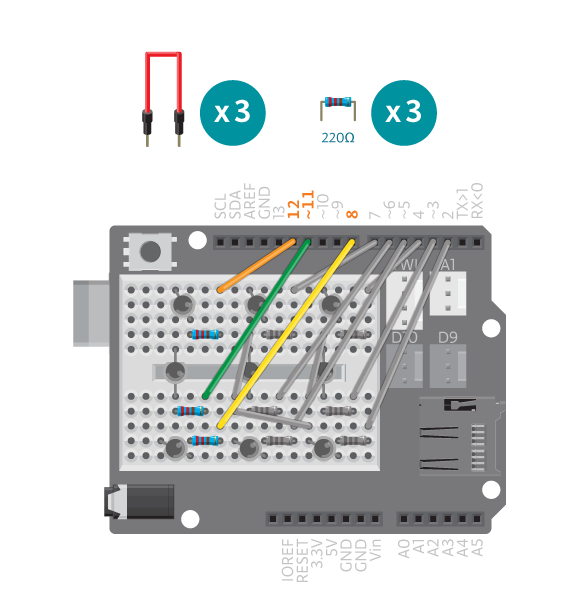
- Connect the short legs of these LEDs and connect them to an Arduino GND.
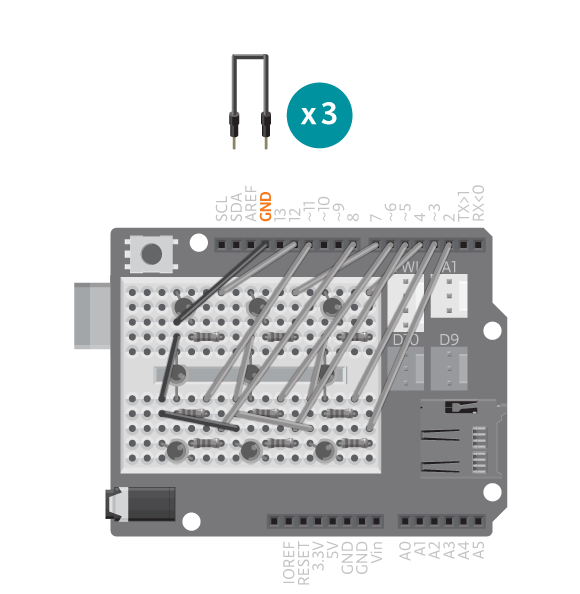
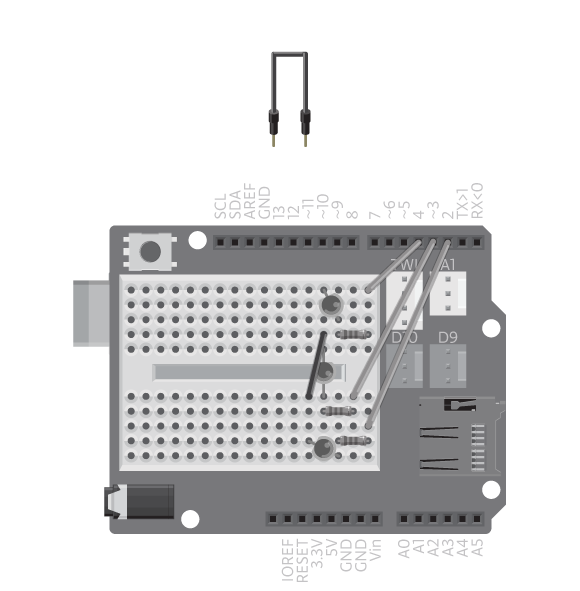
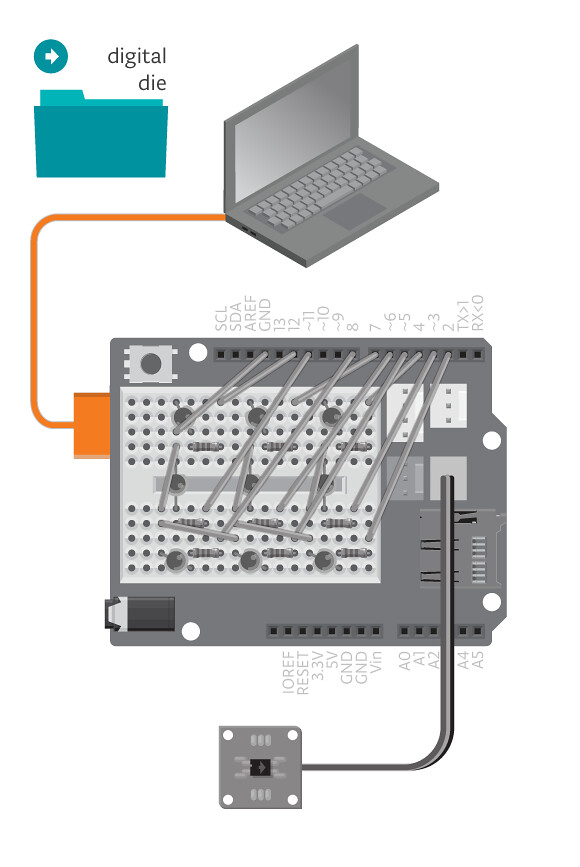
- Connect the tinkerKit tilt switch to D9.

- Connect the Arduino assembly to the computer, upload example Digital Die and try the game.
Code
You can find the code in ”File -> Examples -> Sports -> DigitalDie”
How it works
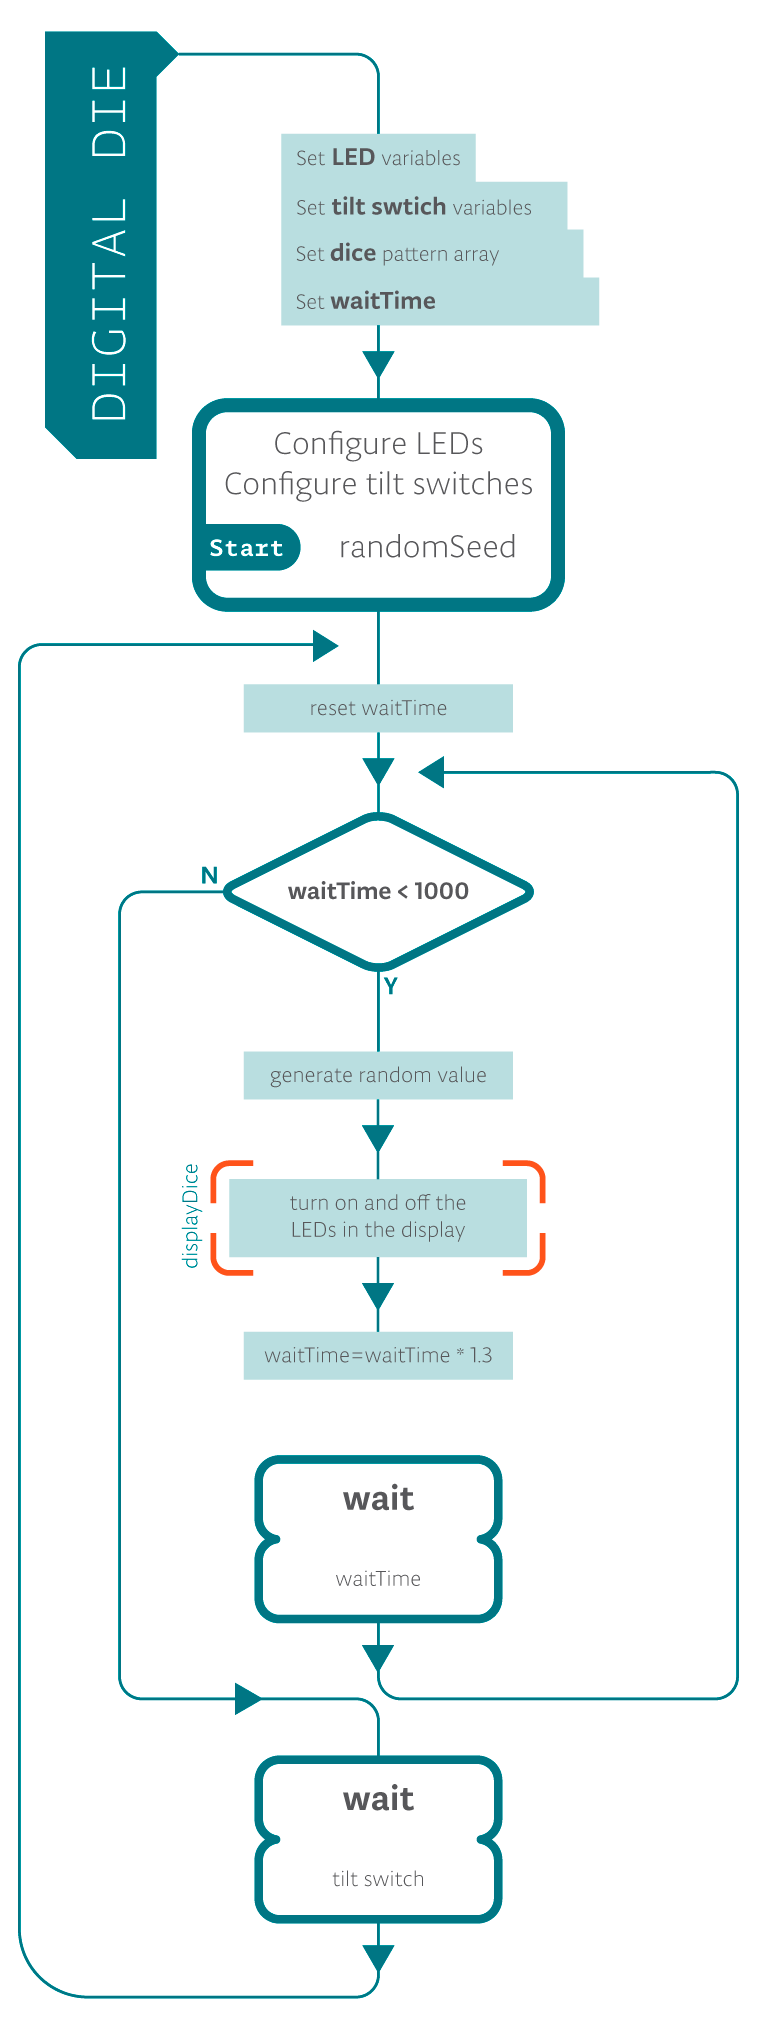
We declare the six different patterns of the die using 0′s and 1′s; a ’0′ represents an LED turned off and a ’1′ an LED turned on. The program generates a random number from 0 to 5 and places it in value. If value is 0, the pattern for the number 1 is displayed. If value is 1, the pattern for the number 2 is displayed, and so on. The program then waits the number of milliseconds specified by waitTime. It then repeats this procedure and uses a mulitiplier to increase waitTime. If waitTime is larger than 1000, the program exits the loop and the last random number generated will be the final pattern the die ends up showing. The program stops until it detects another tilt from the tilt switch, after which the program starts over.
Troubleshooting
- The die doesn’t show the correct combinations of turned on LEDs? Refer to the illustrations and double check all your connections. Make sure the shield and wires are firmly connected. Check the LED polarities to make sure they are consistent and properly wired.
- Is your tilt switch not working correctly? Make sure that it’s in an upright position when the die is still “rolling”. Check the reference for debugging the tilt switch.
Experiment further
- Change the LED patterns to display something else.
- Use a 9V battery to power the Arduino and make a case for assembly so that you can simply shake the box to have it “roll the die”.