The Line Follower does exactly what the name suggests, it follows a line. Make it go where ever you want by showing the way with a 3 cm wide, black line.
Materials
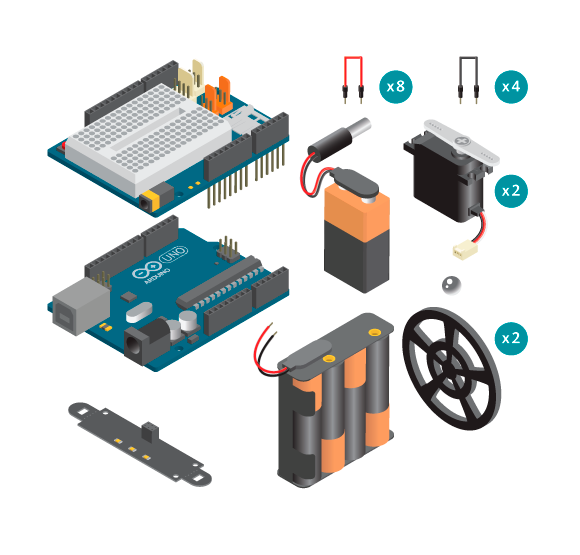
- 1 Arduino Uno board
- 1 Basic Education shield
- 1 IR Array
- 2 continuous rotation servos
- 4 black jumper wires
- 8 coloured jumper wires
- 2 power connectors (One without the plug but with two loose wires)
- 1 4 AA battery pack
- 1 9V battery
- 4 AA batteries
- 1 Line follower kit
- 1 metal ball
Instructions
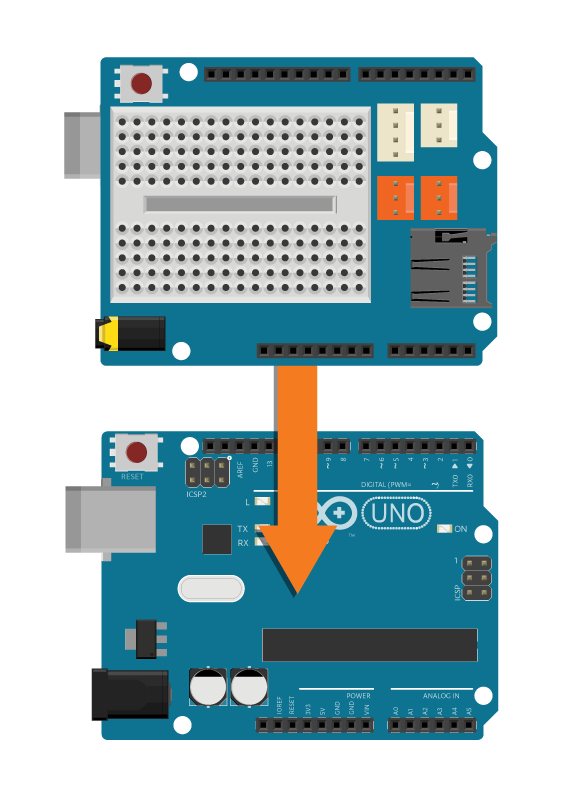
- Attach the shield onto the top of the Arduino board.
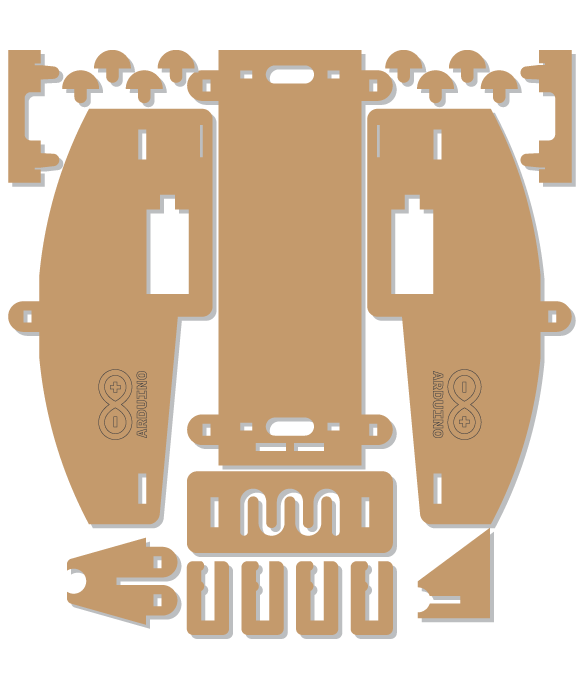
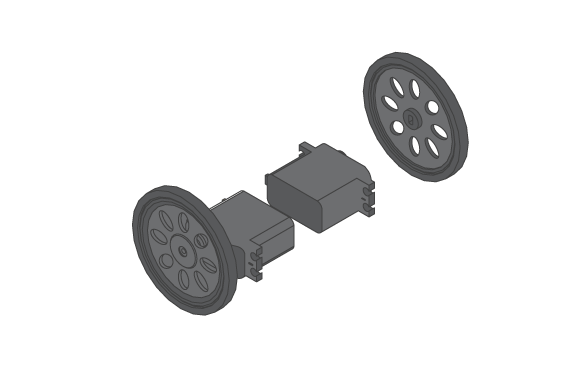
- Attach one servo on each side of the line follower.
-

- Assemble the ball piece on the middle part of the line follower.

- Connect five jumper wires to 5V, GND, IR1, IR2, and IR3 of the IRArray.
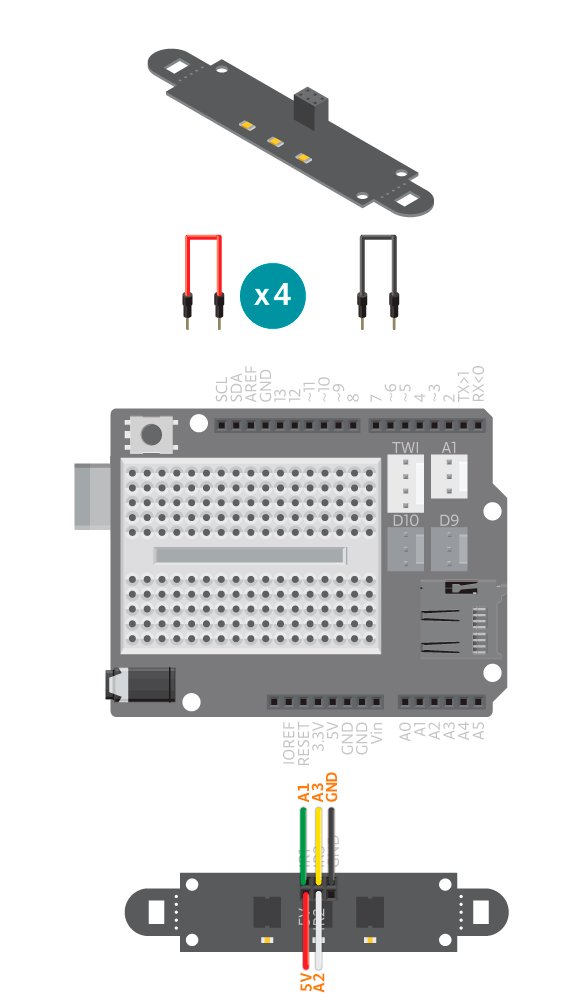
- Put the jumper wires through the front hole of the middle base and then finish assembling the main body.

- Connect the loose wires of the IRArray. 5V to 5V, GND to GND, IR1 to A1, IR2 to A2, IR3 to A3.

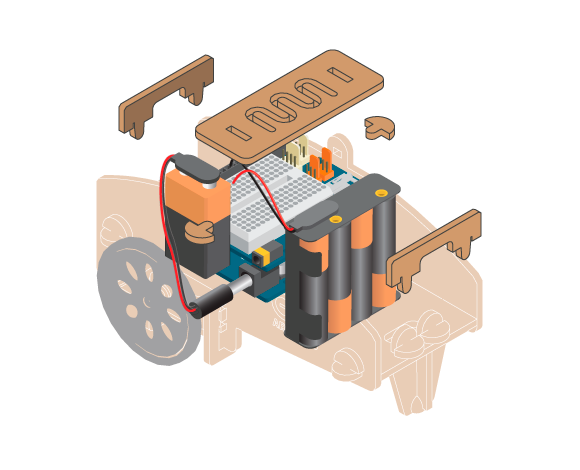
- Using 3 jumper wires, connect the left servo. The black wire to GND, the white wire to digital pin 10, and the red wire to the bread board.

- Using 3 jumper wires, connect the right servo. The black wire to GND, the white wire to digital pin 9, and the red wire to the bread board.

- Connect the Arduino board to the computer and upload example LineFollower.

- Connect the 4 AA battery pack. The black wire to GND and the red wire to the two servo’s power wires on the breadboard.

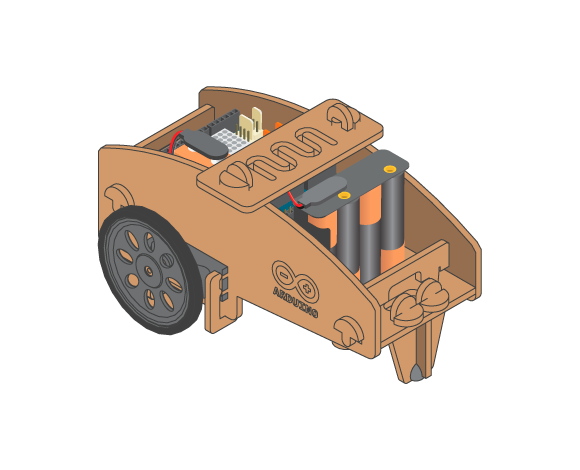
- Place the Arduino and shield on top of the Line Follower and connect the 9V battery to the Arduino.
Code
You can find the code in File -> Examples -> BasicEducationSheild-> Robots-> LineFollower
How it works
The IR sensors in the IRArray can detect black and white. By using the command readLine() we get a value from -100 to 100 representing the direction the line is heading. This value is then used to tell the wheels what direction to go by writing wheels.follow(direction).
Troubleshooting
- Refer to the illustration and double check your connections. Make sure the shield and wires are firmly connected.
- Motors are not working? See the reference about how to debug servo motors used as wheels.
- Debug the IRArray, see the IRArray reference.
Experiment further
- Print a track and build obstacles for the robot. If the obstacles are too difficult, see if there is a way to improve the robots performance by modifying the wheels
- Make the robot react in some way when it “sees” only white. That is, when it has lost the track of the black line.