Spy on your cat with this robot camera. Mount the camera robot and control it with a small joystick. You can run everything from the computer and when you see your cat doing something suspicious, take a picture!
Materials
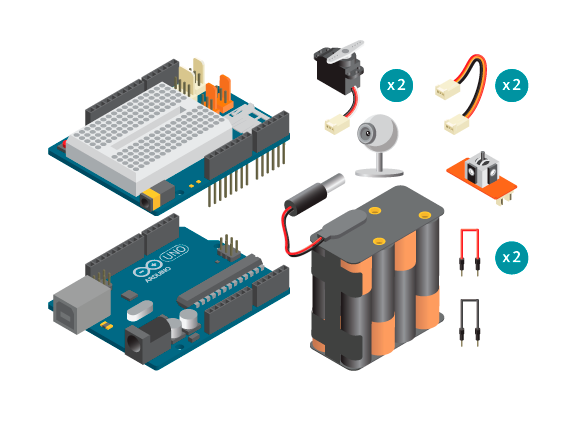

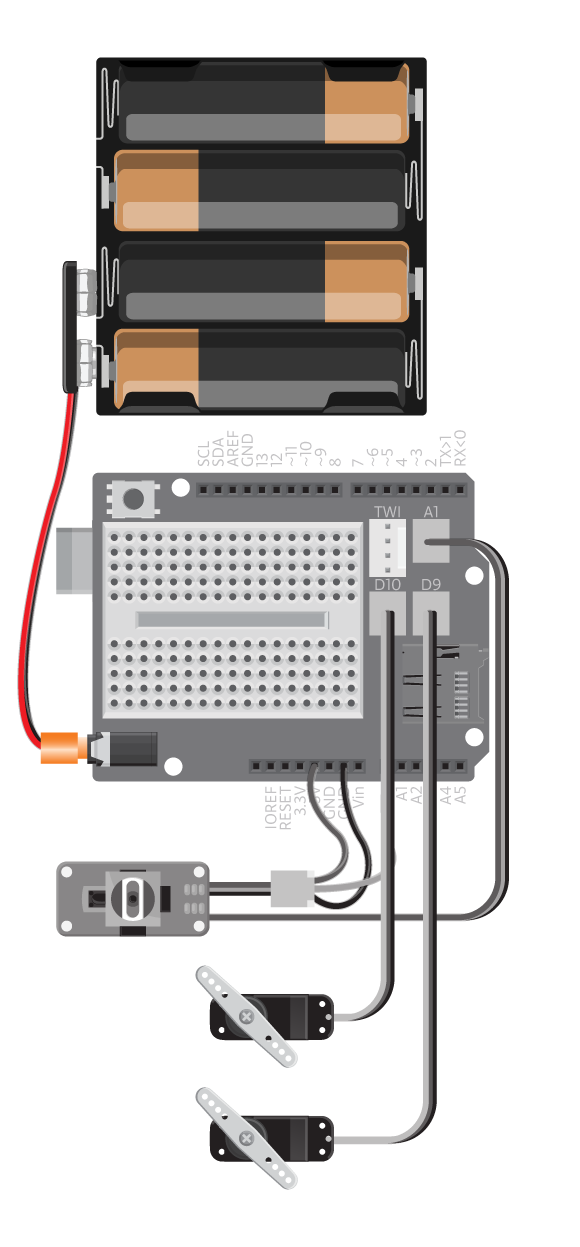
- 1 Arduino Uno board
- 1 Basic Education shield
- 2 standard servo motors
- 1 tinkerKit Joystick
- 3 jumper wire
- 2 TinkerKit wires
- 1 Web camera
- 1 Robot camera kit
- 8 AA batteries
- 1 AA Battery holder
- 1 power connector
Instructions
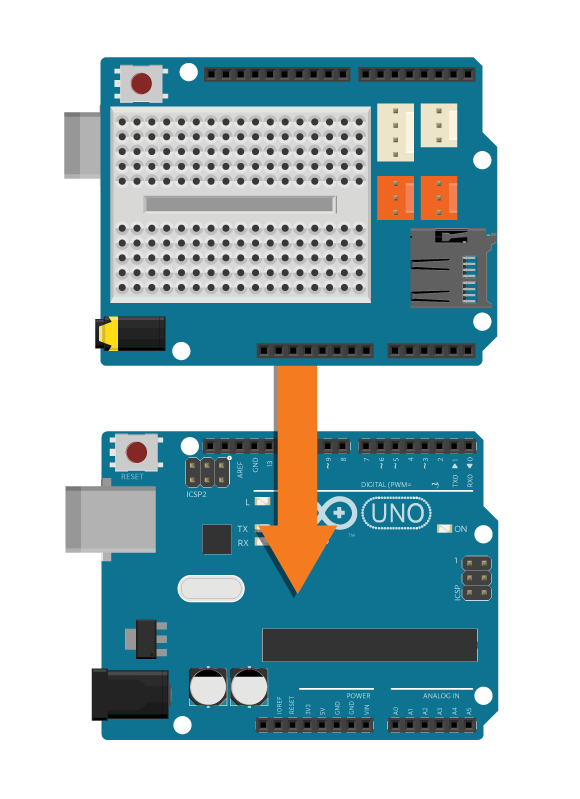
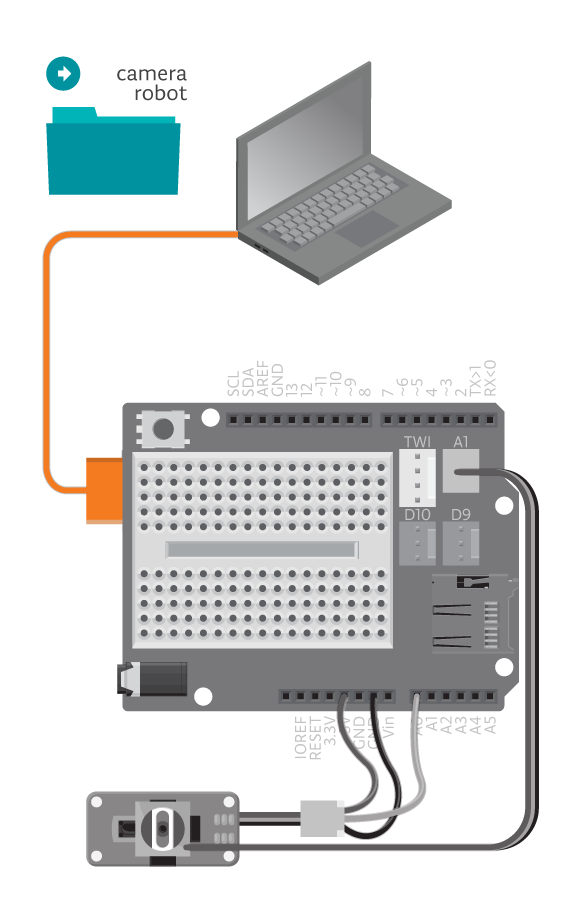
- Attach the shield onto the top of the Arduino board
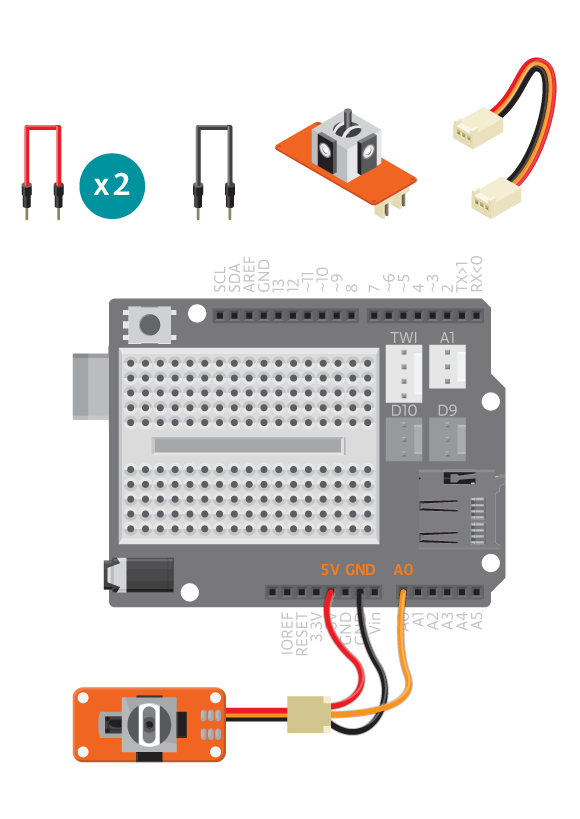
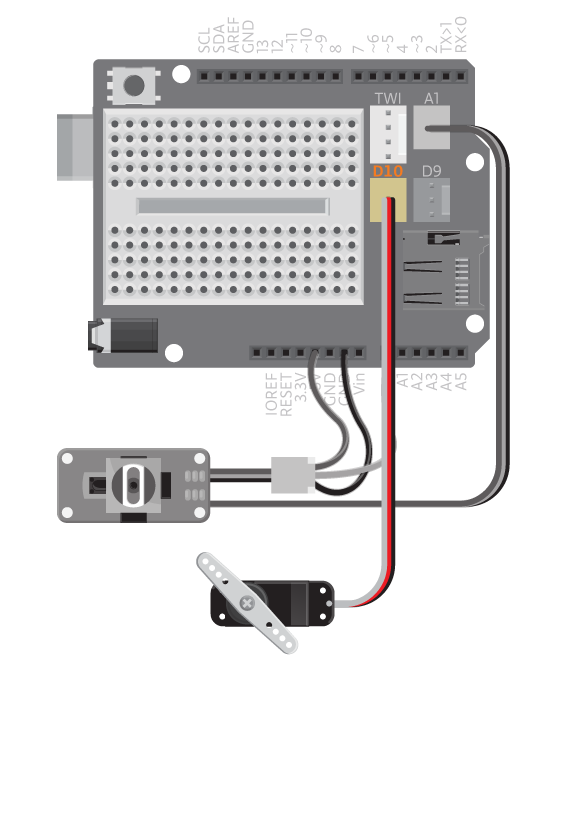
- Connect a TinkerKit wire to the joystick connector labeled as ‘Y’. Connect a red jumper wire to the red cable of theTinkerKit wire, and to 5V. Connect a black jumper wire to the black cable of the TinkerKit wire and to GND. Connect the last jumper wire to the TinkerKit wire and analog pin A0.
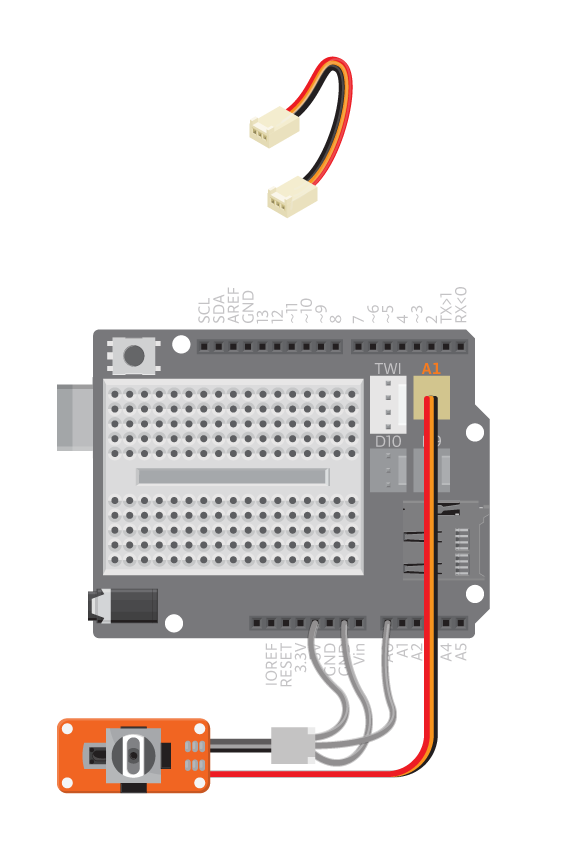
- Connect the second TinkerKit wire to the joystick connector labeled as X and to the three pin A1 connector.
- Upload the exampleFile -> Examples -> Castilla -> Robots -> CameraRobot.
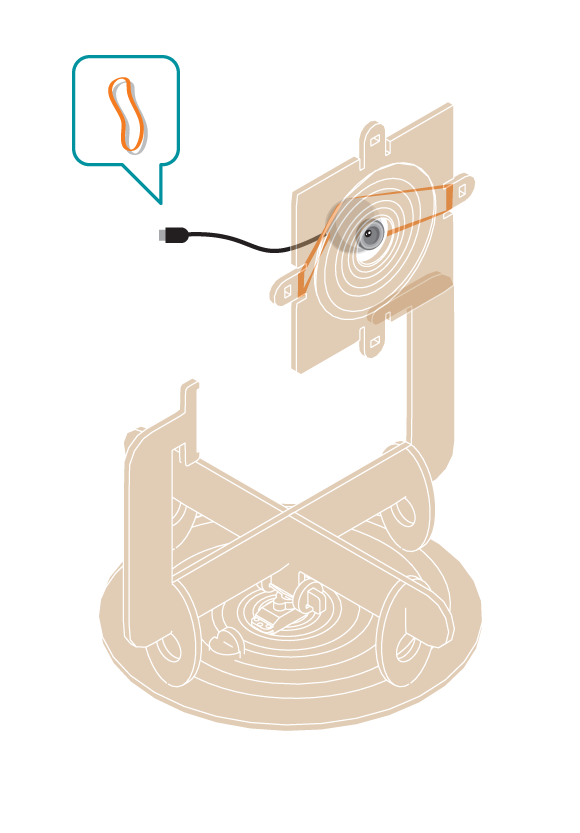
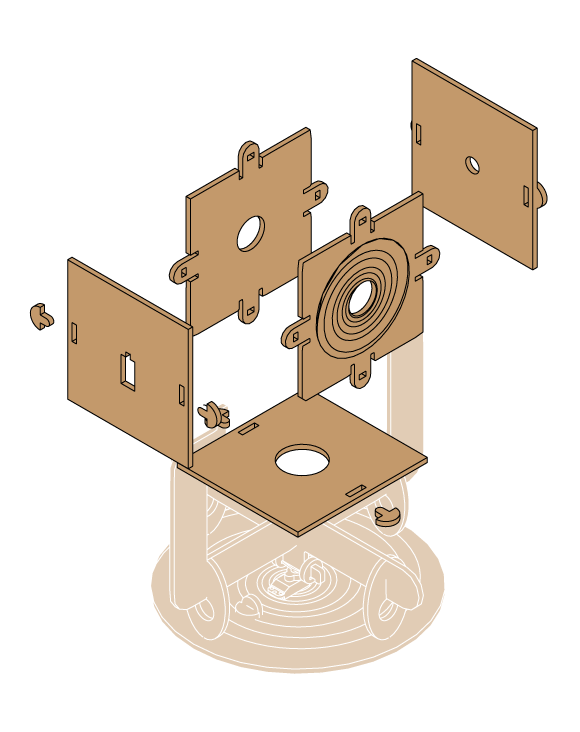
- Build the kit, do not forget to put the webcam inside!

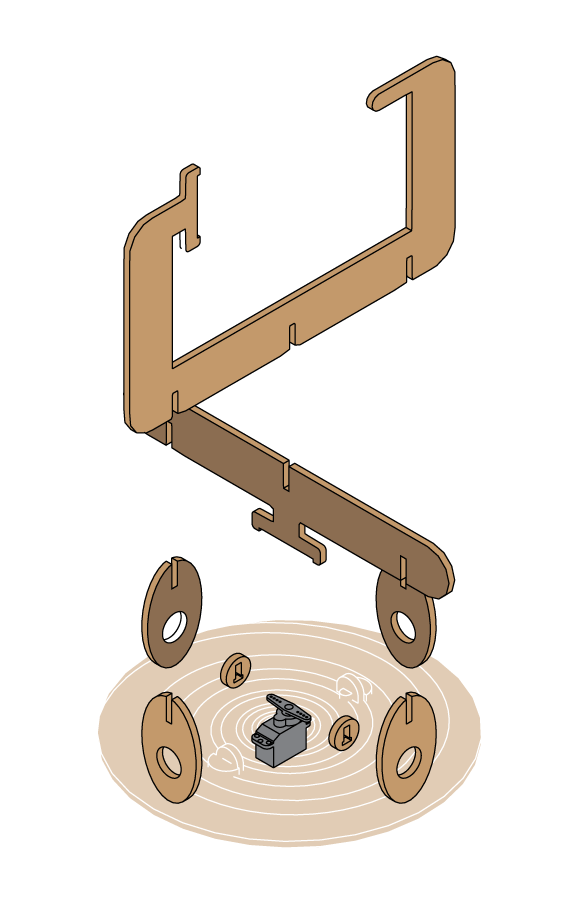
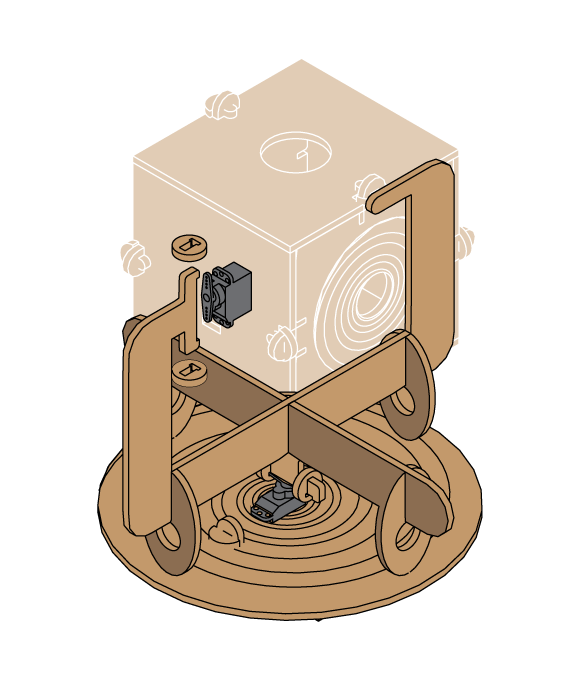

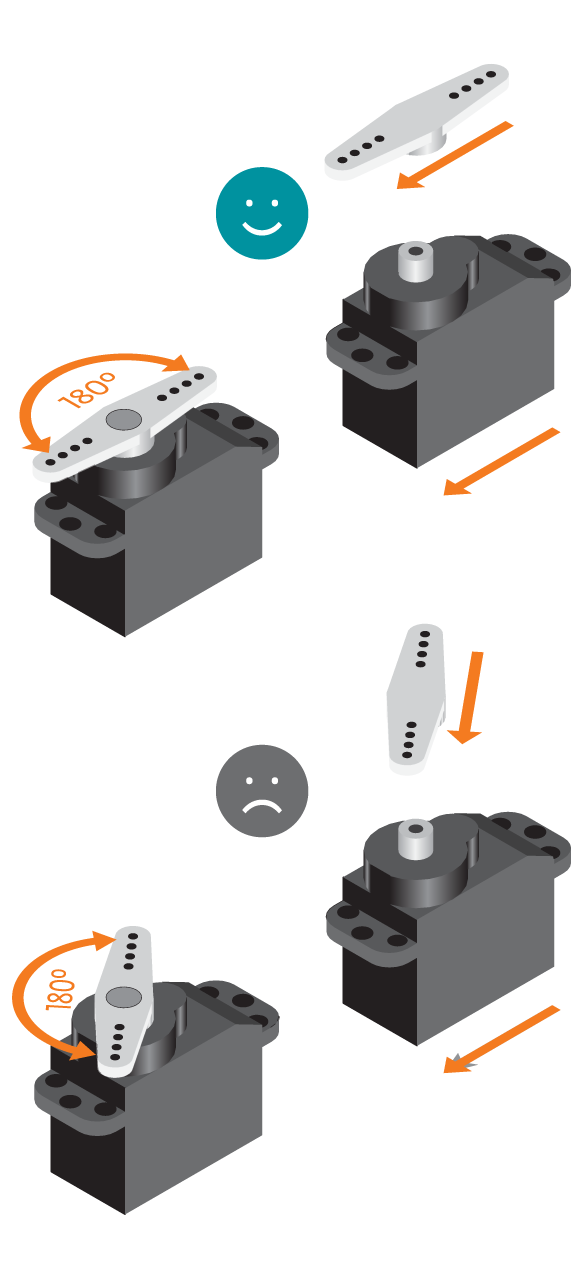
- Turn the servo by hand until it reaches the end. Turn it by hand to a 90 degrees position. Fix the rod-shaped arm along the servo. Do the same with the other servo.
- Connect the side servo to D10.
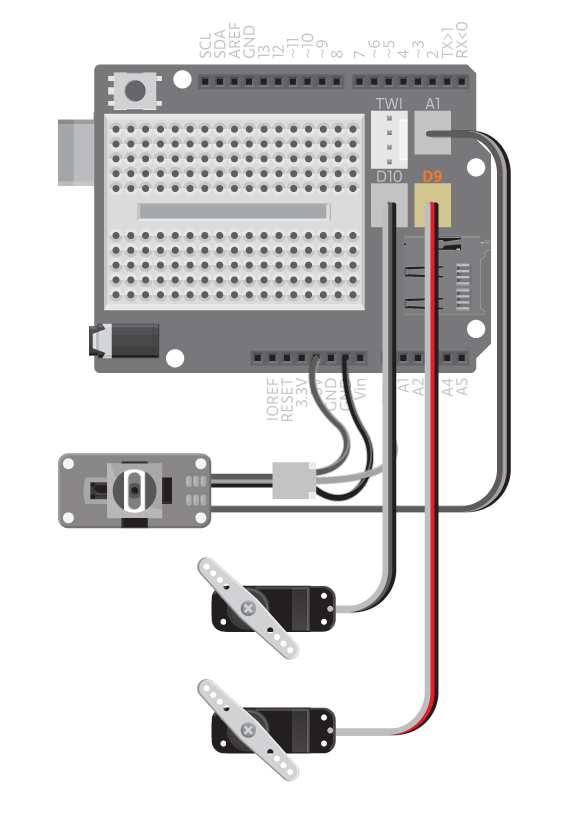
- Connect the servo that is in charge of the sweeping to D9.
- Connect the battery pack to the power jack.
- Connect the webcam to your computer. Open the Processing program called CameraRobot and run it.

Code
You cand find the code at: File -> Examples -> BasicEducationShield-> Robots -> CameraRobot
How it works
We read the values from the joystick. These values will be either 0, -1 or 1 for each axis. 0 is set to the middle, whereas, -1 is one side, and 1 is the other side.
Arduino can only drive one servo at a time. So we can only move one of the servos while the other one is still. Therefore we check first to see if panJoystick, the X value is anything but 0. That is -1 or 1. If it is, we detach the tilt servo, attach the pan servo and move it by adding or subtracting from the angle.
If however panJoystick is equal to zero we detach the pan servo, attach the tilt servo and move it according to the tiltJoystick value.
Troubleshooting
- Make sure you connected the servos correctly. See the reference to make sure the servos work.
- Make sure you have connected the joystick correctly. See the reference to make sure it works.
Experiment further
- Are the servos moving too slow or too fast? Change the
delayin the end ofloopor change the increasing and decreasing steps of the angles. - Are the servos moving too far to the sides, or too much up and down? Limit the angles allowed.