Let’s play a little bit with sound. As you probably already know, sound is vibrations. The sound from a guitar for example comes from the vibrations of the strings. So to produce sound with an Arduino we need to generate vibrations. In the following experiment we will do this with a piezoelectric buzzer (a piezo), making it beep.
The Piezo Buzzer
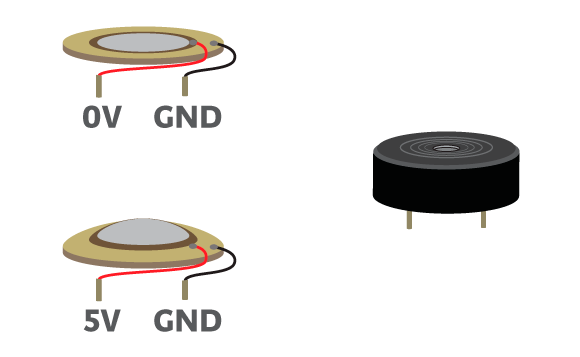
The contact microphone, also known as piezo buzzer, is electronic component made from a combination of two discs of different materials. One is metallic while the other is generally ceramic and both have piezoelectric properties. When a voltage is applied to these materials, they repel and produce an audible click. Removing the voltage difference, the materials will return to their original position causing another click.
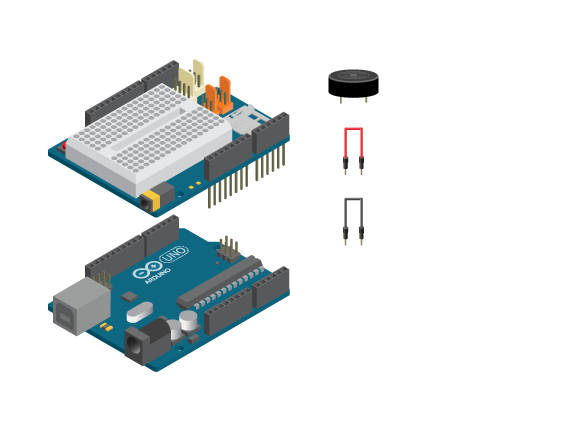
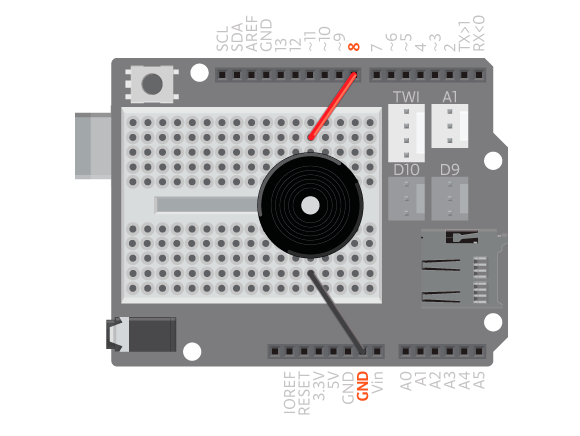
Connect a piezo to digital 8 and ground. It doesn’t matter which of the piezos pins are connected to which Arduino pin. Now to make the piezo vibrate all we need to do is to switch the digital pin between HIGH and LOW repeatedly, that is switch between applying 5V and 0V. This sounds a lot like making an LED blink, right? In fact the program to make the piezo play a sound is very similar to the “Blink” example.
int speakerPin = 8;

void setup() {
   pinMode(speakerPin, OUTPUT);
}

void loop() {
   digitalWrite(speakerPin, HIGH);
   delay(1000);
   digitalWrite(speakerPin, LOW);
   delay(1000);
}
This program makes the material inside the piezo repel and go back to their normal position with a 2 seconds interval. What you hear is a click every second. But to be able to hear a tone we need to make the material oscillate quicker. We can do that by simply reducing the delay time. Try changing the delay to one millisecond:
int speakerPin = 8;

void setup() {
   pinMode(speakerPin, OUTPUT);
}

void loop() {
   digitalWrite(speakerPin, HIGH);
   delay(1);
   digitalWrite(speakerPin, LOW);
   delay(1);
}
Tones
Now you know that you generate sound with an Arduino and a piezo by fluctuating the pin between ’0 ‘and ’1′ a certain amount of times per second. That amount is what we call frequency. You get different tones depending on the value of the frequency. High frequency, that is many oscillations per second gives you a high pitch tone while a low frequency, few oscillations per second gives you a low pitch tone.
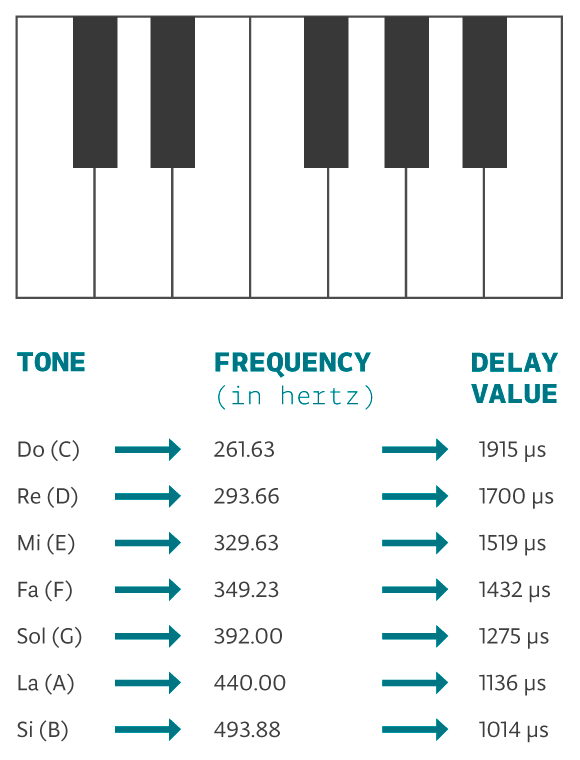
The tones have names: Do (C), Re (D), Mi (E), Fa (F), So (G), La (A), Ti (B). Of these tones Do (C) has the lowest frequency of 262 herz while Ti (B) has the highest of 494 herz. This means that we need to make the pin oscillate 262 times per second to play Do (C) and 494 times per second to play Ti (B).
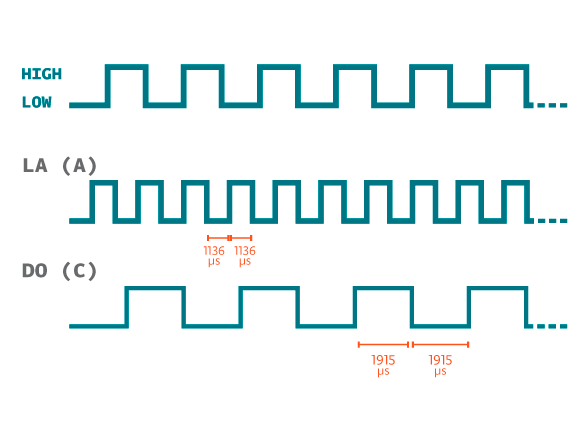
If you want to play different tones, you have to change the amount of time that the pin is ON and OFF so that it corresponds with the tones frequency. You do this by changing the value in the delay(1) function. There is only one problem: to play the tones, they must be controlled more precisely. Instead of using the delay function, you should use the delayMicroseconds(). As you remember, the delay pauses in amounts of milliseconds, while delayMicroseconds pauses in amounts of microseconds, or 1000 times smaller than a millisecond.
The following equation describes the link between the two functions:
delay(1) = 1000 * delayMicroseconds(1) = delayMicroseconds(1000)
int speakerPin = 8;

void setup() {
   pinMode(speakerPin, OUTPUT);
}

void loop() {
   digitalWrite(speakerPin, HIGH);
   delayMicroseconds(1000);
   digitalWrite(speakerPin, LOW);
   delayMicroseconds(1000);
}
Melodies
A melody is a combination of a bunch of notes. To write a melody for a piezo would take forever if we would use the same method as in the previous examples. So, instead of having to calculate the delay time depending on the frequency and decide how many times to oscillate a pin depending on the duration of the note, we’ve made a function called play(). You can read all about how to use it to play melodies here.