He shoots! He scores!
In this game, players will try to land a ping pong ball into a cup. Make five points to win. The score is tracked using a light dependent resistor (LDR).
Materials

- 1 Arduino board
- 1 Basic Education shield
- 1 Tinkerkit LDR
- 1 Tinkerkit cable
- 1 piezo speaker
- 5 LEDs
- 5 220 ohm resistors
- 6 black jumper wires
- 6 colored jumper wires
- 1 plastic cup
- 1 ping-pong ball
- tape
- scissor/knife
Instructions
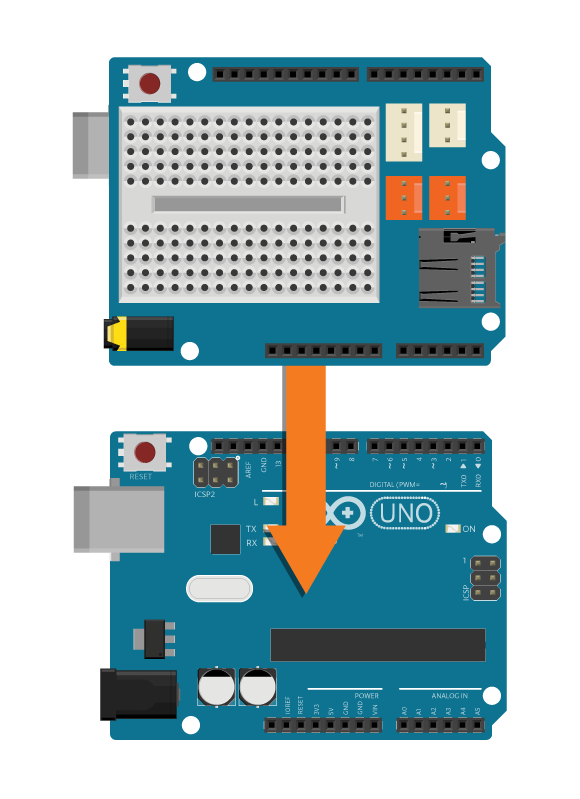
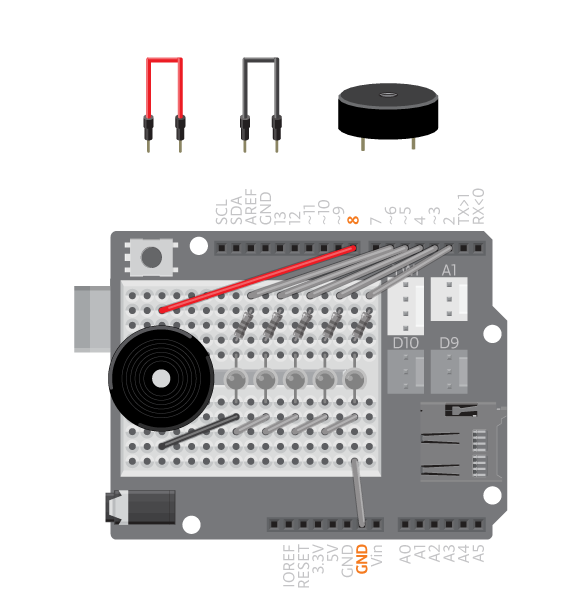
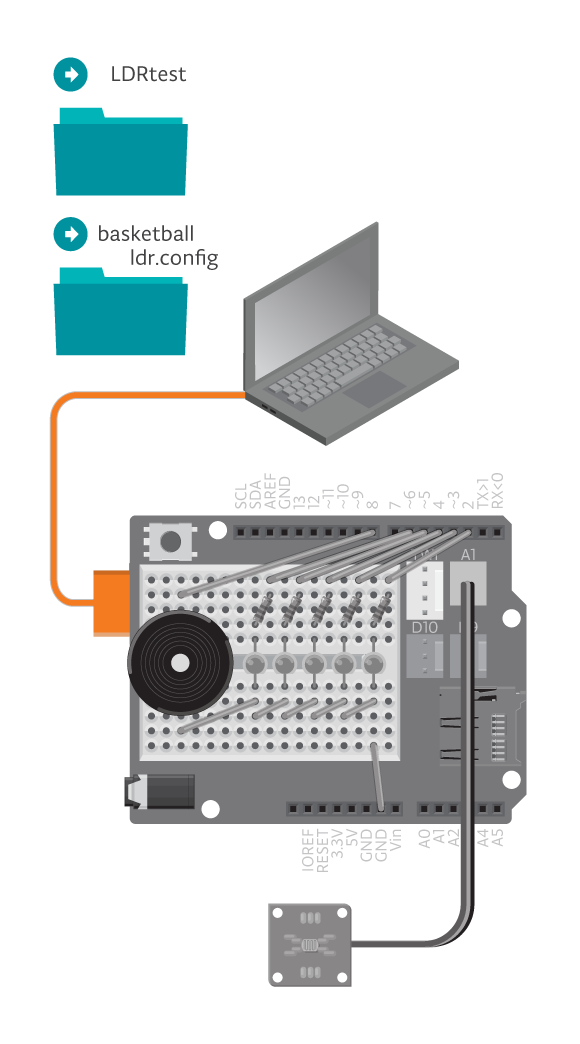
- Attach the shield onto the top of the Arduino board.
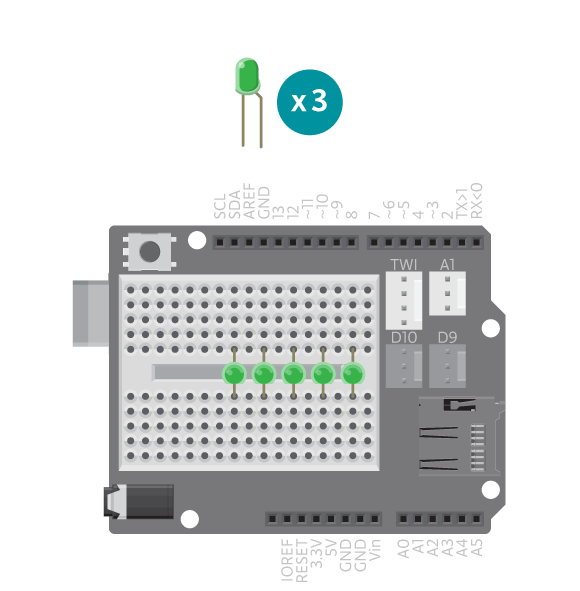
- Connect five LEDs across the breadboard gap.
- Connect a 220 ohm resistor to digital pin 2. Connect the resistor to the long leg of the first LED.
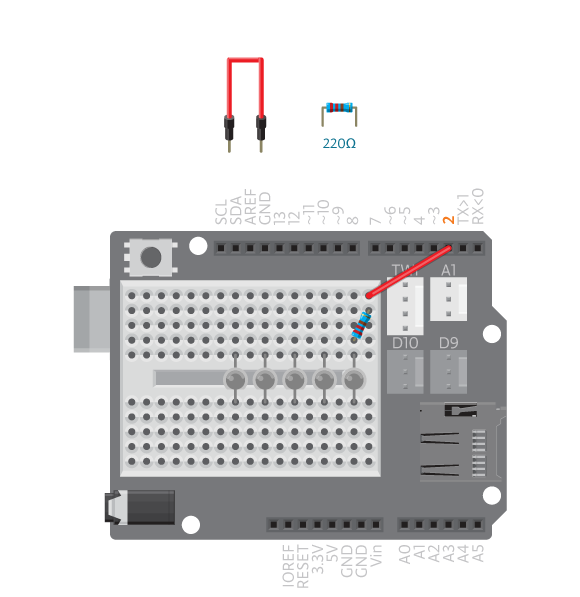
- Connect each of the digital pins 3 through 6 to a corresponding LED following the same method.

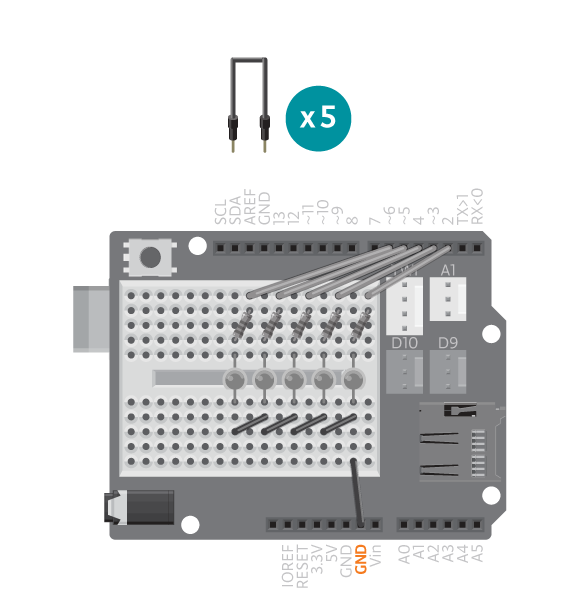
- Connect the short leg of the LEDs to an Arduino GND pin using black wires.
- Connect the piezo speaker to the breadboard and connect one leg to digital pin 8 and the other to GND.
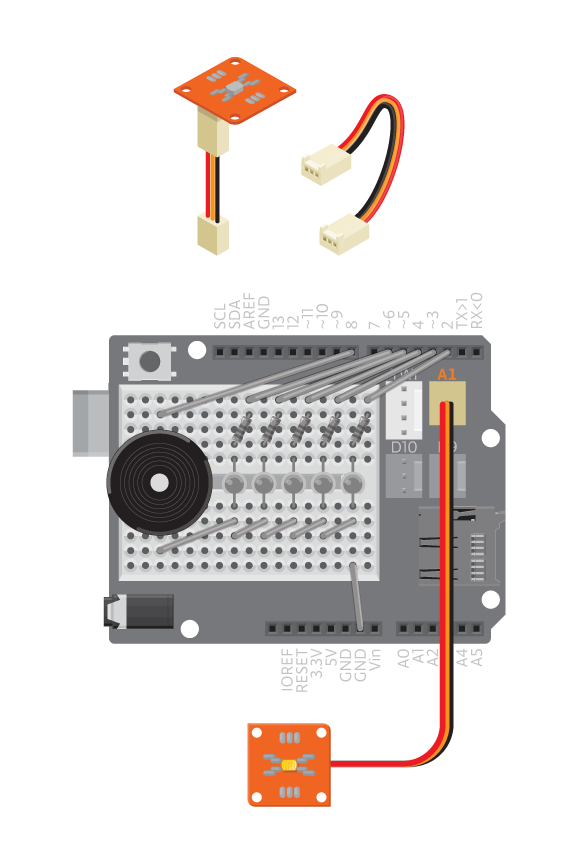
- Connect Tinkerkit LDR to A1 three pin connector.
- Connect the Arduino assembly to the computer. Upload example “LDRtest” and test lighting conditions. Open the Serial Monitor and hold the LDR vertically. Write down
uncoveredvalue.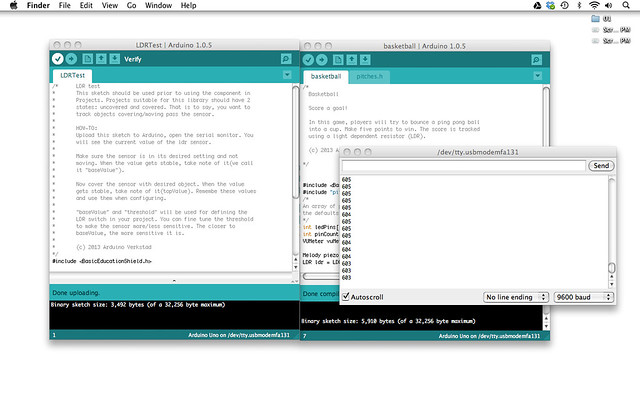
- Place a ping-pong ball over the LDR. Write down
coveredvalue. Average both numbers forthresholdvalue.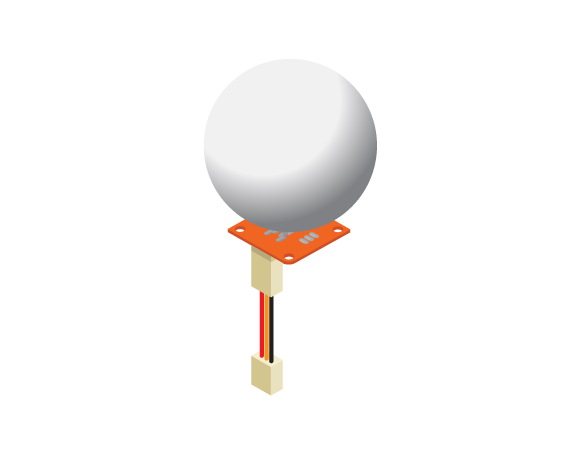
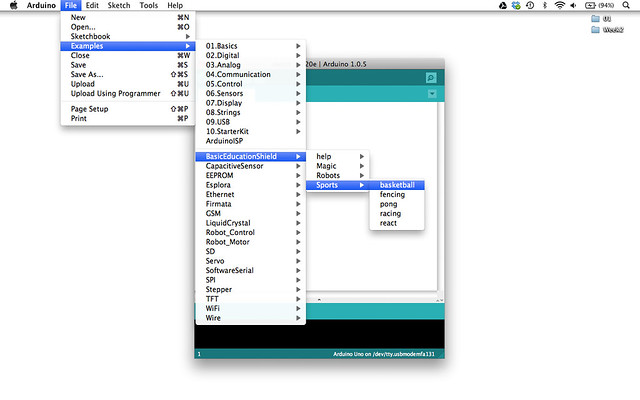
- Open example “Basketball”.
- Find the syntax line
ldr.config(###, ###), changing the###parameters to theuncoveredvalue andthresholdvalue respectively.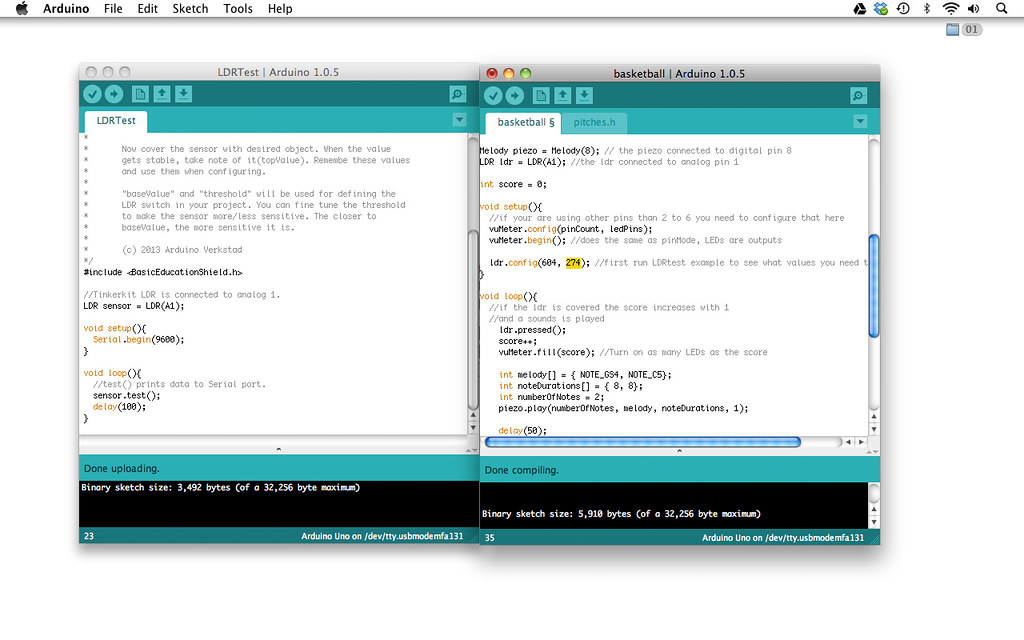
- Upload “Basketball” and try out the game.
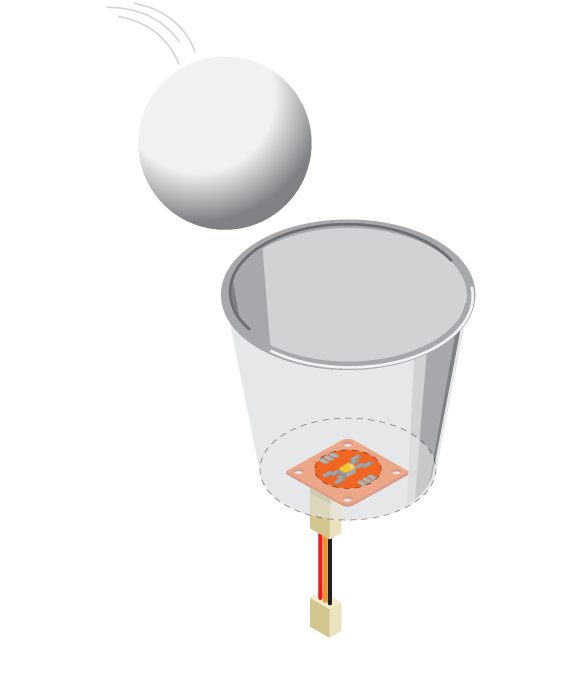
- Cut hole on bottom of plastic cup so it fits LDR.
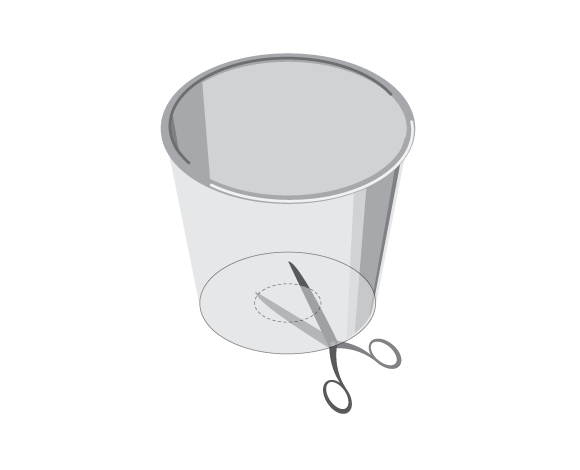
- Place the LDR in the hole, and tape it (don’t cover the LDR). Tape the plastic cup to your table, so it stands.
Code
You can find LDRTest in File -> Examples -> Castilla -> Sports -> LDRTest and the game code in File -> Examples -> Castilla -> Sports -> Basketball
How it works
The variable score will keep count on your score. Each time the LDR gets covered, it detects a value over the threshold and the score will increase with 1. The LEDs will light up on the VU-meter and a short melody will play. At the end of loop() the program checks to see if the score is equal to the amount of LEDs connected to the board (5 on this VU-meter). If it is, the program skips to startOver() where the score is reset to zero, a victory melody is played, and all the LEDs will blink. After that, the program starts over in loop().

Troubleshooting
- Refer to the illustration and double check your connections. Make sure the shield and wires are firmly connected. Check the LED polarities to make sure they are consistent and properly wired.
- Goal doesn’t count? Try changing the
thresholdvalue closer to thebaseValuevalue. See reference LDR sensor for debugging LDR sensor. - VU-meter does not work correctly? See reference VU-meter for debugging.
Experiment further
- Can you add more LEDs and increase the possible score? Dont forget to add them both onto the board and into the code.
- Not happy about the sounds the piezo plays? Make up your own melodies.
- Change the way the LEDs blink when it’s game over. See code example VUMeterTest for the commands you can use.