Run as fast as you can . . . with your fingers!
In this game, a player must tap two sensors alternately in order to run laps. One LED will light up per lap. When all laps are completed, LEDs will blink in victory.
Materials
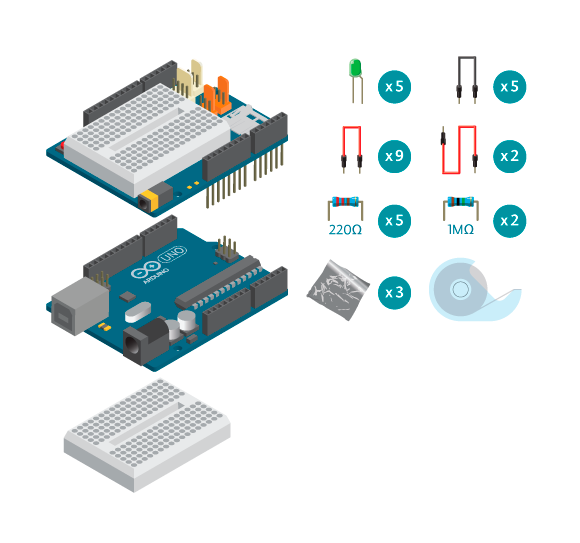
- 1 Arduino board
- 1 Basic Education shield
- 5 LEDs
- 2 1 M ohm resistor
- 5 220 ohm resistors
- 5 black jumper wires
- 11 colored jumper wires (2 long ones)
- aluminium foil
- masking tape
Instructions
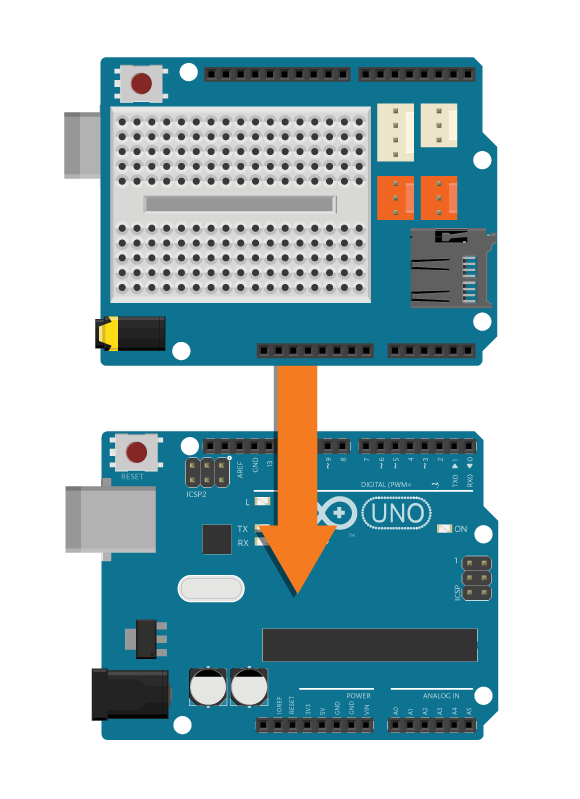
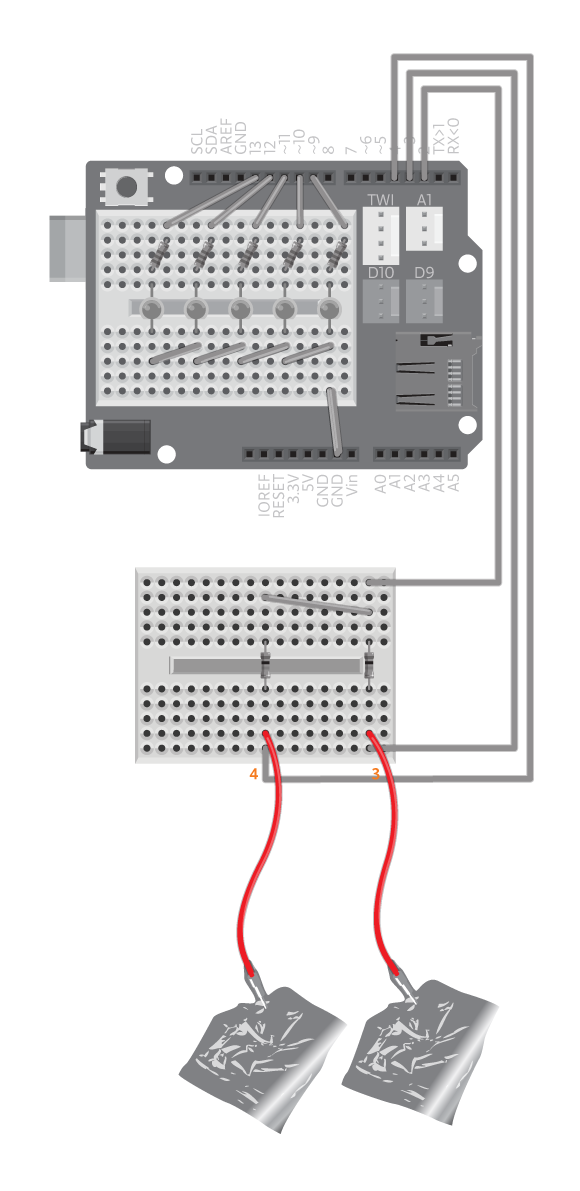
- Attach the shield onto the top of the Arduino board.
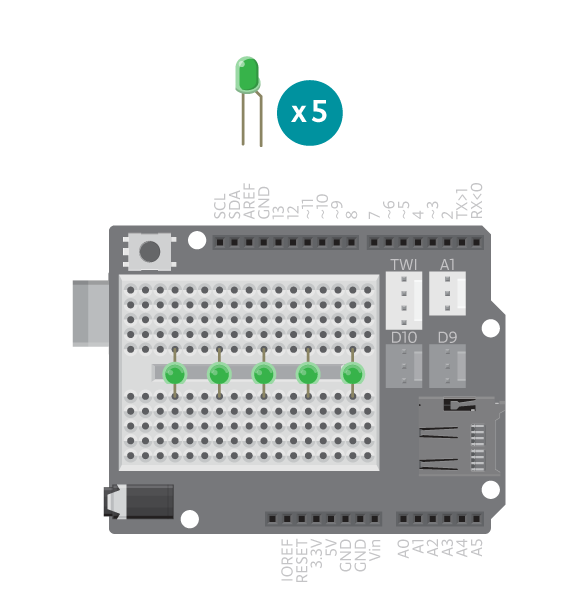
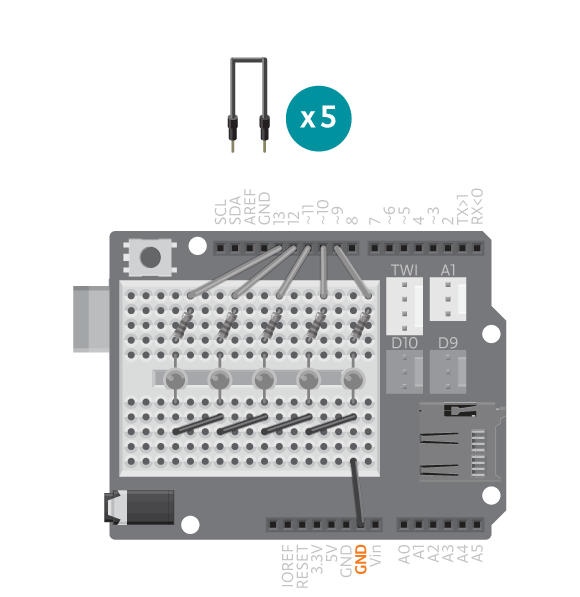
- Connect five individual LEDs across breadboard gap.
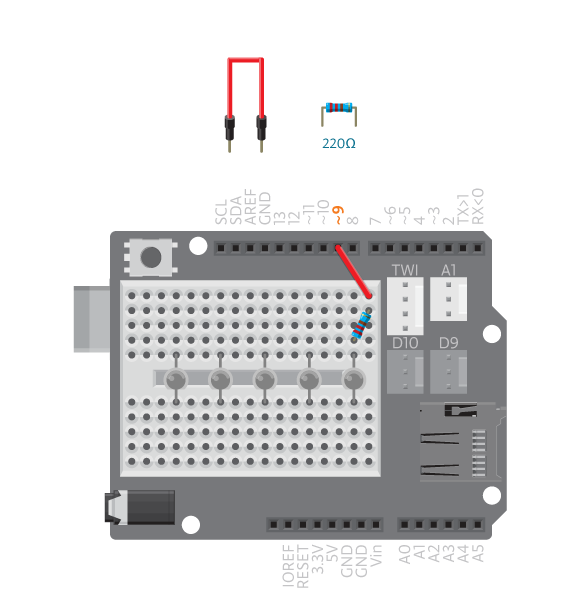
- Connect a 220 ohm resistor to digital pin 9. Connect the resistor to the long leg of the first LED.
- Connect each of the digital pins 10 through 13 to a corresponding LED following the same method.
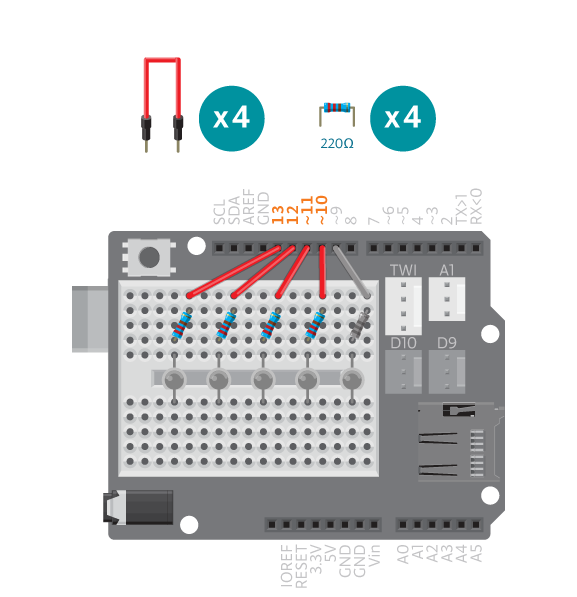
- Connect the short leg of the LEDs to an Arduino GND pin using black wires.
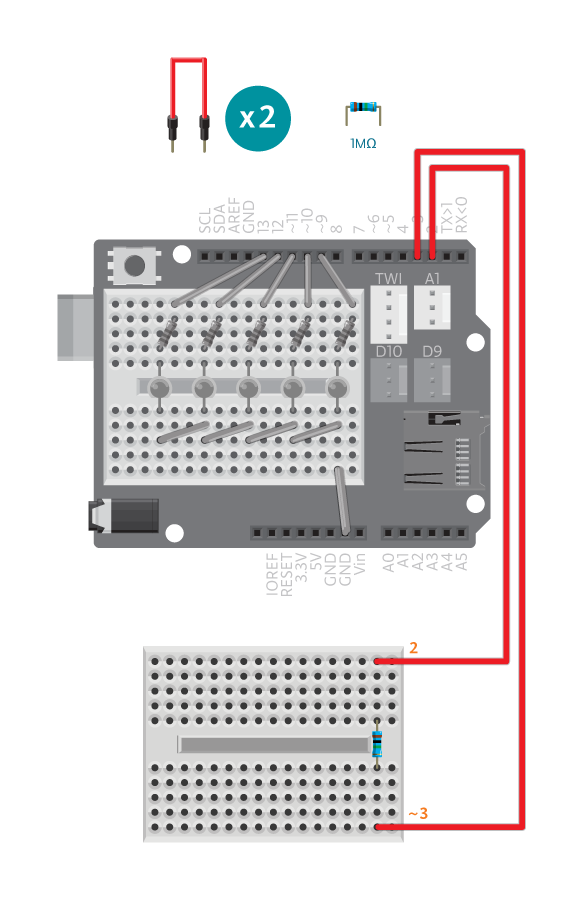
- Using a separate breadboard, connect a 1 Mohm resistor between digital pin 2 and digital pin 3.
- Connect digital pin 4 to digital pin 2 following the same method.
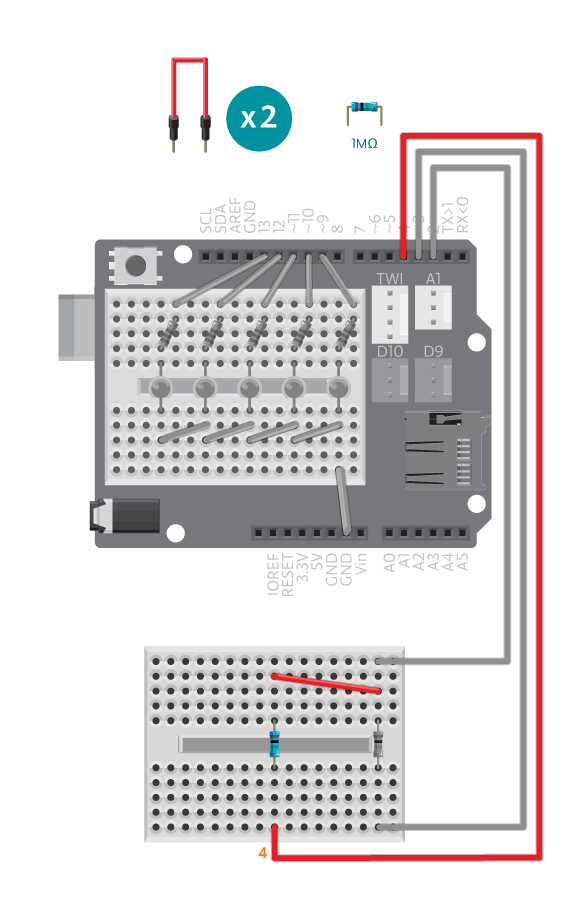
- Make a touch sensor by cutting a 5 cm x 5 cm square of aluminum foil. Wrap one corner of a foil square to a loose wire – the metal of the wire must contact the foil.
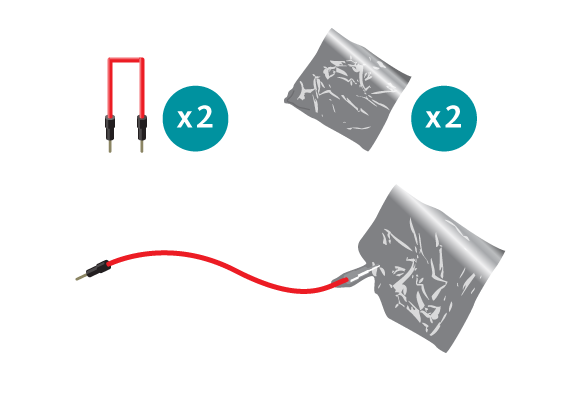
- Make two touch sensors and connect each to digital pins 3 and 4 – tape the two sensors firmly to the table making sure they do not touch.
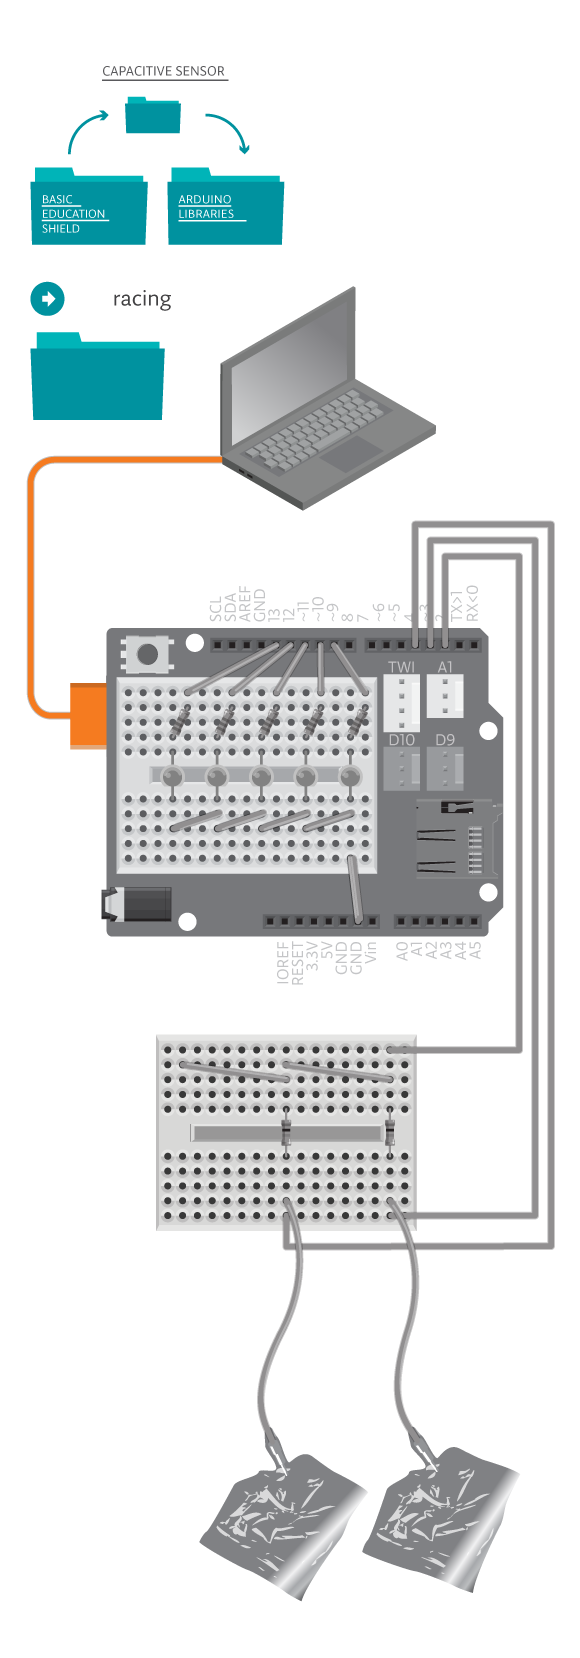
- Move the?CapacitiveSensor?folder from the?Castilla?folder to the?Arduino libraries folder.?Connect the Arduino assembly to the computer and upload example Racing and try the game out.
Code
You can find the code in?File -> Examples -> Castilla -> Sports -> Racing
How it works
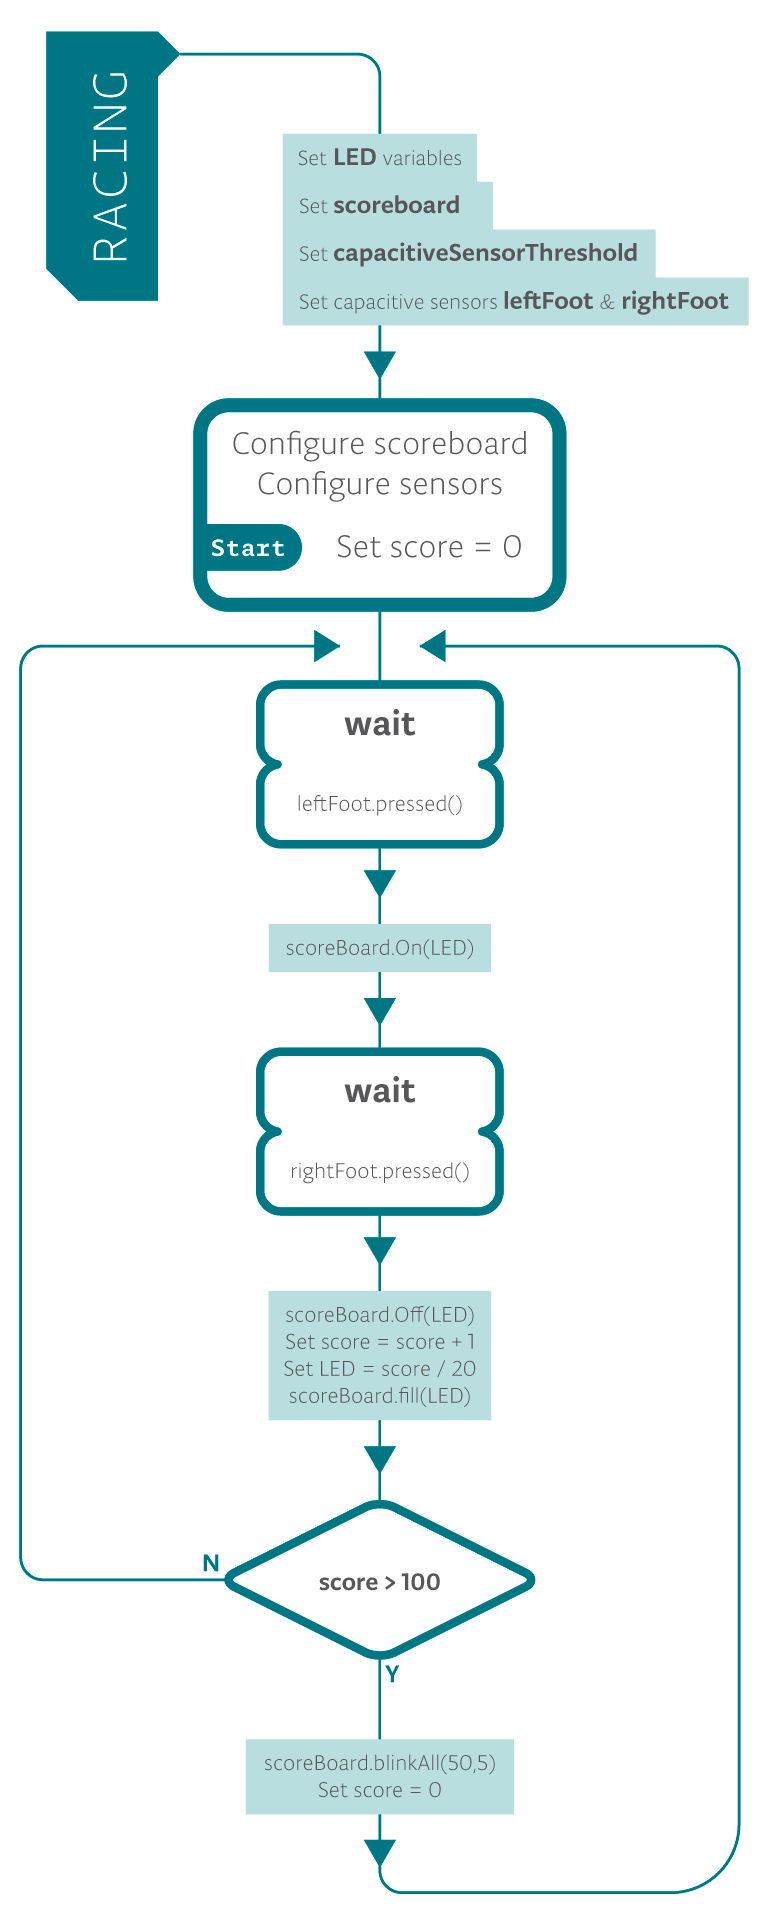
The game begins when you start tapping alternately between the two capacitors – press the left and then the right. For every 20 “steps”, one LED lights up. The LEDs will turn on and off with every step.
Once you have completed 100 “steps”, all the lights will blink in celebration! After that, the game restarts.
Troubleshooting
- Refer to the illustration and double check your connections. Make sure the shield and wires are firmly connected.?Check the LED polarities to make sure they are consistent and properly wired.
- Hitting the foils does nothing? See?Capacitive Switch reference?for debugging capacitive sensor.
- VU-meter does not work correctly? See?VU-Meter reference??for debugging VU-meter.
- You can’t upload the code? Make sure that the CapacitiveSensor library is placed inside the libraries folder in your Arduino folder.
Experiment further
- Change the way the LEDs blink when it’s game over. See code example VUMeterTest for the commands you can use.
- Is the game too easy? Make it longer!
- Find other conductive materials to replace the aluminium foil with (maybe your friends)?
- Use a stopwatch and see who runs the fastest!