With POV, persistence of vision, you can take eg a bike wheel and make it into a display with just a few LEDs. Check out this video to see what we mean.
In this project you will make one of these displays yourself. Wave it with long strokes or even hold it while running to display a text, a statement or a picture. The effect is most visible in a dark place so if you’re running, make sure not to run in to a tree or a friend.
Materials

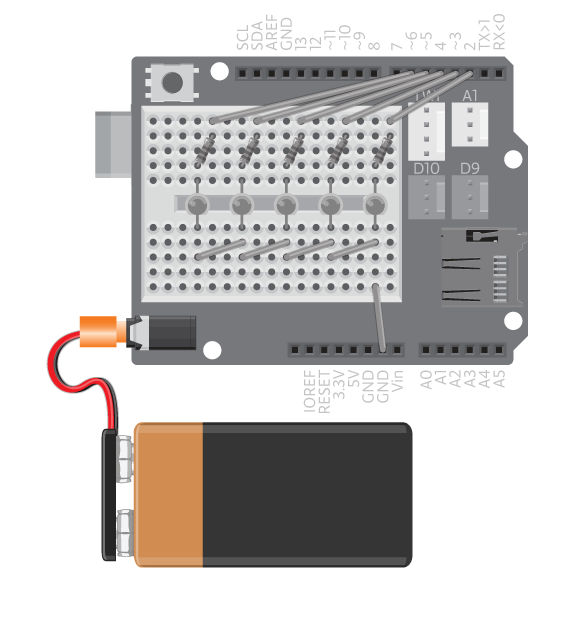
- 1 Arduino Uno board
- 1 Basic Education shield
- 5 LEDs
- 5 220 ohm resistors
- 5 Black jumper wires
- 5 colored jumper wires
- 1 9V battery
- 1 9V battery holder
Instructions
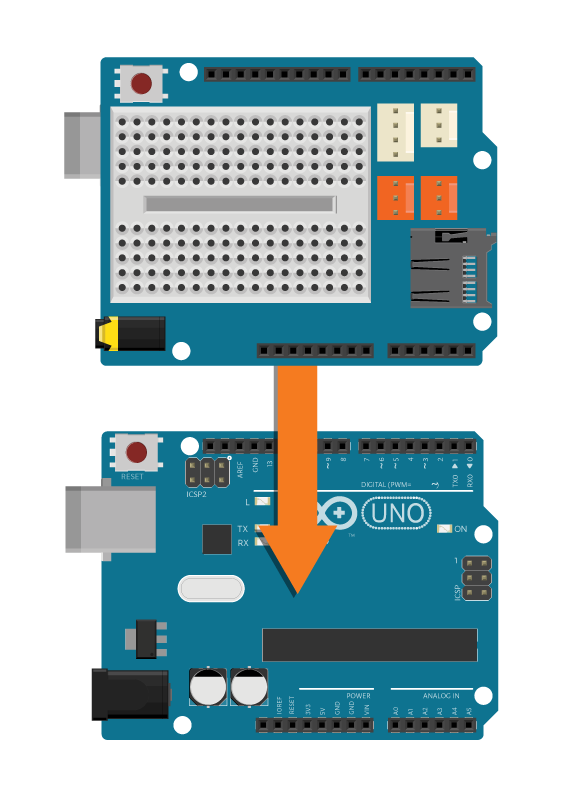
- Attach the shield onto the top of the Arduino board.
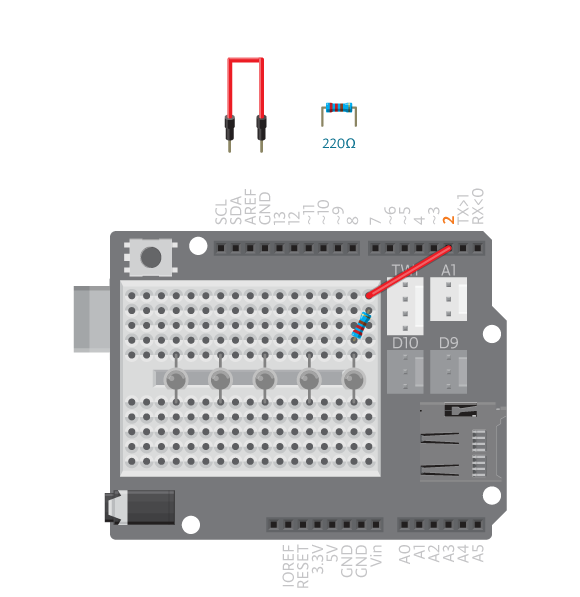
- Connect five LEDs across the breadboard gap.

- Connect a 220 ohm resistor to digital pin 2 and connect the resistor to the long leg of the first LED.
-
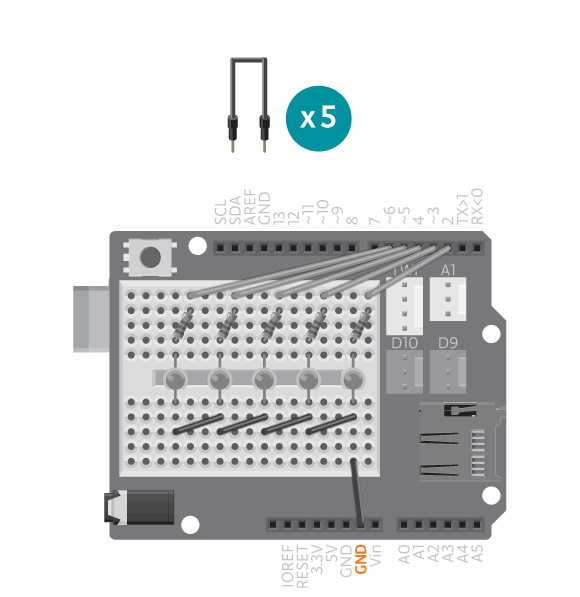
Connect each of the digital pins 3 through 6 to a corresponding LED following the same method.

-
Connect the short leg of the LEDs to an Arduino GND pin using black cables.
-
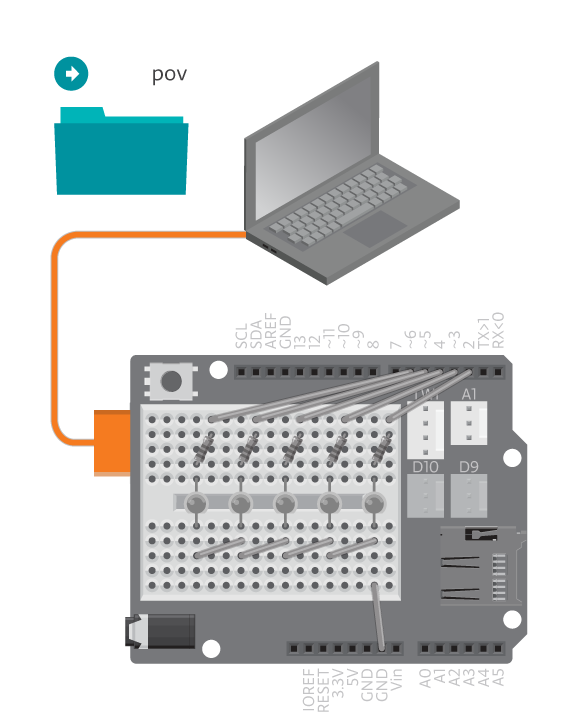
Connect the Arduino assembly to the computer and upload example POV.
-
Unplug the Arduino assembly and connect a 9V battery and holder to the Arduino’s power jack.
Code
You can find the code in File -> Examples -> Castilla -> Magic -> POV.
How it works
The program blinks the LEDs according to the information inside the array called message. The persistence of vision effect is only seen as the VU-meter is waved back and forth.
Troubleshooting
- VU-meter does not work correctly? See the VU-meter reference for debugging
Experiment further
- Try different messages, with a different length.
- Change the message to a pattern or a drawing.
- Take a photo of yourself waving POV. Check out the cool effect!