Ready… Set… Go! Test your reaction time!
In this game, one of three LEDs will randomly light up. You must tap the corresponding capacitive sensor as quick as possible. If you don’t react fast enough, the game is over.
Materials

- 1 Arduino board
- 1 Basic Education shield
- 1 piezo speaker
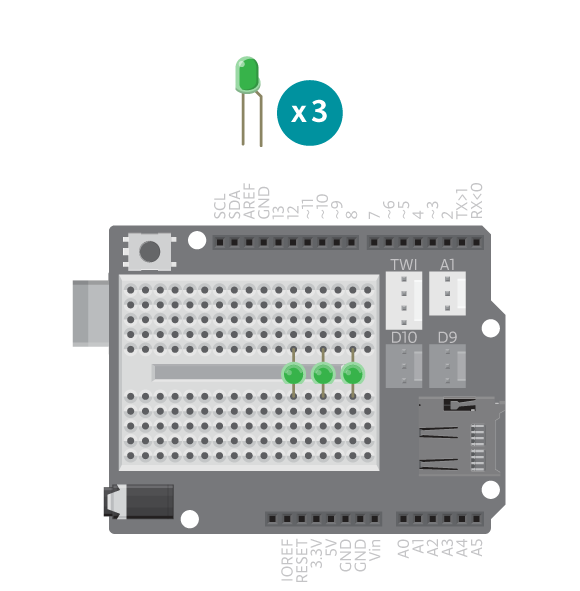
- 3 LEDs
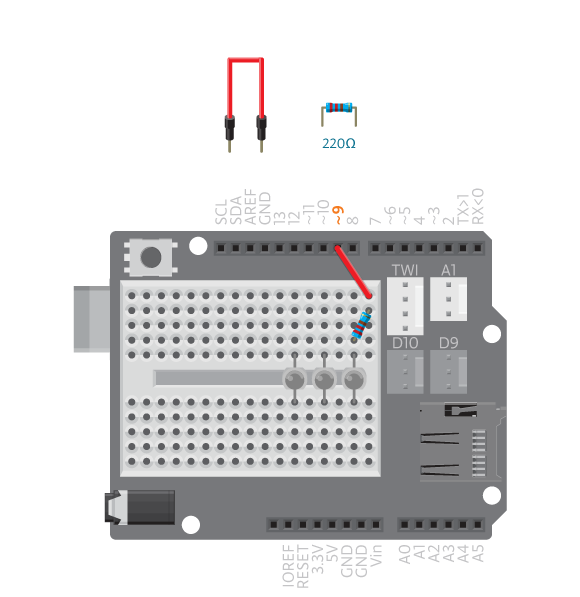
- 3 220 ohm resistors
- 3 1 M ohm resistors
- 6 black jumper wires
- 12 colored jumper wires (3 long ones)
- 1 ?breadboard
- aluminium ?foil
- masking tape
Instructions
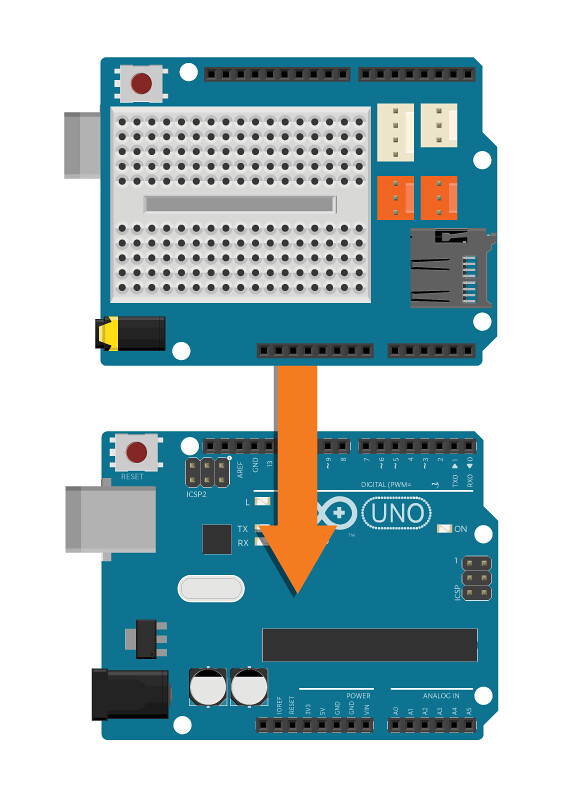
- Attach the shield onto the top of the Arduino board.
- Connect three LEDs across breadboard gap.
- Connect a 220 ohm resistor to digital pin 9.?Connect the resistor to the long leg of the first LED.
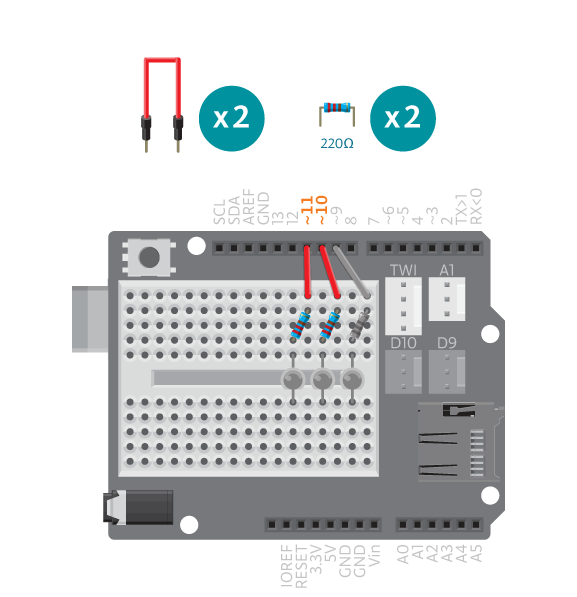
- Connect each of the digital pins 10 and 11 to the corresponding LED following the same method.
- Connect the short leg of the LEDs to an Arduino GND pin using black wires.
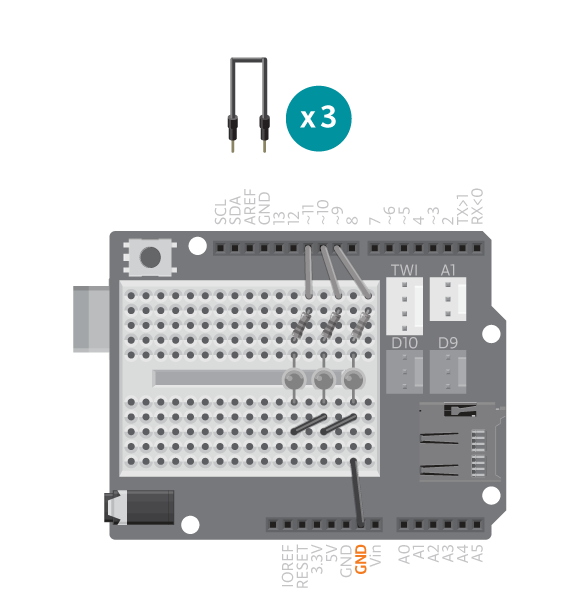
- Connect the piezo speaker to the breadboard and connect one leg to digital pin 8 and the other to GND.

- Using a separate breadboard, connect a 1 M ohm resistor between digital pin 3 and digital pin 2.
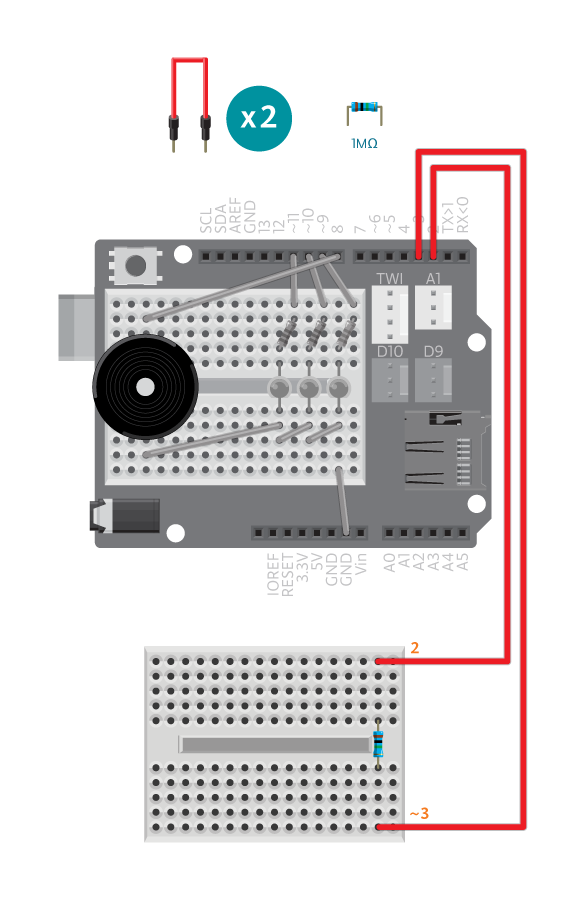
- Connect digital pins 4 and 5 to digital pin 2 following the same method.

- Make a touch sensor by cutting a 5 cm x 5 cm square of aluminium foil.?Wrap one corner of a foil square to a loose wire – the metal of the wire must contact the foil.
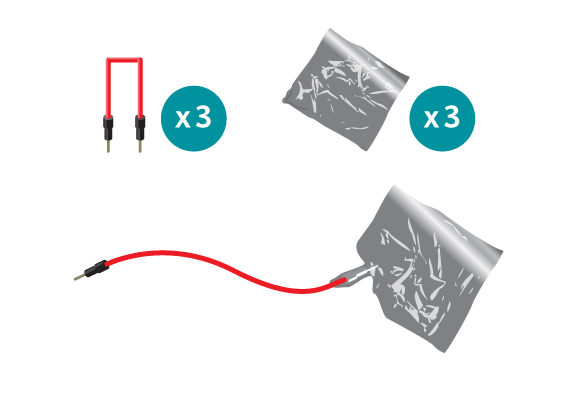
- Make three touch sensors and connect each to digital pins 3 through 5 – tape the three sensors firmly to the table making sure they do not touch.

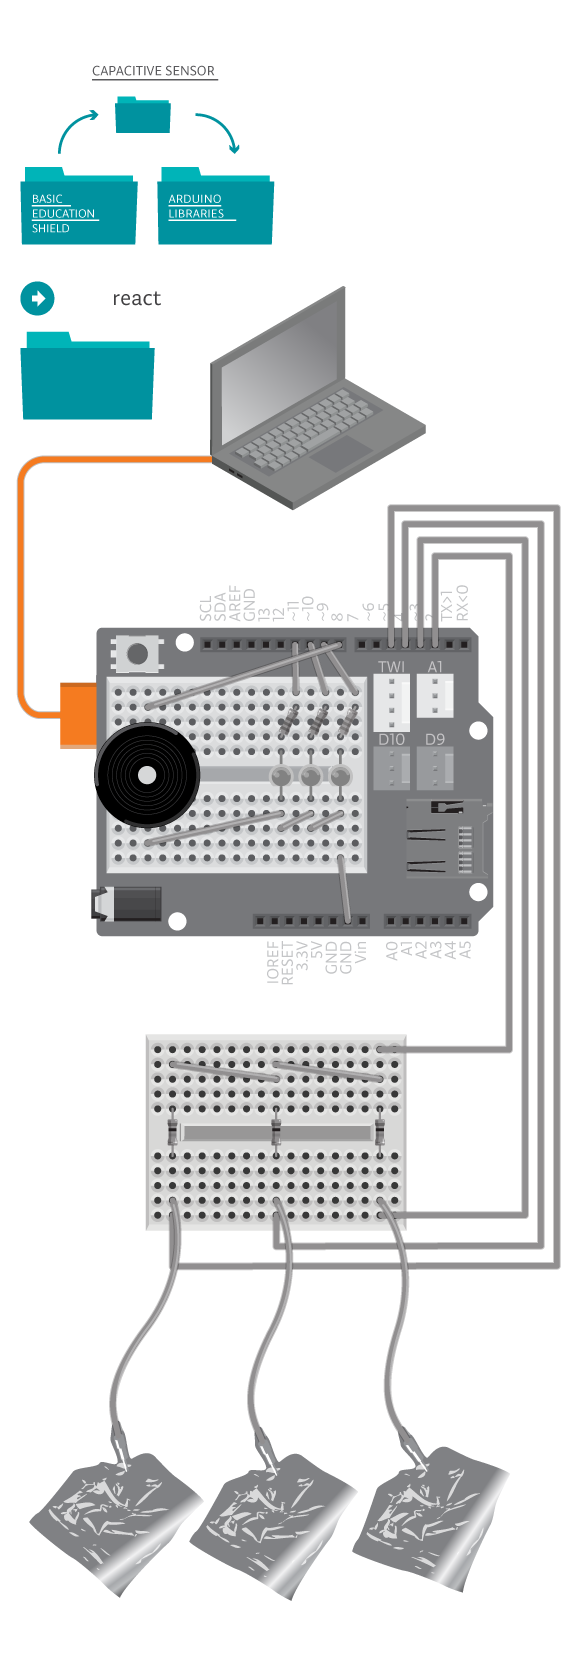
- Move the?CapacitiveSensor?folder from the?Castilla?folder to the?Arduino libraries folder.?Connect the Arduino assembly to the computer, upload example?React?and try out the game.
Code
You can find the code in?File -> Examples -> Castilla -> Sports -> React
How it works
The game first waits for a random period of time and then picks a number between 0 and 2. This number represents the LED that will be turned on and the sensor associated with it. You must touch the sensor of the lit LED within the value of ?reactTime, a cheering sound is played. The game will then repeat.
However if you fail, the program calls?gameOver()?which blinks all the LEDs and makes sound to signal game over. The game then resets and starts again.
?
Troubleshooting
- Refer to the illustration and double check your connections. Make sure the shield and wires are firmly connected.?Check the LED polarities to make sure they are consistent and properly wired.
- Increase the allowed reaction ?time to make the game easier for testing. Make sure to change them back when everything is working.
- VU-meter does not work correctly? See?VU-Meter reference for debugging VU-meter.
- Can’t upload the code? Make sure that the?CapacitiveSensor?library is placed inside the?Arduino libraries folder.
Experiment further
- Can you make game harder to play? Change the reaction time and the waiting time.
- Not happy about the sounds the piezo plays? Make up your own melodies.
- Change the way the LEDs blink when it’s game over. See code example VUMeterTest for the commands you can use.
- Can you add more LEDs and sensors? Dont forget to add them both onto the board and into the code!