Play a simplified version of the classic arcade game, Pong!
In this game, a “pong” will move across five LEDs (VU-meter) and bounce back and forth as players press the button. Players must press the button at the right time in order to return the pong.
Materials
- 1 Arduino board
- 1 Basic Education shield
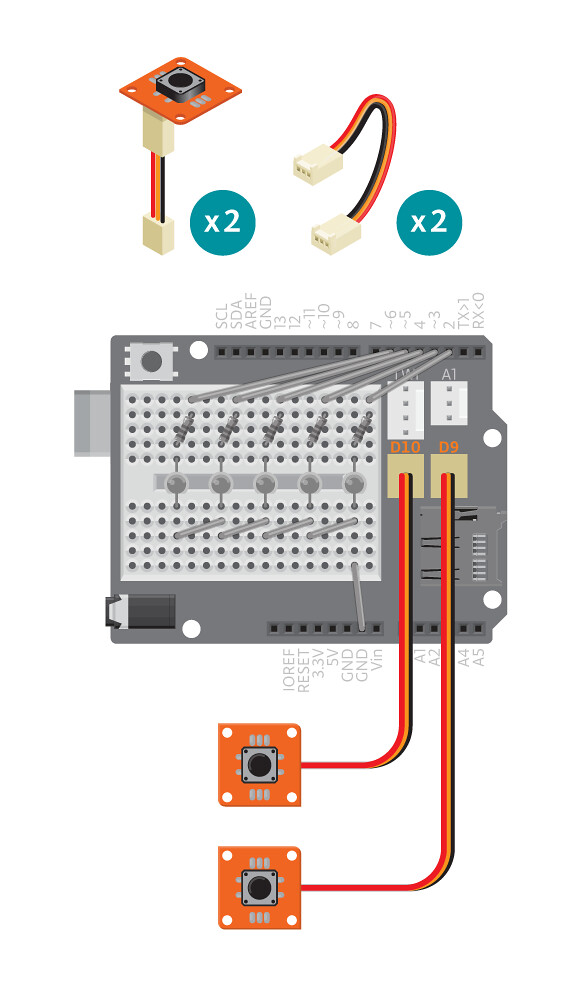
- 2 Tinkerkit buttons
- 2 Tinkerkit wires
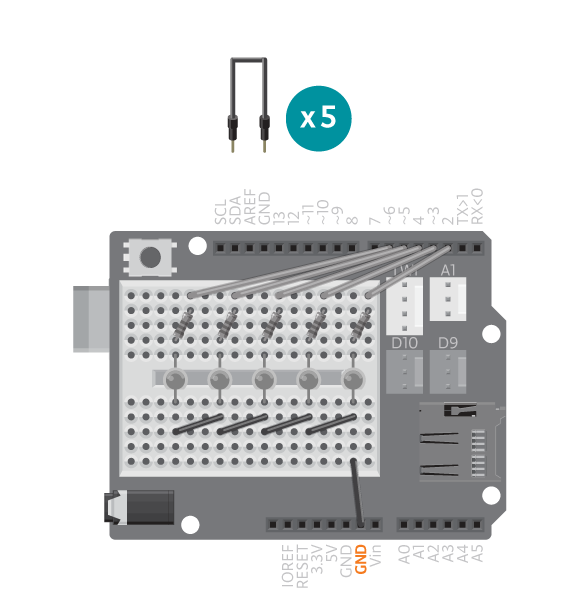
- 5 LEDs
- 5 220 ohm resistors
- 5 black jumper wires
- 5 colored jumper wires
Instructions
- Attach the shield onto the top of the Arduino board.

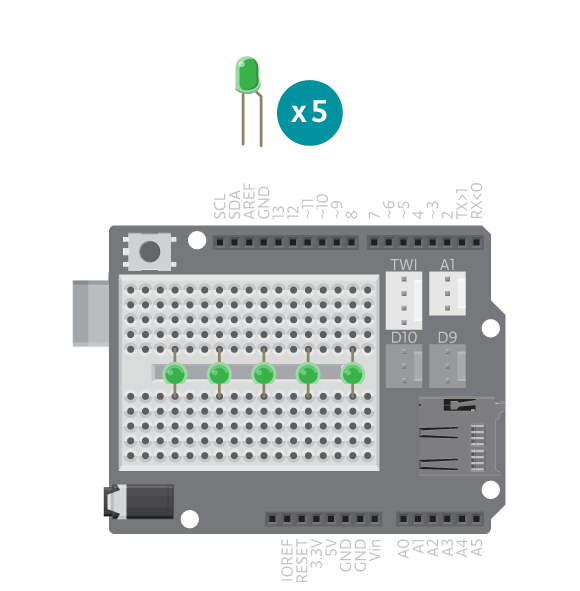
- Connect five LEDs across the breadboard gap.
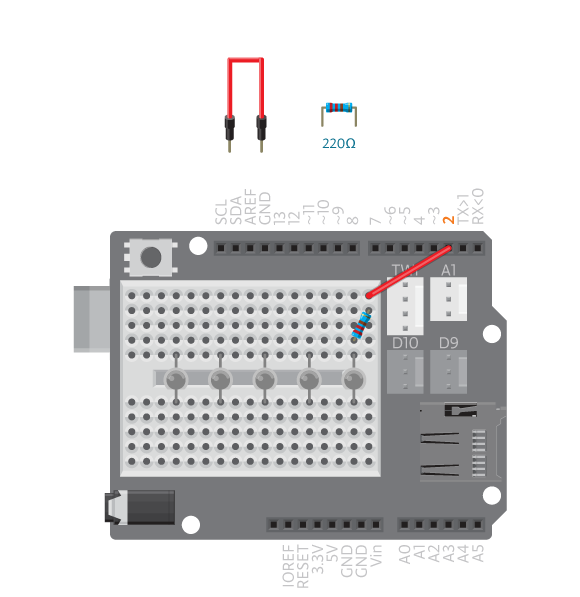
- Connect a 220 ohm resistor to digital pin 2. Connect the resistor to the long leg of the first LED.
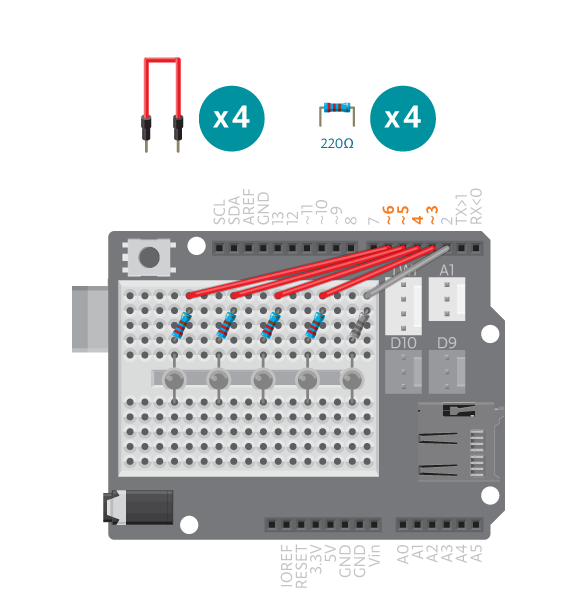
- Connect each of the digital pins 3 through 6 to a corresponding LED following the same method.
- Connect the short leg of the LEDs to an Arduino GND pin using black jumper wires.
- Connect Tinkerkit buttons to D9 and D10.
- Connect the Arduino assembly to the computer, upload example Pong and try the game.
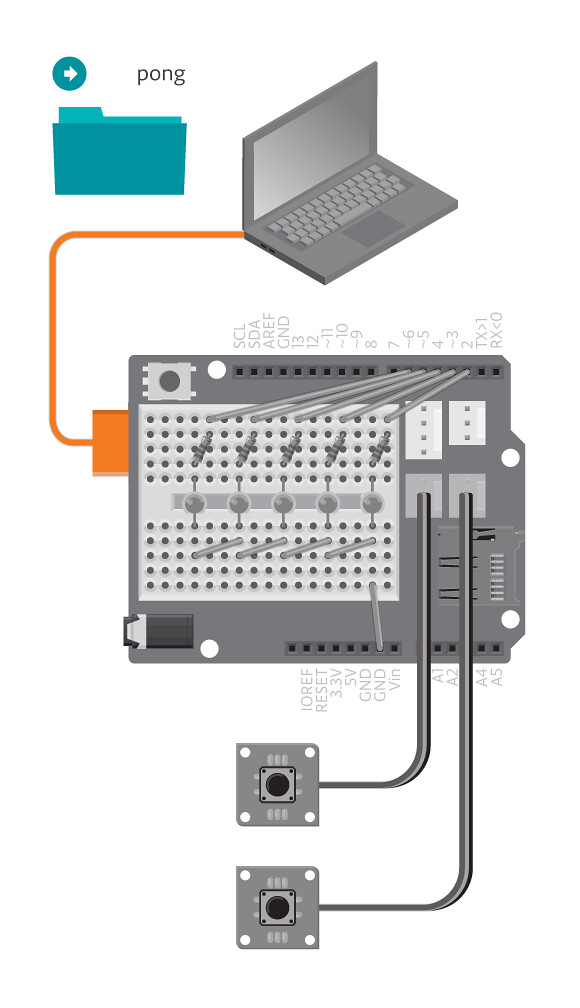
Code
You can find the code in ”File -> Examples -> Sports -> Pong”
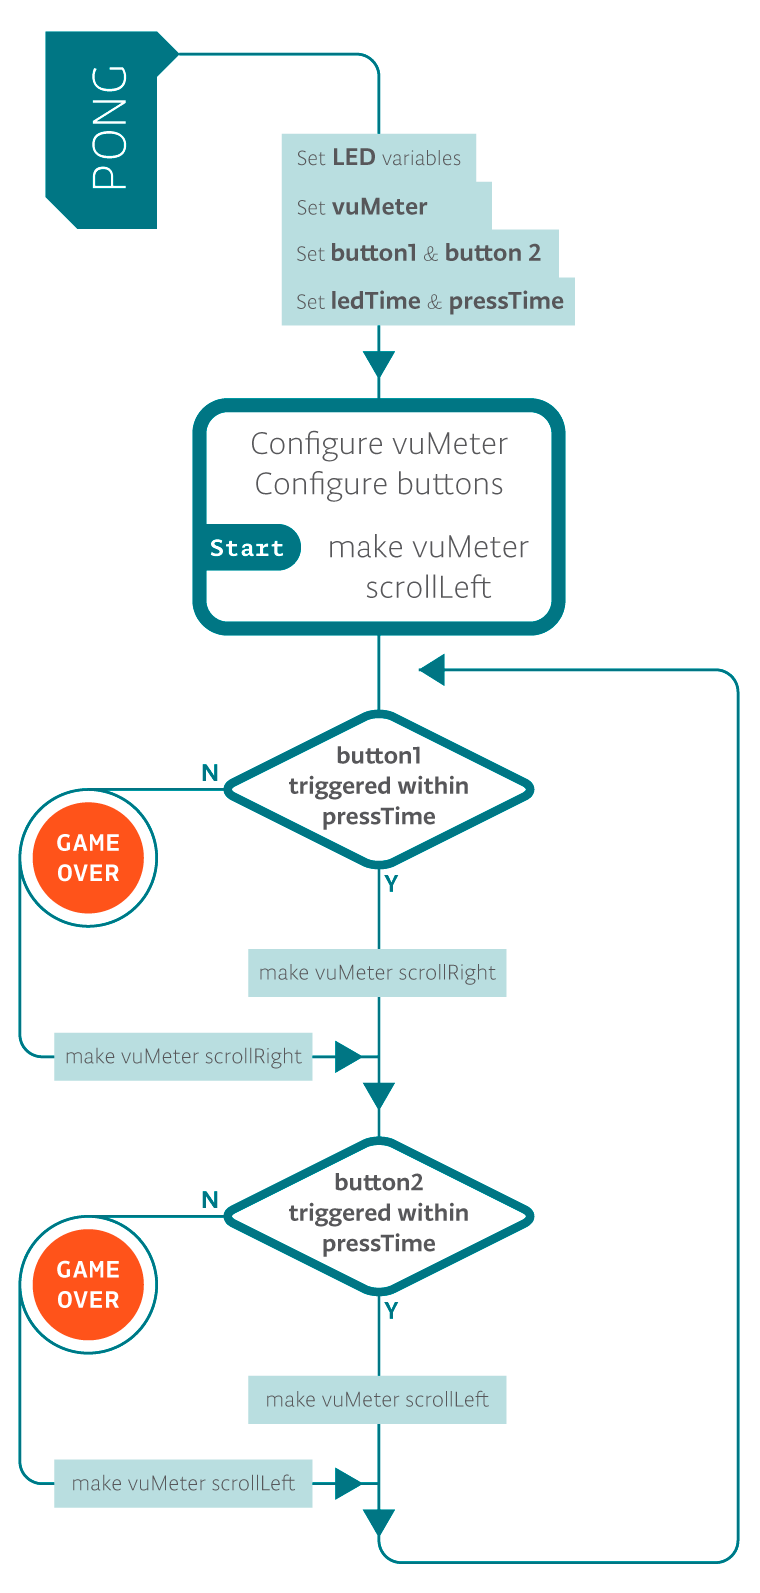
How it works
The game starts with the LEDs scrolling to the left. When the last LED is turned off, button one has to be pressed within the preset time frame. If successful, the LEDs begins to scroll back to the right. As before, button two needs to be pressed within the preset time frame. If played successfully, loop() will run again.
However, when a player fails to press the button in time, the program skips to gameOver() whereupon all the LEDs blink. It will immediately restart the game and the LEDs will scroll to the left.
Troubleshooting
- Refer to the illustration and double check your connections. Make sure the shield and wires are firmly connected. Check the LED polarities to make sure they are consistent and properly wired.
- Can’t hit the pong? Try swapping your buttons. If it still doesn’t work, see reference for debugging buttons.
- VU-meter does not work correctly? See reference for debugging the VU-meter.
Experiment further
- Change the way the LED blinks when it’s game over. See code example VUMeterTest for the commands you can use.
- Design and build a box for the game. Poke the LEDs through the top of the box or cover with a translucent material. Mount the buttons on the box.
- You could try to change the digital pins the LEDs are connected to to see what happens. Don’t forget to change it both in the connections and in the code. Also, don’t forget that digital pins 9 and 10 are already in use for the buttons.