Draw audio with drawdio. You might think that this pen is magic, and it might just be. Drawdio turns (almost) everything that is conductive into an instrument. You can either make music by drawing a picture or by touching the tip of it to different conductive things around you. See some examples of ways to use it in this video.
Materials
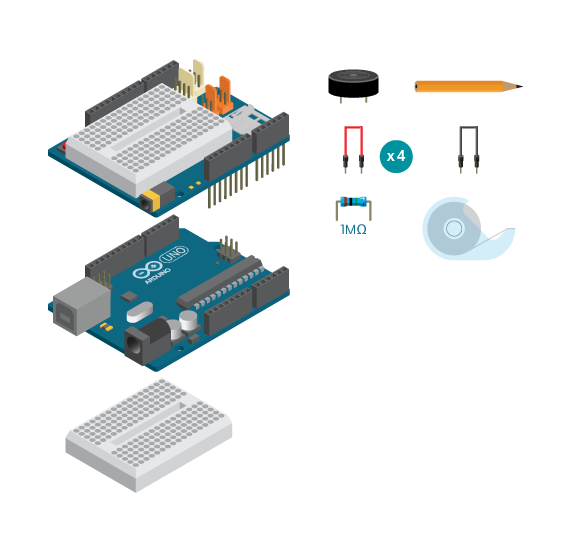
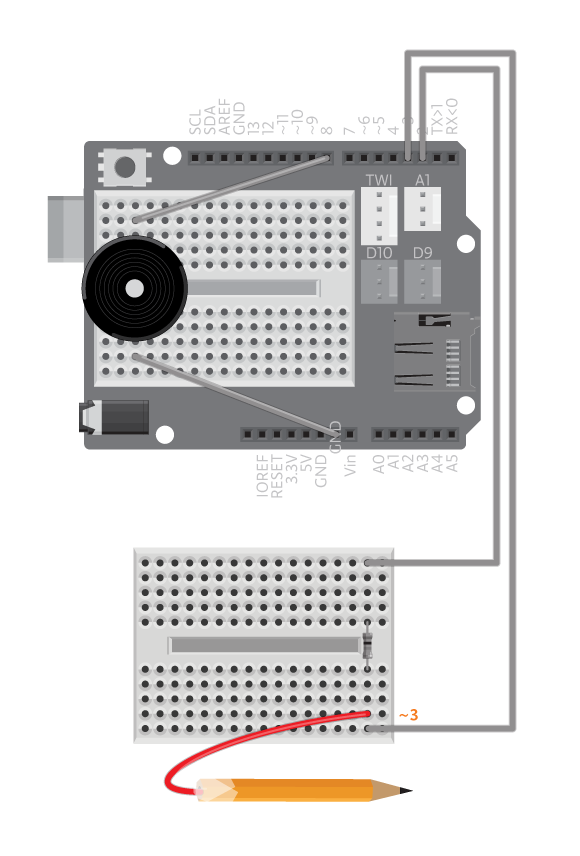
- 1 Arduino Uno board
- 1 Basic Education shield
- 1 Piezo
- 1 1M ohm resistor
- 4 colored jumper wires
- 1 black jumper wire
- 1 9B pencil
- 1 Breadboard
- Masking tape
Instructions
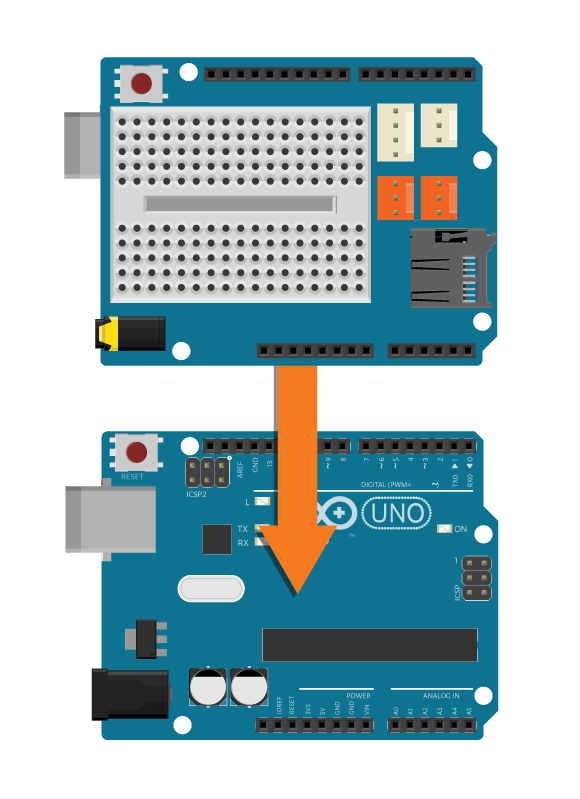
- Attach the shield onto the top of the Arduino board.
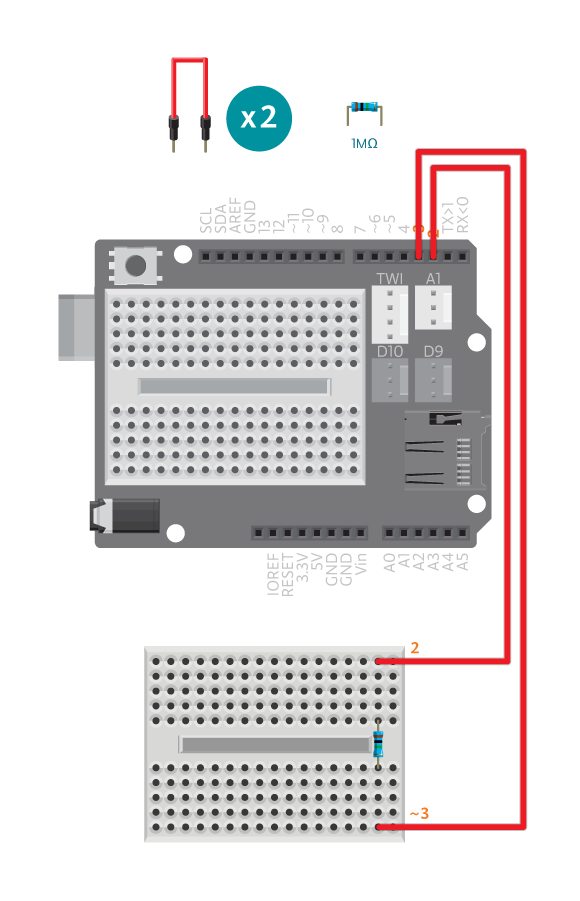
- Connect a 1 Mohm resistor between digital pin 2 and digital pin 3.
- Connect the piezo speaker to the breadboard and connect one leg to digital pin 8 and the other to GND.
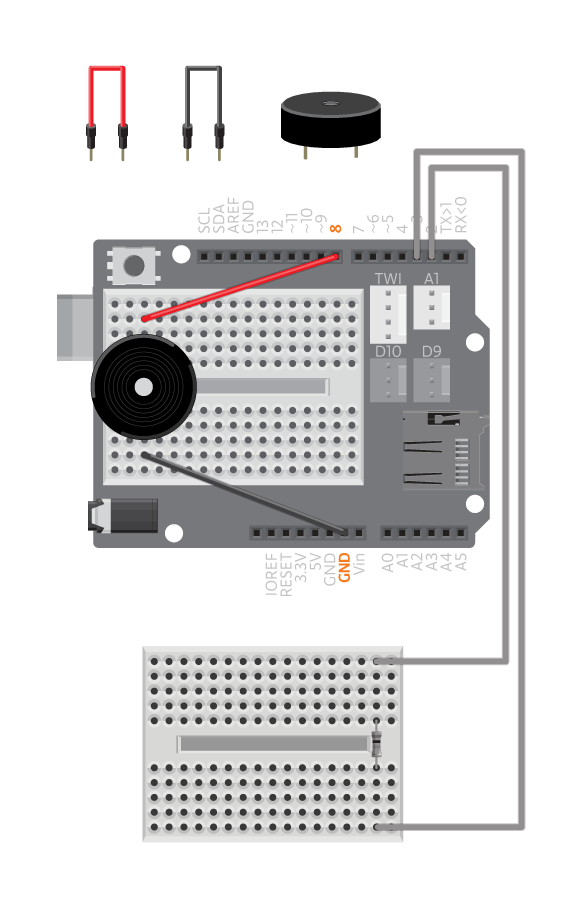
- Tape a pencil to a loose cable – the metal wire must contact the exposed graphite.
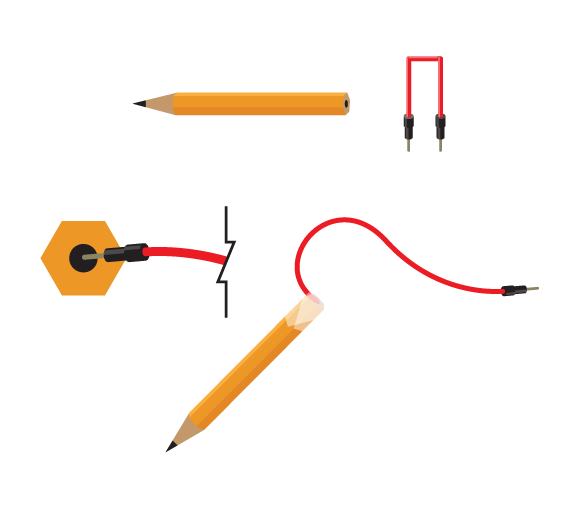
- Connect the cable to digital pin 3.
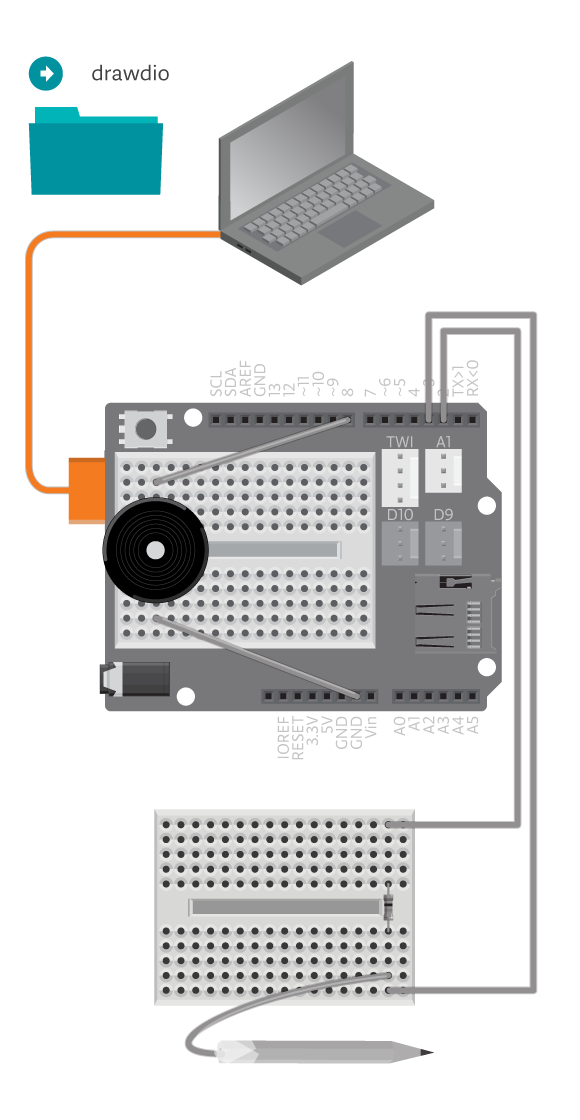
- Connect the Arduino assembly to the computer and upload exampleDrawdio.
Code
You can find the code in File -> Examples -> Castilla -> Magic -> Drawdio
How it works
Drawdio measures the capacitance of objects. The program maps the value to sound depending on the range specified. Any value less than the bottom threshold value will be equivalent to zero.
Troubleshooting
- Metallic objects are conductive, but may not work for Drawdio. Water, human, fruit, plants and pencil drawings make better use for Drawdio. Use File -> Examples -> Castilla -> Help -> CapacitiveSwitchTest to experiment on the capacitance of different objects.
- If using pencil drawings, make sure the lines and shapes are broad and thick. Try touching one end of the object when you are using Drawdio.
- See the capacitive sensor reference for more explanation.
Experiment further
- Draw a cool instrument with Drawdio, and play a music with it.
- Fine tune Drawdio, so that it’s more accurate with the objects you’re using.
- Change the sound Drawdio can play.
- Use the most creative material you can find for Drawdio!