Test your memory with this game!
LEDs will blink in a pattern that you have to remember and repeat. If you get it right, the game gets more and more challenging.
Materials
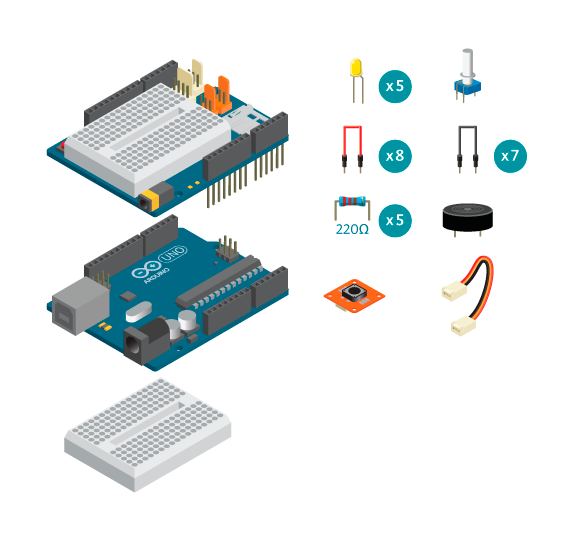
- 1 Arduino board
- 1 Basic Education shield
- 1 Tinkerkit button
- 1 Tinkerkit wire
- 1 Potentiometer
- 1 Piezo
- 5 LEDs
- 5 220 ohm resistors
- 1 Breadboard
- 7 black jumper wires
- 8 colored jumper wires
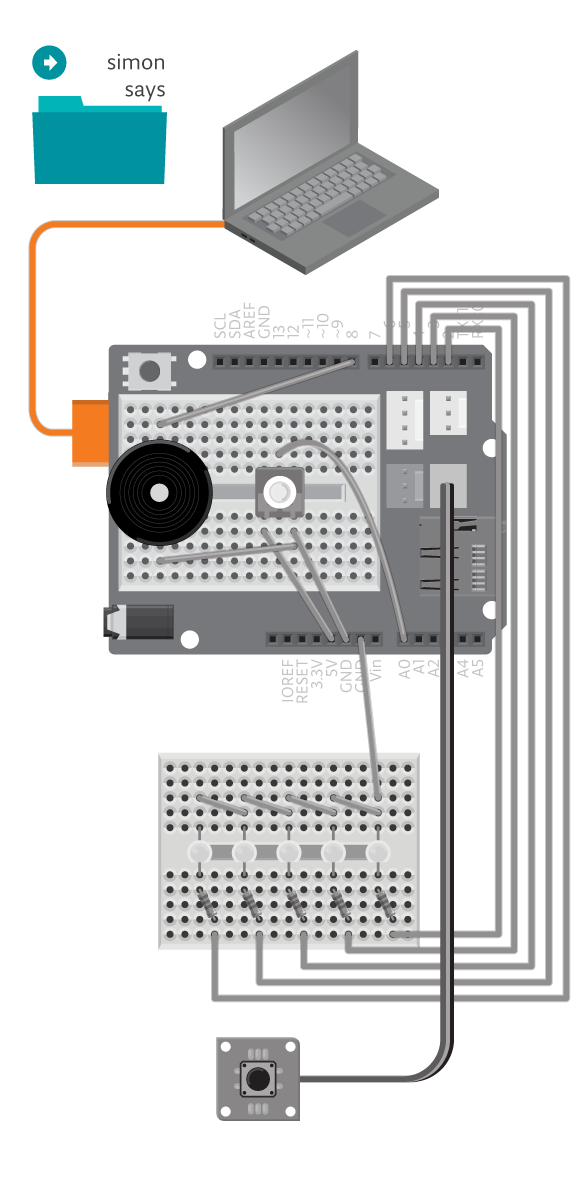
Instructions
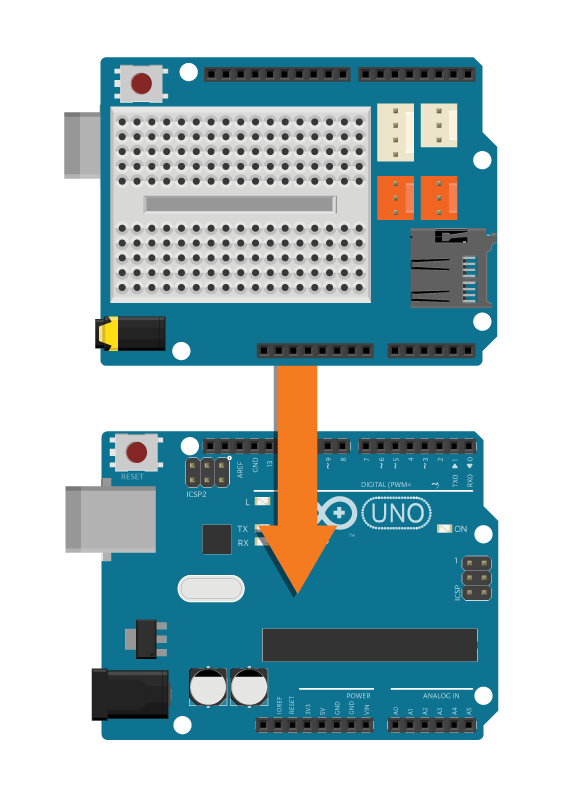
- Attach the shield onto the top of the Arduino board.
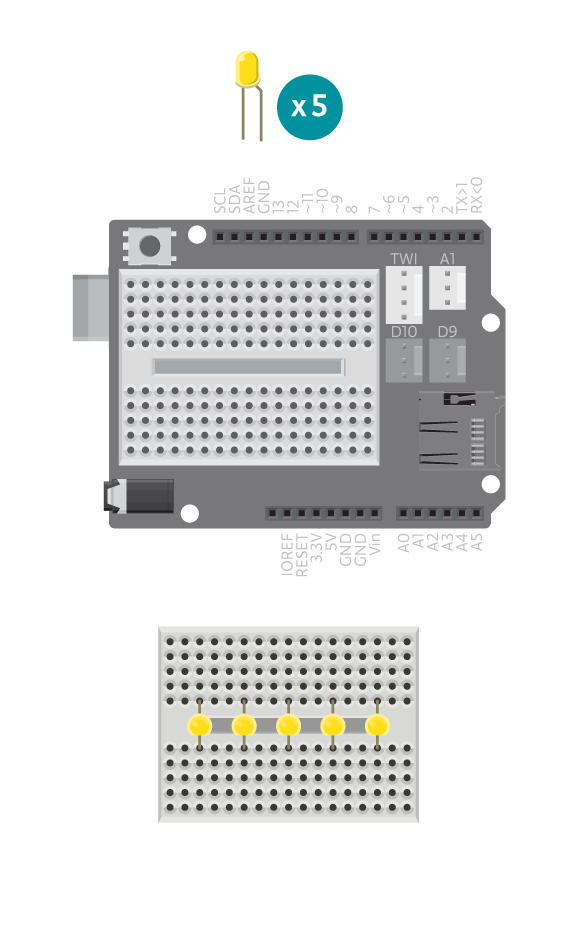
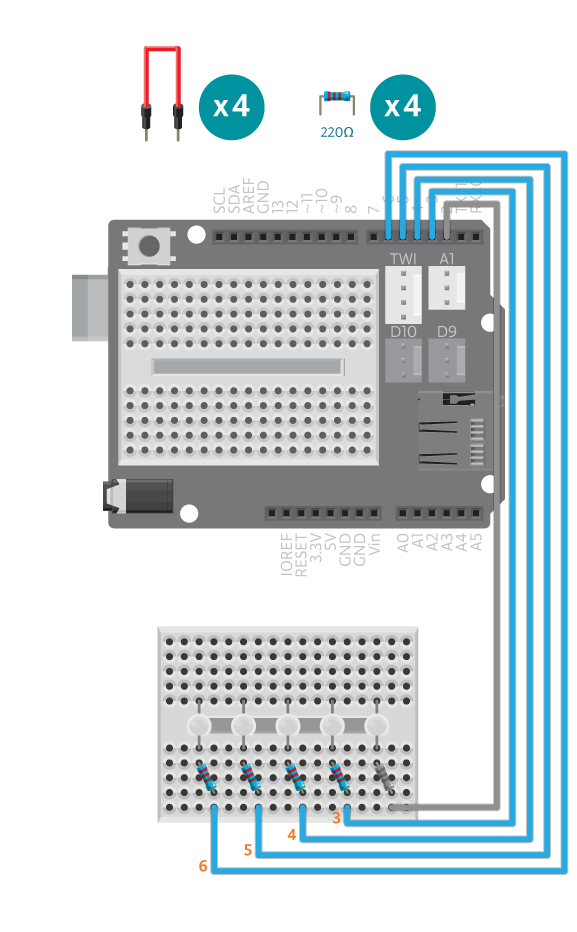
- Connect five LEDs across the separate breadboard gap.
- Connect a 220 ohm resistor to digital pin 2. Connect the resistor to the long leg of the first LED.
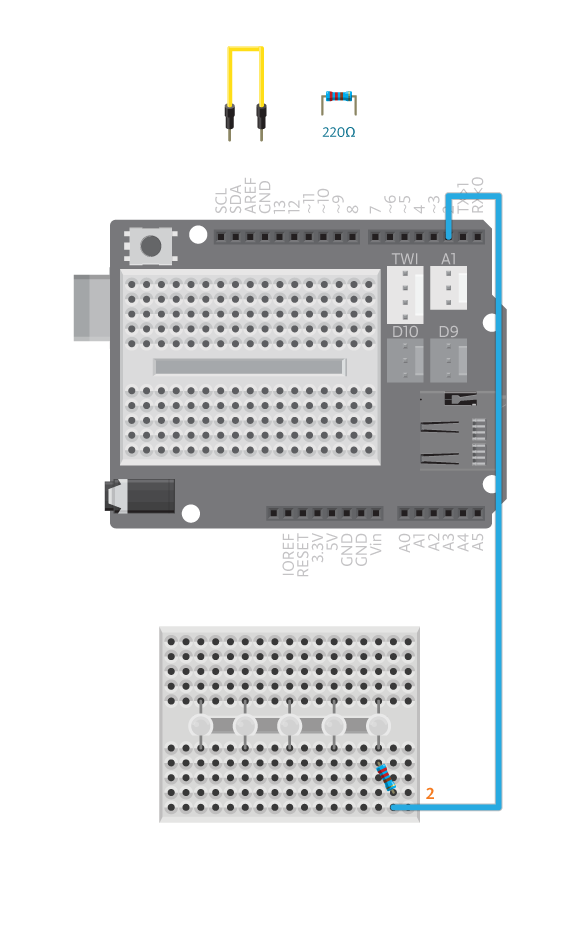
- Connect each of the digital pins 3 through 6 to a corresponding LED following the same method.
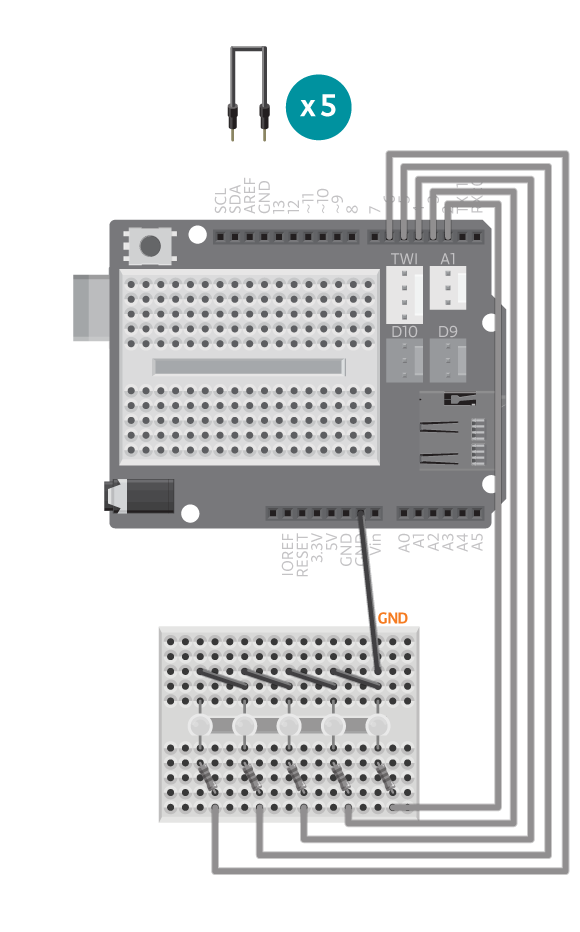
- Connect the short leg of the LEDs to an Arduino GND pin using black jumper wires.
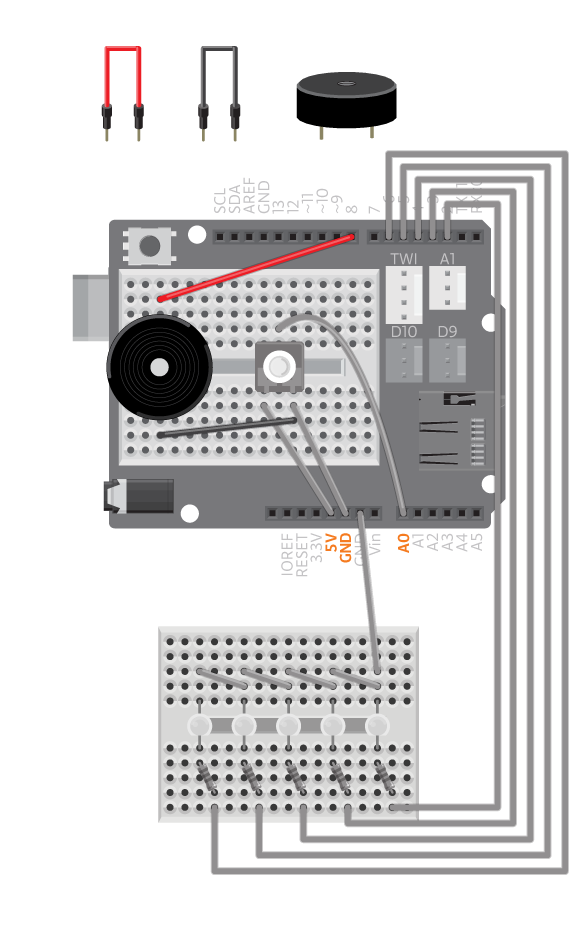
- Connect the potentiometer to the on shield bread board. Connect the middle pin of the potentiometer to A0, left pin to GND and right pin to 5V

-
Connect the piezo to GND and digital pin 8.
- Connect the tinkerKit button to D9
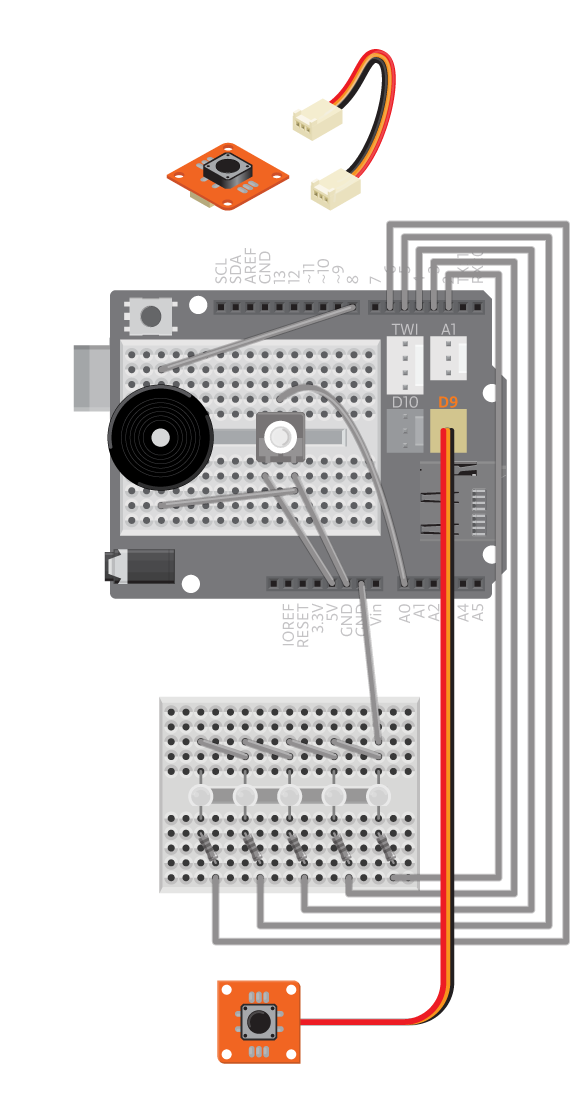
- Connect the Arduino assembly to the computer, upload example SimonSays and try the game.
Code
You can find the code in ”File -> Examples -> Sports -> SimonSays”
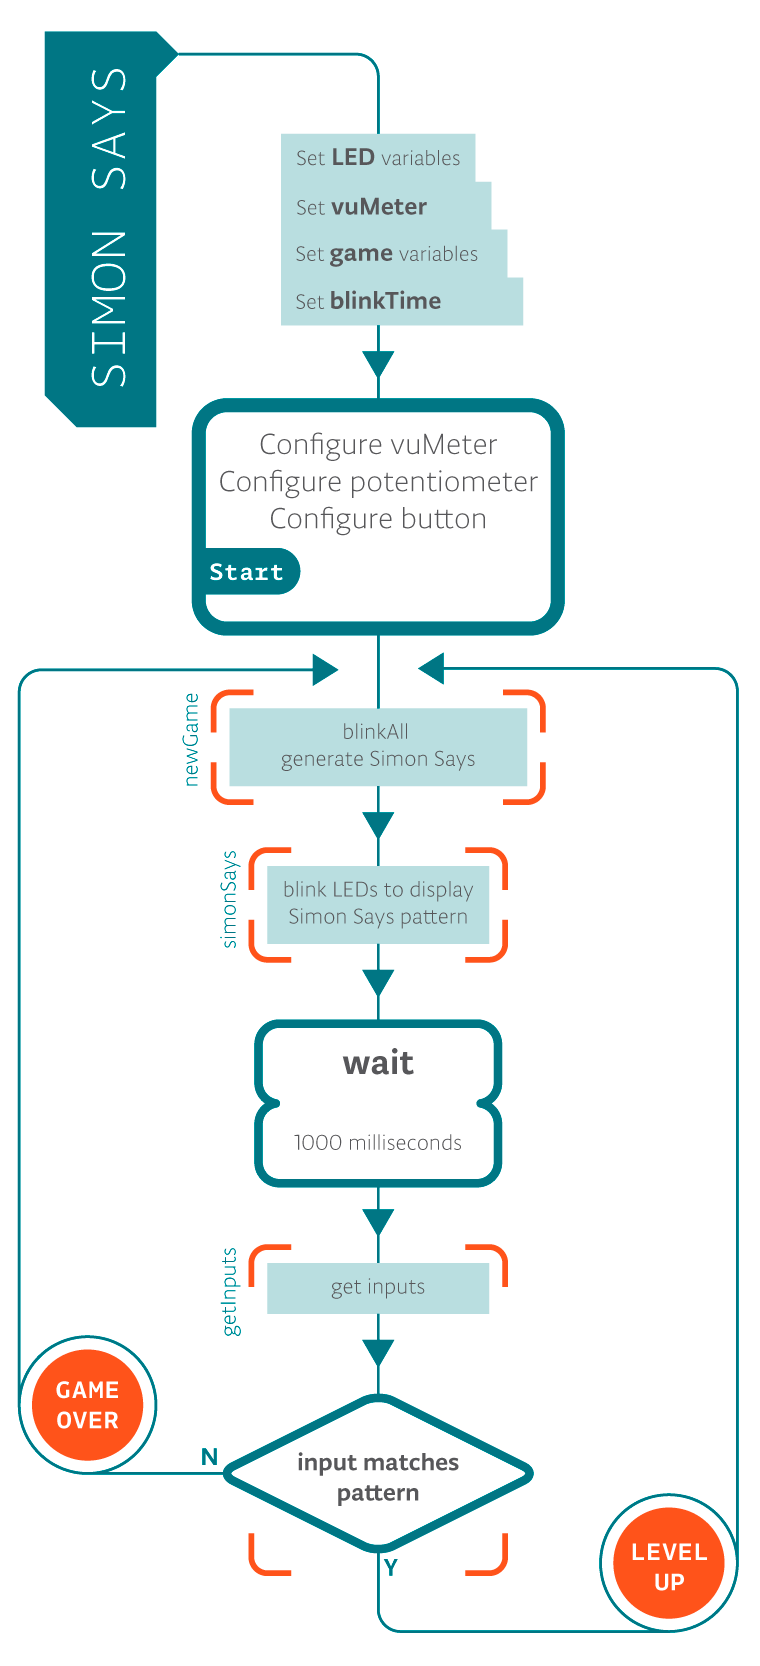
How it works
The game starts with generating as many random numbers as the variable turns is set to. The random numbers can be from 0 to the amount of LEDs used. This is what happens in newGame().
We move on to simonSays() where the LEDs corresponding to the generated numbers are blinked in a sequence. We wait for 1000 milliseconds and then starts waiting for the inputs in getInputs(). We check for inputs for as many times as turns. Each time an input is detected we check if it is the same number as the generated random number in order. If it’s not we jump to gameOver() where the game is reset. If it is correct we keep checking for inputs.
When we checked for inputs as many times as turns without getting it wrong, we go to levelUp(). turns increases with one and a winning sound is played before we start over the game.
Troubleshooting
- Refer to the illustrations and double check your connections. Make sure the shield and wires are firmly connected.
- The button doesn’t work? See reference for debugging buttons.
- VU-meter does not work correctly? See reference for debugging the VU-meter.
Experiment further
- Make the game more challenging by making it go faster.
- Make it a two player game. Record the first players patterns and let the second player repeat it.