This is your first step towards these kinds of skills. The boom box is a small sample player you can use to make music, or just random sound. It comes with three prerecorded samples but we probably don’t have the same creative cleverness when it comes to recording as you do so you should definitely record your own samples too!
Materials
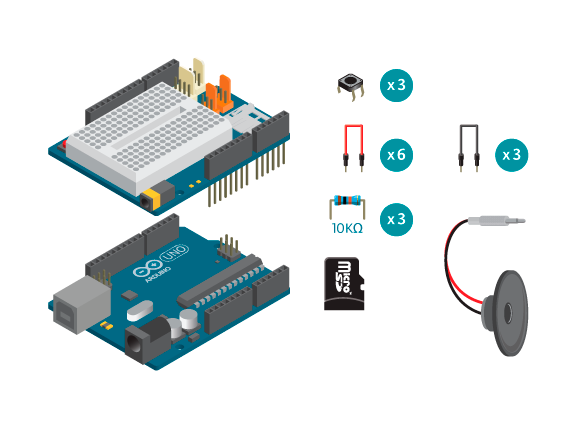
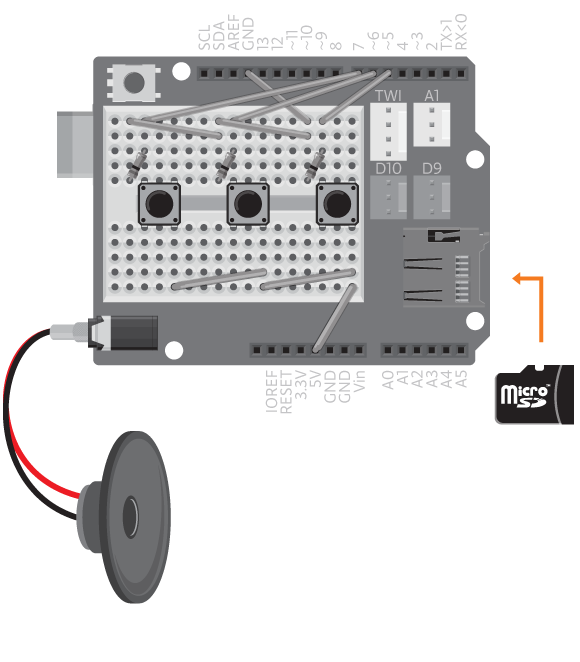
- 1 Arduino Uno board
- 1 Basic Education shield
- 1 micro SD card
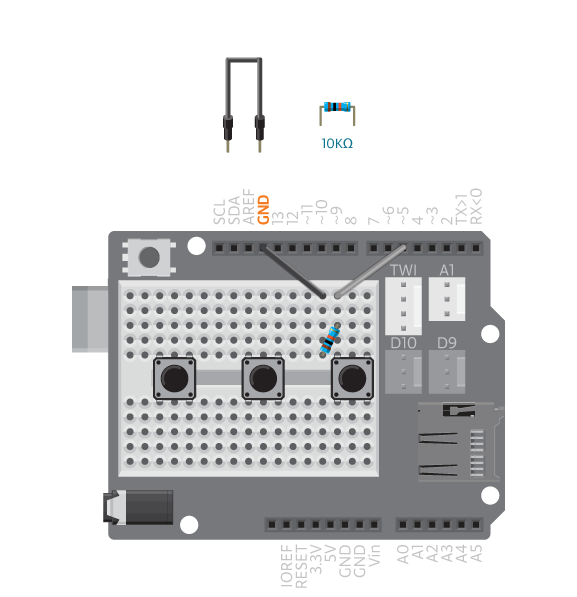
- 3 buttons
- 3 10k ohm resistors
- 3 black jumper wires
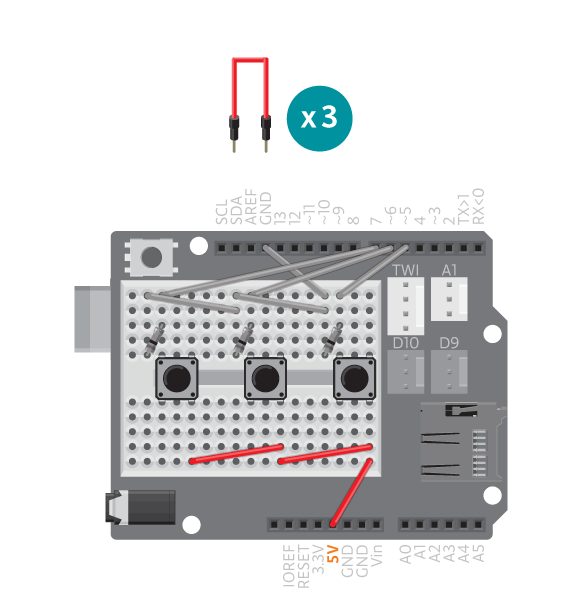
- 6 coloured jumper wires
- 1 paper speaker
Instructions
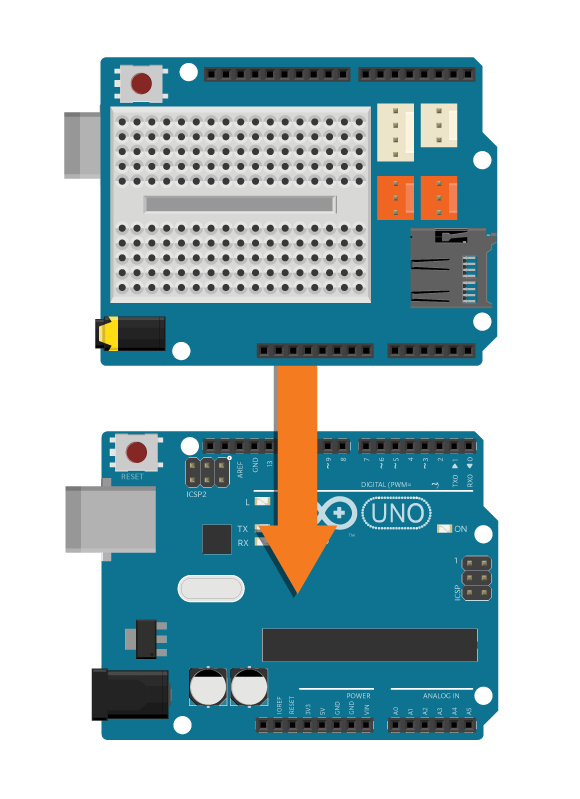
- Attach the shield onto the top of the Arduino board.
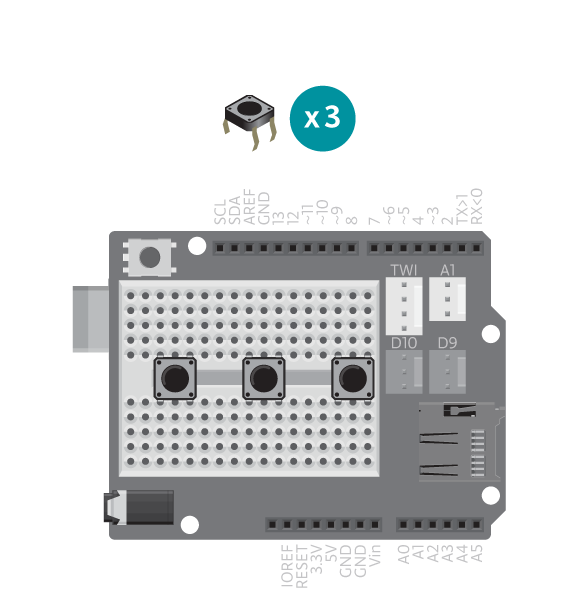
- Connect 3 buttons across the breadboard gap.
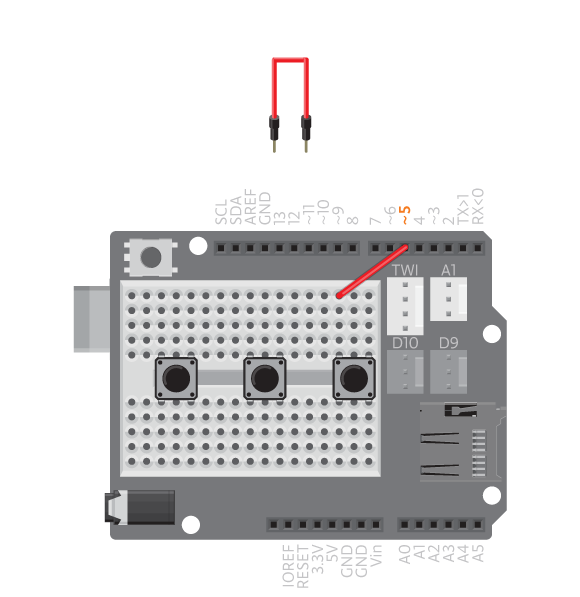
- Connect one pin of the button to digital pin 5.
- Connect the same pin to a 10KOhm resistor and then connect that resistor to GND.
- Connect digital pins 6 and 7 to a corresponding button following the same method.
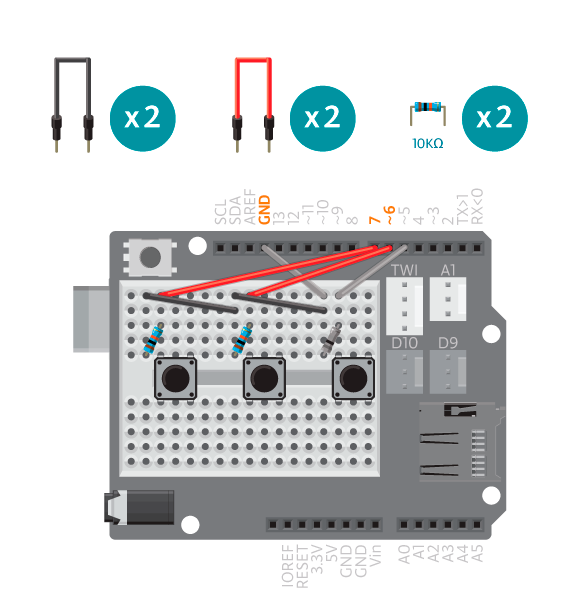
- Connect the other ends of the buttons to 5V.
- Record 3 wav sound files naming them “0.wav”, “1.wav”, “2.wav” or use the ones we have provided in the project folder. Save them to the root directory of the SD card.
Note: You can use Audacity (http://audacity.sourceforge.net/) to record sound that fits with Arduino. See reference Prepare Wav Sound for details.
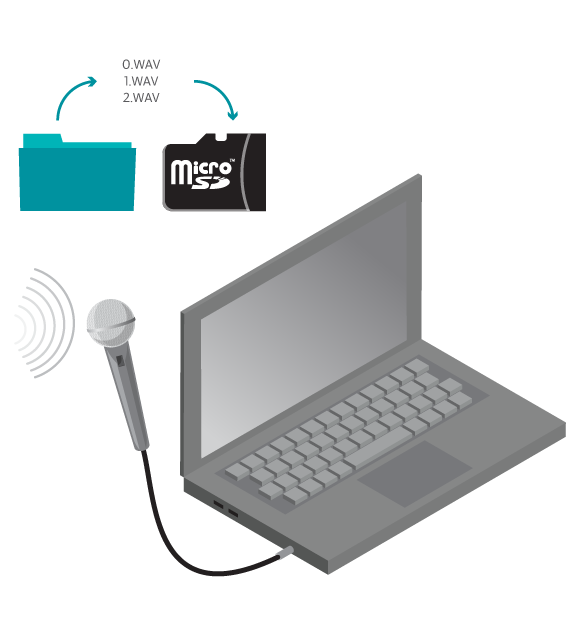
- Place the SD card into the shield’s slot and plug in the paper speaker to the audio socket.
- Connect the Arduino board to the computer and upload example BoomBox.
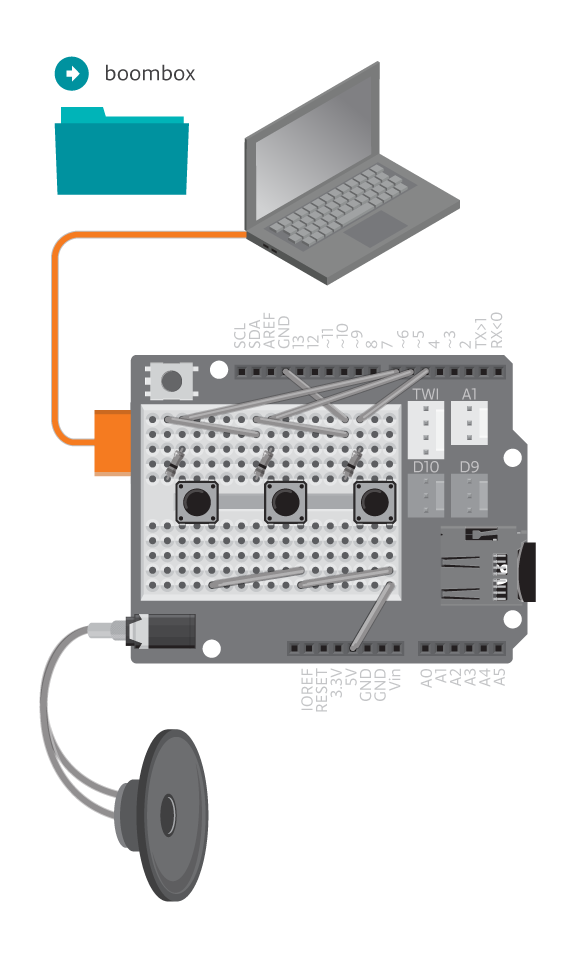 Note: Use only the paper speaker for the audio socket, as it gives you the best possible quality.
Code
You can find the code in File -> Examples -> Castilla -> Magic -> BoomBox
How it works
Player enables Arduino to play .wav sound from an SD card.
The program first waits for either of the 3 buttons to be pressed, and plays the sound associated with it. Then it restarts.
Troubleshooting
- Debug the buttons, see the button reference.
- Debug the music player, see the Player reference for details.
Experiment further
- Add more buttons to play more sounds!