This example will explain how to use a piezo as a knock sensor. You can knock on it directly, or tape it to a surface and knock on the surface.
Materials
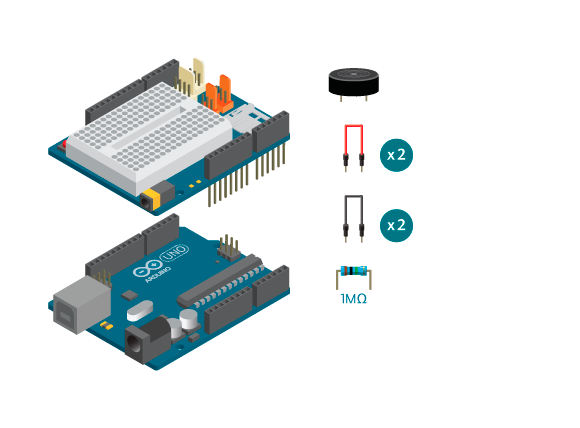
- 1 Arduino Uno board
- 1 Basic Education shield
- 1 piezo
- 1 1m ohm resistor
- 4 jumper wires
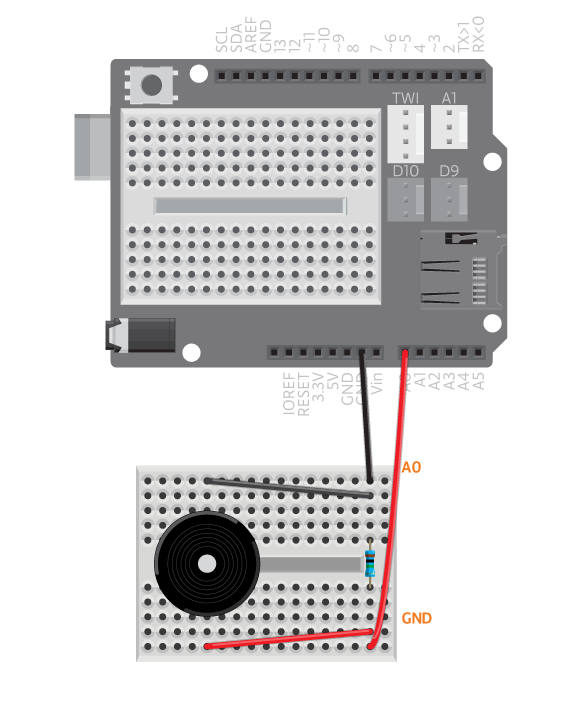
Instructions
- Connect the resistor to A0 and ground.
- Connect the piezo to A0 and ground through the resistor.
- Open Example>BasicEducationShield>Help>PiezoKnockSensor
/*
Piezo Knock Sensor
*/

#include <BasicEducationShield.h>

PiezoKnockSensor sensor=PiezoKnockSensor(A0);

void setup(){
Serial.begin(9600);
sensor.config(40,80);

}
void loop(){
Serial.println("Please knock...");
//Wait until the button is knocked.
Serial.println(sensor.knocked());
}
Upload it to the board. Open the serial monitor and knock on the piezo to see if it works. It should print a “1” in the serial monitor window when you knock.
To change the sensitivity of the knock sensor, in setup change the line sensor.config(40,80). 40 is the knock sensing threshold and 80 is the debounce time. Threshold defines how hard you need to knock, debounce time prevents the sensor from returning several hits from one knock, but also limits how rapid you can knock.
Most of the time, it’s easier to improve the construction than finding a good threashold/debounce value. If you tape the piezo to a surface, it’s better to knock the surface close to the piezo. Removing the plastic casing of piezo also helps increasing the sensitivity.
It’s not working?
- Make sure everything is connected correctly.
- Make sure you have connected the piezo to the same pin as you’ve stated in your code.
- If you are using piezo for both Melody and knock sensor, make sure you distinguish them two!
Note: Remember not to use A4 orA5