A button is a digital INPUT. This means that it can have two states, either HIGH (5V) or LOW (0V). When you connect a button to your Arduino board you can read these states as 1 or 0.
Materials
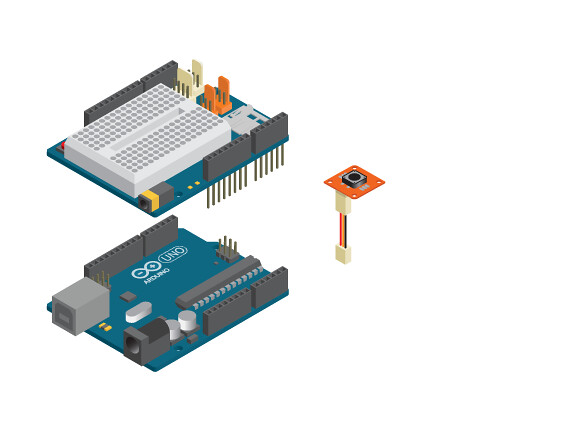
- 1 Arduino Uno board
- 1 Basic Education shield
- 1 TinkerKit Button
- 1 TinkerKit wire
or …
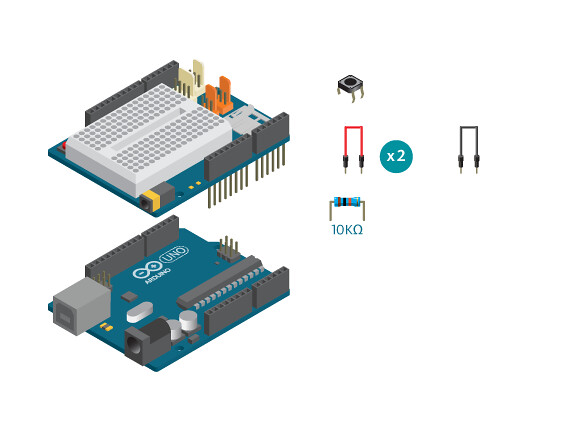
- 1 Button
- 1 10k ohm resistor
- 3 Jump wire
Instructions
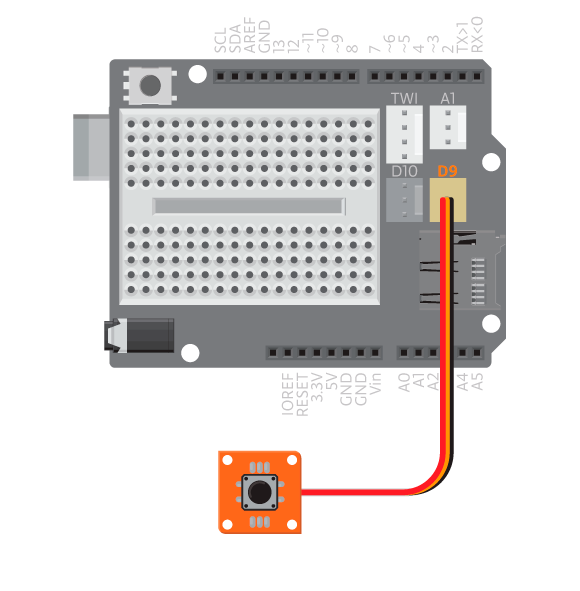
- Connect the TinkerKit button to the TinkerKit wire.
- Connect the other end of the cable to D9 or D10.
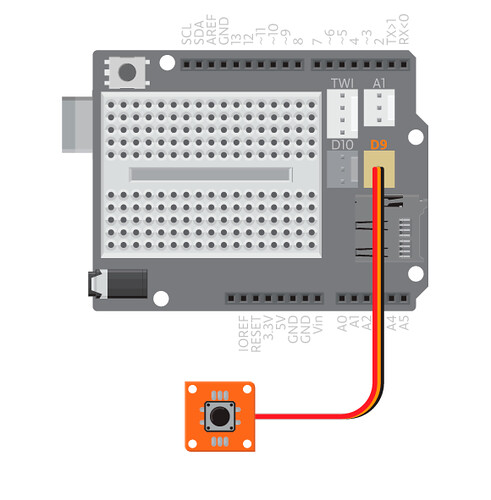
or..
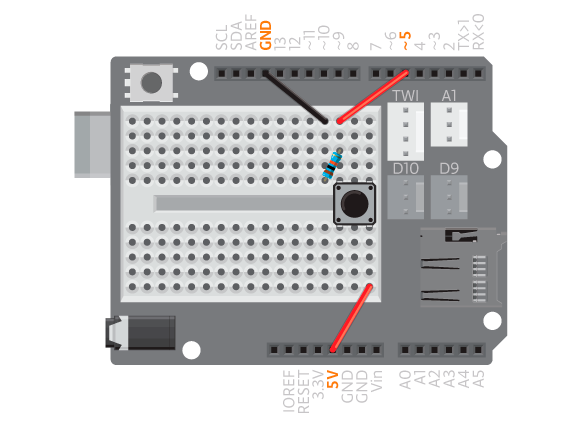
- Connect the button across the center ditch of breadboard.
- Connect one pin of the button to any digital pin. Here we use digital pin 5.
- Connect the same pin to a 10k ohm resistor, and the resistor to GND.
- Connect the other end of the button to 5V.

Now to test the button, In the Arduino IDE open Example>BasicEducationShield>Help>Button.
For the button to work you need to make sure that your program is reading from the digital pin where you connected the button to. This is either 9 or 10 if you’re using a tinkerkit button. You need to change the number stated in the line Button me = Button(9, HIGH) to the number you connected the button to.
Open the serial monitor and follow the printed instructions to see if it works. Each time you execute an instruction the serial monitor will print “1″.
It’s not working?
- First of all make sure that the connections between button, cable and board are correct.
- If you’re using a regular button, it usually comes with 4 pins. They’re separated into two groups, each of the two pins facing each other are actually connected together. So make sure that the pins connected together are in different sides of the breadboard center ditch.
- If you’re using a tinkerKit button there is a small LED on the back of the button that lights up when the button is connected. If you are sure that it is connected correctly and the LED still doesn’t light up, the button is probably broken.
- Make sure that the program is reading from the right digital pin. Try changing the number in the line
Button me = Button(9, HIGH).