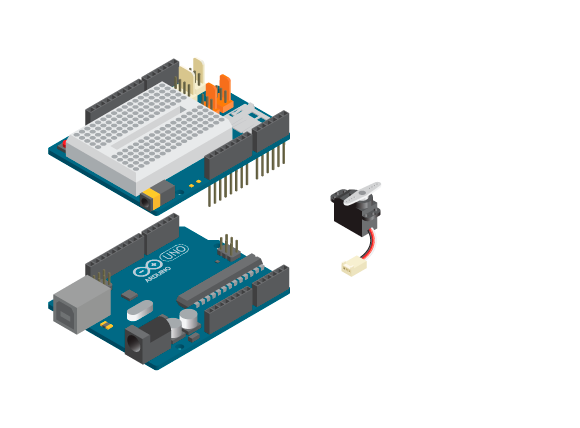
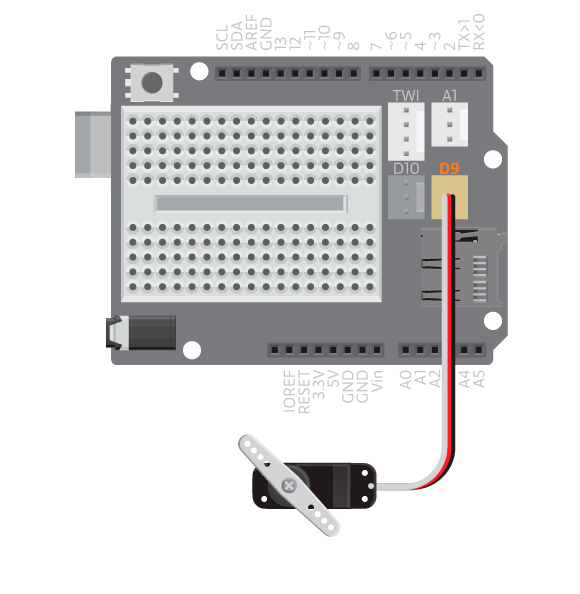
Lets start with trying out a standard rotation servo. Connect it to D9.
To control the servos, we are going to use a library called Servo. A library is a piece of code that has already been written and that you can call upon whenever you need to use it. Instead of having to write all that code yourself, you just have to add this line of code#include <Servo.h> to the beginning of your program.
Continue reading →
Now lets try out the continuous rotation servo. Connect the motor to digital port D9. You control the continuous rotation servo by writing a speed to it instead of a position. Why don’t you see what happens when you upload the same code as in the previous example.
Let’s try to use an input component to control the servo. In this example we will use a potentiometer. Connect the middle pin of a potentiometer to analog input A0. Connect one of the other pins to 5V and the final pin to Ground. Connect a standard rotation servo to D9.
When using two servos at the same time, your Arduino board will have a problem distributing enough current. There are different techniques to overcome this. Here you will explore how to write signals to the servos separately through the program.
Continue reading →
You are going to use the Arduino board to control motors. Many electronics that have moving parts contain motors, e.g. printers, car toys, electronic toothbrushes. While there are many different types of them, you will mostly find the following three types of motors:
The robot week is finally here. This week you will build different machines using motors. The basic function of these motors is simple; they spin. But you will see that depending on how you decide to use them, you can get different objects to animate in many different ways. First of all, you will get an introduction to the different types of motors there are and some examples of when to use them. In the end of the week you’ll get to build a ticklish rocking chair robot or maybe a light chasing robot. Continue reading →

